
Leveling a wooden floor under a laminate: a comparison of 3 different ways
Flooring is the most exploited element of the interior. It is on how smooth, warm and technological they turn out to be, and the comfort of those living in such a house depends. And wooden floors have been the most popular in all ages: pleasant to the touch, exceptionally eco-friendly, “lively”. Even the most unusual 3D ideas cannot be compared - anyway, with all the aspirations to make their own housing modern and fashionable, many lay simple boards in their country house. And once, thanks to well-thought-out advertising, the desire arises to lay a beautiful laminate of a noble color - and the wooden floor is extremely rarely perfectly ideal, especially the old one. What to do with him? Line up!
97% of all problems that arise with a coating such as laminate flooring are an improperly prepared base for laying it. And usually we are talking about roughness of the rough floor - because of it fragile locks are easily destroyed, boards are deformed and cracks appear. And this is just the beginning. The view is still on the floor — old boards in a country house sometimes look better.
Content
How to measure the curvature of a wooden floor?
A modern laminate is demanding on the base - so much so that its durability directly depends on the curvature coefficient of the floor: it’s all about locks that quickly lose their strength, crack and collect moisture and dirt, which have destructive effects on all boards. And therefore, the creation of a perfectly flat surface is the first task in the process of laying such a coating.
It is simply impossible to lay a laminate on a wooden floor. Natural wood, as a living material, can behave differently under different temperature and humidity conditions: both dry out, and bend, and go wide gaps. That is why an intermediate leveling layer is needed, which will take on the main stresses between the old floor and the new finish. Usually solution lay laminate flooring on top of a wooden floor - a consequence of the fact that the latter has long lost its appearance. And certainly not the perfect horizontal.
In general, it is important to first examine the floor itself. So, all the shattered floorboards must be wedged out, put on PVA glue, and all rotted and affected by the fungus fragments should be replaced with new ones. All that sticks out - boards, knots - cut so that the base is at least relatively flat. Only after that we pick up the levels.

You can measure the curvature of an existing floor using the following tools:
- Bubble level. This is the easiest hand tool, usually a meter or three meter long, with an air bubble in the liquid in the middle of the ruler. If the bubble is in the desired range between the marks - the floors are even, if it rolls to the right or left - there is a curvature. More modern models of this tool are additionally equipped with a digital display, which also calculates the degree of inclination of the base. Simple and inexpensive, but not very accurate over large areas, and yet heavy and bulky.
- Rotational laser level. Creates a line in the horizontal and vertical plane, and already the height difference is measured with a simple rail.High accuracy and a wide range of actions are pluses, and of the minuses - point results, which are not always convenient to work with.
- Linear laser level. With this tool, it is most convenient to measure the distance between the floor surface and the line. If such segments are equal, then the floor is even, and if not, you will immediately understand where and how much it is lower or higher than necessary. Lightweight, compact laser, but the operating range is low.
It is possible to level the wooden floor with plywood or sheets of chipboard, putty the joints and even arrange the screed. Each of these methods is now described in more detail.
Leveling Method # 1 - Dry Floor Screed
A dry screed is a backfill of the base under the leveling sheets of dry elements. As you guessed from the name, water is not used in the process of such work at all, and therefore there is no sense in waiting for a month to dry out, which is the main plus of such methods.
For dry couplers Today, GVL sheets, moisture-proof plywood, asbestos sheets and drywall are used. The most durable are gypsum fiber sheets glued in two layers. And the most popular version of dry backfill for such a screed is expanded clay. It has remarkable thermal insulation properties, it does not retain water and therefore there is no need for any insulation. And an ordinary film as a basis is enough to create a reliable vapor barrier. Lay sheets on a dry screed should be like brickwork - with offset joints. More details:

What is good, a dry screed can be done at any time of the year.
To date, the Knauf system is the only one in the world where wet processes are not used and the floors are ready for use on the second day. You can read more about dry screed using German technology in the article:https://floor.expertexpro.com/en/viravniv-stazhka/suxaya-styazhka-knauf-superpol.html.
Leveling method # 2 - plywood, fiberboard, particleboard and OSB
Of the sheet materials for leveling the floor, as you probably know, the most popular are particleboard, gypsum fiberboard and plywood. And one of the most reliable ways to protect such a fragile material like laminate from dampness and prevent it from deforming is plywood floor levelingin other words, plywood flooring. Moreover, it has so far proven itself better than others in many of its characteristics.
But the alignment of the wooden floor with fiberboard sheets also has its own characteristics. So, if the floor is “waves”, such thin sheets will simply repeat this whole relief, and in the end nothing good will come of it. But on an almost flat floor you can.

Chip leveling:

Indeed, in the construction world there are still disputes over whether it is still better to level the floor - particleboard or plywood? The advantage of the first material in cheapness, the second - in quality. But for the sake of experiment, you can put a sheet of one and the other on the lags, and try to step on - the chipboard will crack immediately.
The second way is to put two pieces in water, and you will see that plywood is more resistant to moisture. In addition, plywood has a light weight, and, at the same time, it is quite solid and flexible, resistant to stress. A high strength of this coating provides perpendicular placement of adjacent layers. Therefore, for relatively flat wooden floors, we recommend the use of fiberboard, and plywood, chipboard or OSB for floors of medium curvature.
In more detail, we will consider the technology of leveling a wooden floor with plywood, which is most suitable for use in a living room.
Chip leveling
Here is a detailed instruction for leveling a wooden floor oriented particle boards:
- We check the whole basis of the rule. Where the protrusions are marked with a marker.
- Where the boards stick out noticeably, we drown them with a hammer and a driven dowel.
- We remove all remaining protrusions with a planer.
- We lay out sheets of oriented chipboard. We leave small gaps for thermal expansion.
- We drill holes in the plates with a diameter equal to the diameter of the ridges of the thread of the screws, with a step of 30 cm
- We countersink these holes with a large diameter so that when the cap is drowned, wood chips do not rise around it.
- We pull the material to the floor.
As you can see, nothing complicated:

A high-quality laminate from pure mountain alpine spruce, a 30-year guarantee and a huge selection of chic textures - all this is Kaindl laminate. Let's talk about the advantages and disadvantages of this material on our website:https://floor.expertexpro.com/en/pol-pokritiya/laminat/obzor-laminata-kajndl.html.
Alignment with plywood sheets
When choosing plywood for the floor, also pay attention to its grade:
- The first grade is considered the best in quality, it is rarely possible to notice relief or cracks in it.
- The second is the most optimal option, but glue can appear a little in such sheets, wood inserts, small dents and scratches are noticeable - up to 5% of the entire surface.
- The third one will already “delight” you with dropped knots and wormhole traces.
- Fourth - the lowest quality grade, with a considerable number of defects. Although the quality of veneer sizing remains satisfactory.
Plywood is also sold formatted and large-format, in accordance with GOST. You can understand whether the plywood was sanded at the factory, not only by appearance, but also by special designations: “Ш1” means that only one side was sanded, “Ш2” - that only from two sides, and “NS” - This is unpolished plywood. Pay attention to such markings as “E1” - for 100 g of dry plywood mass, only 10 mg of formaldehyde was added, and in the case of “E2” - from 20 to 30 mg.
Let's take a closer look at the value of the brand on plywood. So, FOF and FB are used for industrial construction, where the main thing is great strength. But the FSB and FC are quite suitable for arranging the floor in a private house or apartment, unless crowds of people walk on it, which is unlikely. But note that the FBA plywood is not moisture resistant, as here, for bonding veneers, albuminokasein glue is used. But it’s environmentally friendly. But FB plywood is designed even for the wettest conditions, because it was covered with bakelite varnish even in the factory.
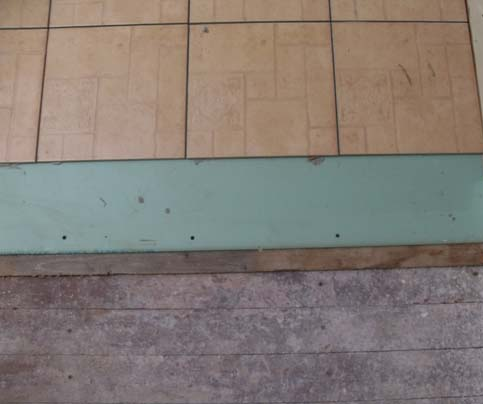
If the old wooden floor has planks of no more than 20 cm wide, without special deflections and delta, then plywood can take 12 mm. But if you do not use leveling logs, and the boards are swollen unevenly, then use 18 mm thick sheets. If the wooden floor also has good crevices near the walls, then close the joint of the plywood with foam - this is one of the proven methods:

Finally, check the ends of all sheets for defects and delamination. Just throw away the spoiled ones - there will be no sense in them. Now let's talk about sheet sizes. You already noticed at our step-by-step master classes that plywood is laid both small, and longer and wider. Of course, in the second version, all work goes much faster, but many experienced craftsmen still advise to cut such material at least twice - so that later it can be attached more firmly to the sex lags. But, at the same time, for the arrangement of the floor in an ordinary apartment with a small cross, there is no need for such a expenditure of forces. Therefore, if you are uncomfortable working with large sheets, cut the plywood into standard squares of 1250x1250 mm. It will be convenient to cut it with a manual circular electric saw or a jigsaw.
To install the plywood floor you will need a tape measure, a building level, a punch, a hammer, a jigsaw, a drill and a screwdriver. Additionally: nails, putty, primer and self-tapping screws, depending on what type of fastening you choose.
Before laying, be sure to fold the plywood for two days in the room where you will lay it - so that it accumulates the humidity that usually happens there always. In the construction language, this is called "acquire the desired moisture characteristics." Laying plywood is more convenient from a far angle.It is possible to lay plywood in two layers - a floor of 8 mm will turn out even stronger than 16 mm. It is important only to overlap the seams between such layers.
The process of installing plywood on the floor begins with fitting - just spread it on the floor without any fasteners, and leave 4-5 mm gaps between the sheets, 10 mm from the wall. Avoid when laying the intersection of the seams. Number the sheets of plywood and remove. To create not only a perfectly even floor, but also durable, you can lay another layer on top of the plywood, moreover, on glue.
It also happens that the old floor has to be aligned in two layers: first fiberboard, then plywood. This is usually due to board problems that have to be covered.

If you fasten plywood with self-tapping screws with plastic dowels, you need to twist them around the perimeter and in the center of each sheet.
They chose a laminated floor, leveled the floor, but can’t decide on the layout option? Pay attention to the diagonal installation of the laminate, which will help to hide the unevenness of the walls and the design flaws. Read about this installation method in our material:https://floor.expertexpro.com/en/pol-pokritiya/laminat/ukladka-laminata-po-diagonali.html.
Leveling Method # 3 - Adjustable Logs
Logs are also necessary when the temperature and humidity conditions in the room are problematic, or the floors have significant curvature. The question is especially acute when the level also shows the slope of the general horizontal.
First of all, we build logs from the boards. It is important to set the first lag correctly - on it you will align all the others. If you are unable to cut bars for such lags, then just purchase a ready-made bar 50x50, or 75x50 and 100x50 especially for joints.
It is better to take not planed boards for lags. They must be kept in the room where you will level the floor for at least a week. Then we make their culling: boards that screw or even jarred, you need to remove.
Logs should be laid across the direction of sunlight from the windows, and in enclosed spaces - in the direction of movement of people.
And now a little about mini-lags. If you have to put the logs on an extremely uneven base, then do not make them short in height, trying to set the desired height with the help of bars, because any such substrates are another reason for the future creaking of the floor. Therefore, it is better to make the racks for the logs more authentic, and if necessary, saw off the unnecessary parts. With the biggest differences, when things are completely bad, you can cheat and make special linings. For example, fiberboard segments on foam.
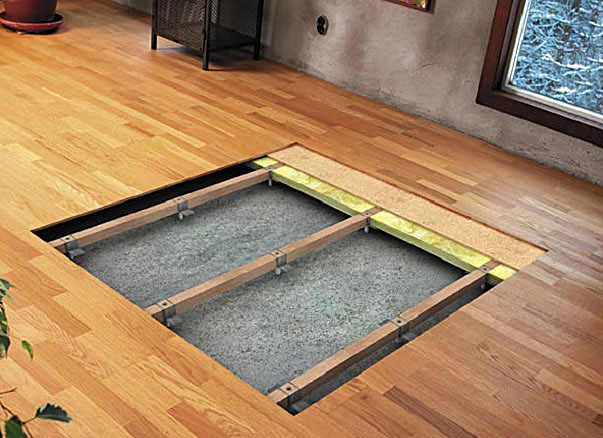
The bottom line is this:

Here is how the devices of such lags look:

As for the heat-insulating material that can be laid between the lags, be careful. The fact that everything is supposedly “natural and environmentally friendly” is a pure marketing move, and in a residential building all this will take several years to breathe. For example, the same mineral wools lose their “environmental friendliness” after a few years, any foamed glass will issue thin glass needles into the air that will irritate the respiratory tract, and everything that is derived from oil is completely poisonous.
Of course, you can use expanded clay as a heat and sound filler - but only if you have the right to create an increased load on the floor slab or live in your own home. And finally, if you have a desire to purchase some standard toxic material, but it is good to seal it in a plastic film under the floor - yes, this is an option, but only after years it will still have to be sorted out, and you can get poisoned for life.
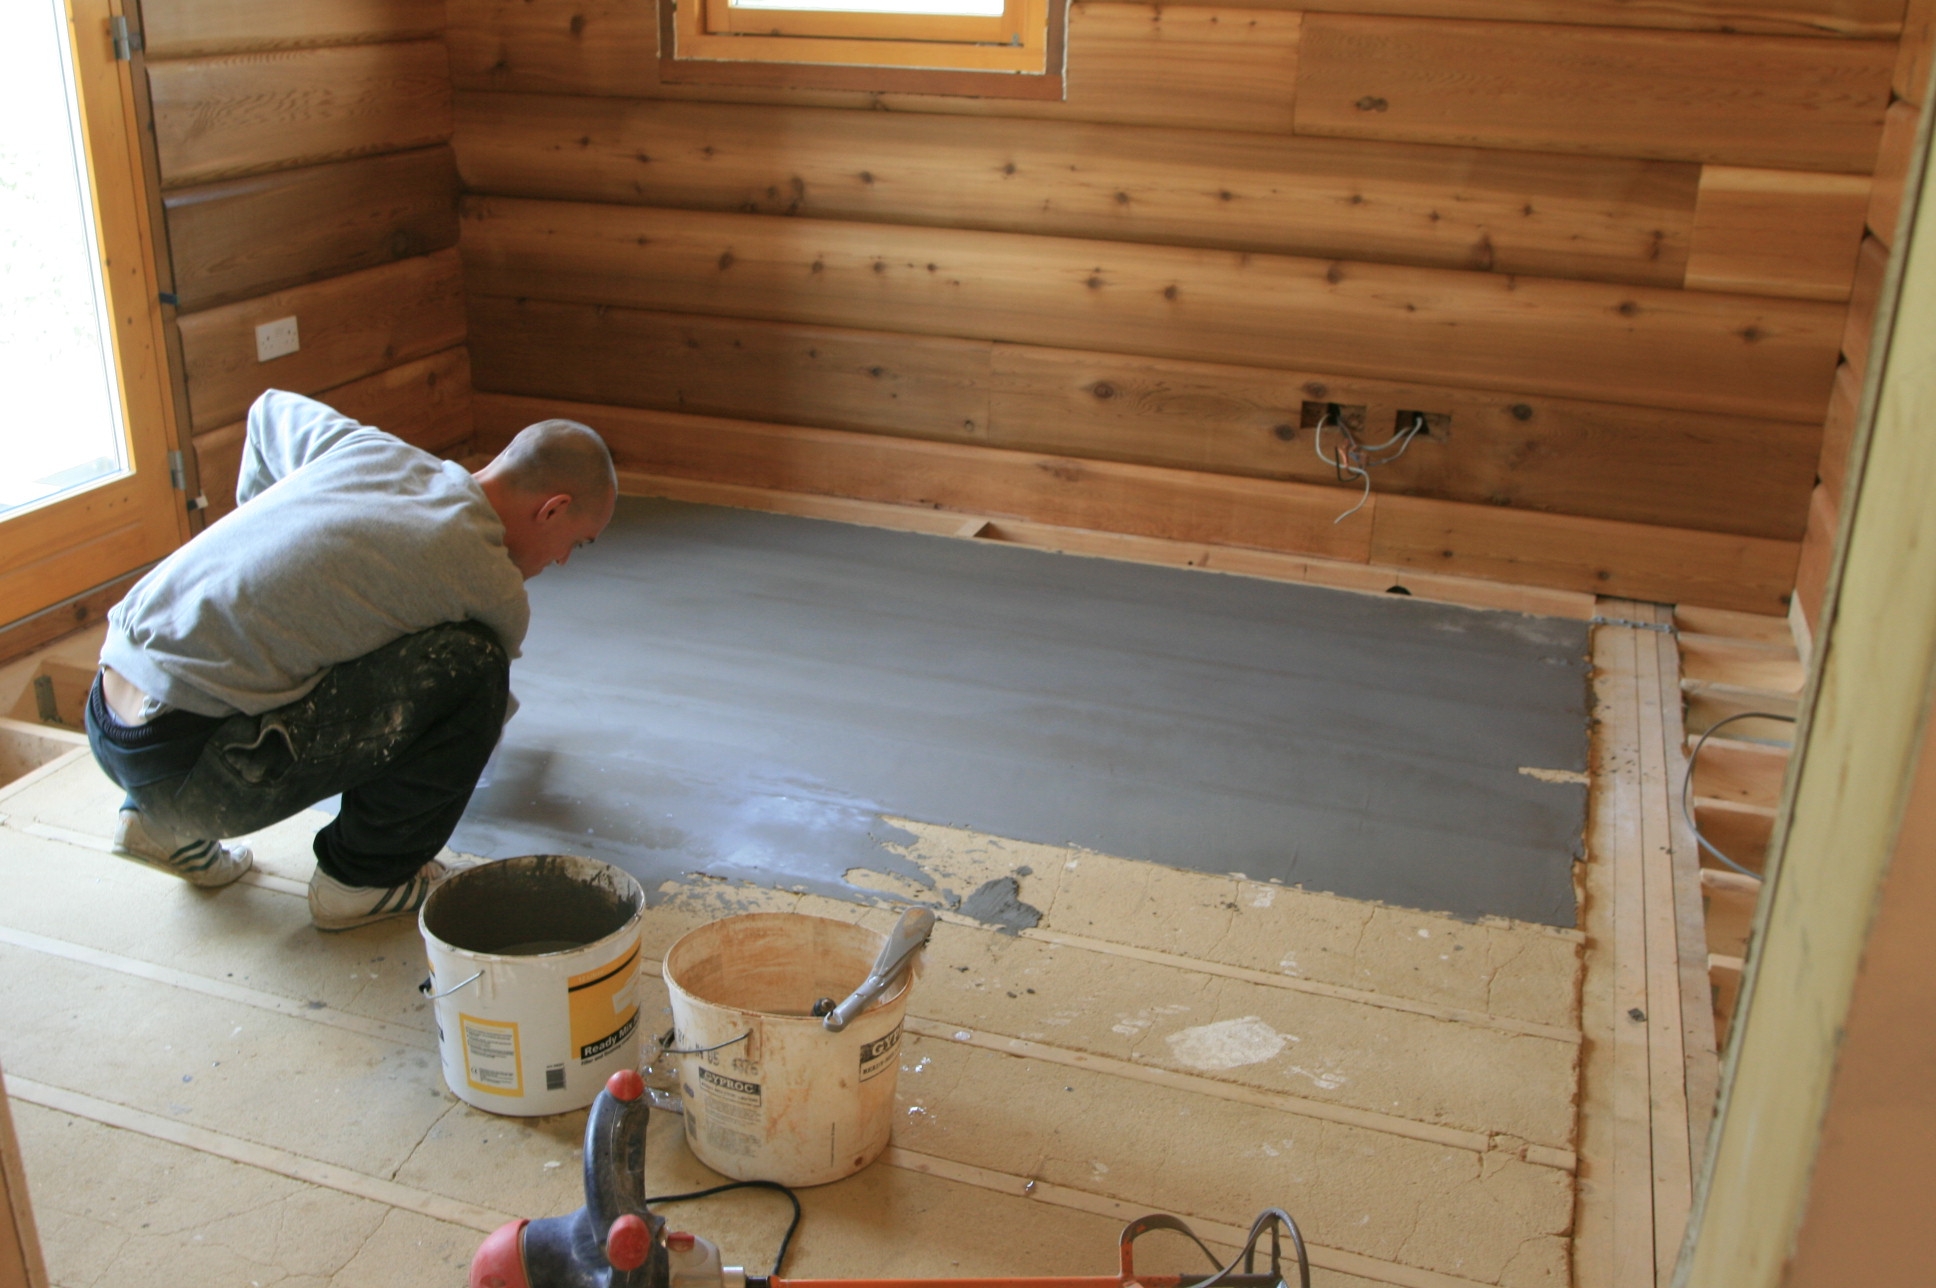
Here, by the way, is a good example of the rather laborious work of leveling the old wooden floor under a new floor, where everything was done technologically competently:

After all, it is important not only to prepare the wooden floor well for laying the laminate, but also to take care of the environmental friendliness and reliability of all the materials used.
2 comments