
How to lay tiles in the bathroom - step-by-step installation instructions
Every day more and more new finishing materials appear on the shelves of construction stores. But if we talk about repairs in the bathroom, then the choice is not great. For many years, tile has held the palm here. True, the manufacturers of this material are doing everything possible so that the consumer does not feel limited in choice.
The variety of textures, colors, shapes and sizes of the tiles is so great that sometimes "eyes run up." Yes, and decide how to lay the tiles in the bathroom - horizontally divide the walls with decor, lay out all the same tiles or come up with your own original design - is also not easy. So, taking up the independent repair of the bathroom, be prepared to visit the store more than once.
Content
How to choose a tile for the bathroom: advice from an experienced designer
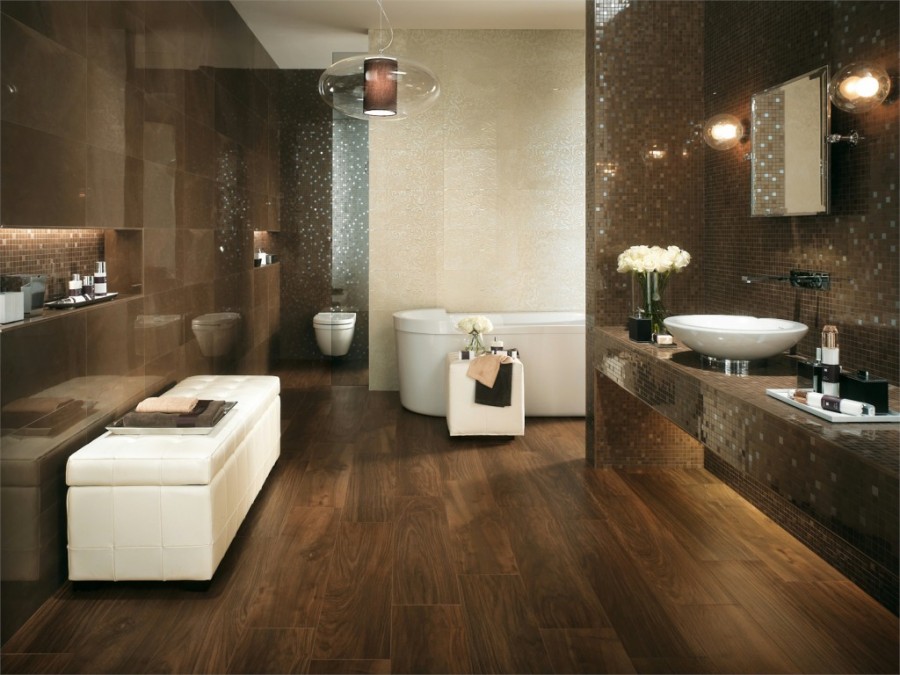
The appearance of ceramic tiles is the primary factor when choosing. And this is not surprising, because everyone wants to get a beautiful and stylish interior for their money. However, it often happens that it seems that the tile was expensive and beautiful, and the installation was done perfectly, and the result is completely unsuccessful either in design or in practicality. When communicating with professional designers, we learned a lot of interesting things about fashion trends in the design of the bathroom and the rules for choosing ceramic tiles, so we will be happy to share useful information with our readers.
Color, pattern, texture
Of course, various flowers and patterns are a matter of taste, however, even abstract drawings in the form of lines are no longer in trend today. If you want to get a truly fashionable and stylish interior, focus on the decor, which imitates stone, wood, concrete, leather and other natural materials. In this case, you should refuse to lay tiles of different tones according to a complex pattern in the form of geometric shapes, stripes, etc. We decided to imitate the natural texture, so do it by the rules. And they say that you can connect the finish with different shades only at the inner corners. In addition, materials that are different in tone must be separated from each other. You can do this by advancing or recessing the planes onto which tiles of different colors and textures will be applied.
Size and Type
An ideal option in terms of design is a large-format tile with a rectified (trimmed) edge. When laying, you will receive a minimum number of seams that will be almost imperceptible - such a decor will always look elegant and modern. At the same time, do not forget to correlate the size of the tile with the dimensions of the room, choosing the option that will require minimal trimming.
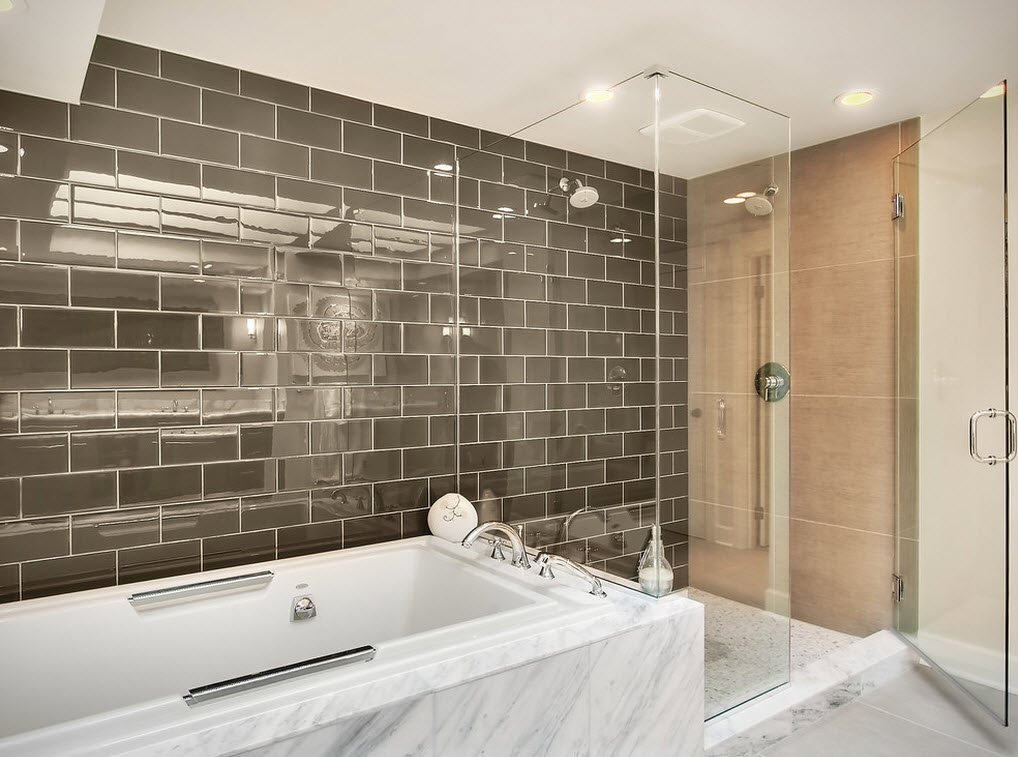
Shiny or rough
The age-old debate about which tiles are better - matte or glossy in the bathroom is definitely resolved in favor of rough material. With a velvet texture, matte tiles do not collect imprints and water marks on themselves. In addition, in a room that should tune to a peaceful mood, it is not entirely appropriate to use a finish that will glare from any light source. And finally, the last argument concerns security. Even if you are a fierce supporter of glossy surfaces, still lay on the floor rough porcelain stoneware - it will not slip, even when completely wet. And leave options with a smooth, mirrored tile of large size for shopping centers - there it will be more appropriate.
Grout
Never use a tile grout in the bathroom that contains cement as a binder. Of course, its cost is not comparable with two-component materials based on epoxy, but over time you will be able to appreciate the charm of the latter option. Unlike the cheaper grout, the polyester composition does not change color, repels moisture and does not lend itself to the effects of fungi, chemicals and other harmful factors. Remember that the color of the seams is chosen according to the darkest shade on the ceramic tile.
How to calculate the number of tiles
Sellers of construction stores are already accustomed to the appearance of bewildered customers who do not really know what they need. Even after choosing a tile, such people often cannot calculate how much it is needed. If the design of the bathroom involves the combination of several colors or tiles of different sizes, the calculation of the required amount turns into flour.
In the end, unfortunate builders buy tiles, and after a while they return in order to return the remnants or buy the missing 0.5 m2. And if the reception of balances in large stores is usually practiced, then with the purchase of the missing material there may be problems. It may turn out that this one batch of goods has already been sold, but does not plan to order another store or the shade of the new batch of tiles does not match the previous one. In the store you will not notice this, and at home on the wall such a difference will be very striking.
The cost of high-quality tiles is quite high, so do not buy it “by eye”. It is necessary to make an accurate calculation and only then go to buy.
To avoid all these troubles when choosing a tile, follow this algorithm. First, measure the walls and floor of the bathroom, taking into account the location of the bathtub and moydodyr. Then go to the store, choose a tile and be sure to ask the seller if there is enough of this particular product for you. If there is, be sure to write down the size of the tile and the direction of the picture on the decors.
Now go home and do the calculations. On a sheet of paper in a cage, draw a plan of your bathroom in expanded form (each wall separately), while observing the scale. Now apply the contours of the tiles to the walls.
The height and width of the wall is rarely enough to be a multiple of the size of the tile, which means you have to cut it. It is on the plan that it is easiest to determine the places where the cut tile will be the least noticeable. In addition, accurate calculation allows you to significantly reduce the number of trimmings. When the plan is ready, count the required number of tiles of different colors. In order not to make a mistake, calculate not in square meters, but in the number of tiles.
Now you can return to the store and buy material, but do not forget that In addition to the tile, you will need glue for it. If the repair is in your the employee will do the bathroom, he will tell you what glue to get. If your plans include self-laying tiles in the bathroom, consult with the seller.
It is important to note that the choice of adhesive for the tile is wide enough, and if your bathroom does not have any special conditions, it will be enough to purchase a mixture of CM11. This glue has been used for many years, which makes it possible to talk about its quality. And the price, in comparison with other compounds, is quite affordable.
You can learn more about choosing tiles for a bathroom, given the color, style and purpose, from an article on our website:https://floor.expertexpro.com/en/pol-pokritiya/plitka/kafel-dlya-vannoj-foto.html.
Room preparation
Tile selected and purchased. Now you need to prepare the room for its installation. To begin, take out the furniture, then turn off the valves for supplying cold and hot water.
After that, dismantle the plumbing. If you do not plan to change the toilet and washbasin, you need to remove them very carefully so as not to damage.
Dismantling old tiles
If the walls are faced with old tiles, it must be removed. The best assistant in this process will be a puncher. It is enough to set it to shock mode and place it under the lower edge of one of the tiles. Before starting work, be sure to wear glasses and gloves - this will protect you from sharp fragments of tiles. For convenience, one of the lower tiles can be beaten off manually using a chisel.
In some places, the old coating will fall off in large layers along with glue and plaster. Do not try to avoid this. Anyway, the old solution will have to be removed.
Pre-leveling Walls
When the wall is completely cleaned and you see a solid, dry coating, you need to measure its geometric parameters. We use a plumb line, a water level and a square for this. To do the following:
- The plumb line determines the deviation of the wall from the vertical
- Angle measure the angles, each of which should be 90 degrees.
If the walls in your bathroom are flat - you're in luck. Otherwise, before you put the tiles in the bathroom, you need to take a number of measures to align them. I must say that the brick or concrete walls in our apartments are smooth so rarely that the likelihood of such luck is very small.
So, let's get to work. You will need:
- Stucco beacons
- Composition for fixing them (you can use mortar for plaster)
- Container for mixing solution
- Hammer drill with mixer
- Rule - any flat board or metal profile
- Trowel or plaster bucket and trowel
If the wall is not strong enough, it is better to prime it before leveling and before laying the tiles in the bathroom. When the soil has dried, we attach lighthouses to the wall.
We apply adhesive in several places, apply a beacon and, until the glue has dried, set it to level. Then install the next beacon. Be sure to ensure that the beacons are in the same vertical plane. This can be done using the rule.

When all the beacons are installed, the gaps between them and the wall must be filled with mortar. This must be done carefully so as not to slide the guides and so that there are no sag on their surface. The glue under the guides has dried - it’s time to prepare the solution and get to work.
To level the walls in the bathroom, you can use ordinary cement mortar, but for strength and fluidity, it is recommended to replace one part of the cement with one part of the tile adhesive.
With the help of a trowel or a plaster bucket, he throws the solution on the wall. This should be done with short sharp movements. Professionals start work from above, but if you can’t do it, you can start from below. When the space between the rails is filled by 1-1.5 m, we take the rule, apply it to the beacons and remove all unnecessary.
Do not put too much pressure on the guides, it is better to make short zigzag movements.The excess solution is returned to the general container and continue to work until all the gaps between the beacons are filled.

If in the process of work you have some difficulties and unevennesses remained on the walls, after the solution dries a little, you can remove them using a trowel. To do this, it is enough to put a little solution on an uneven place and remove the flaw in a circular motion with a half.
After drying, the walls are ready for finishing.
In the diversity of the market offer, it is difficult to determine and understand which glue for the tile is better to choose. What to look for when choosing glue? We will help in this matter and talk about everything in detail in a special article:https://floor.expertexpro.com/en/pol-pokritiya/plitka/vybiraem-klej-dlya-plitki.html.
Floor leveling
Before you lay the tiles in the bathroom, you need to align not only the walls, but also the floor. This can be done using beacons or a self-leveling mixture. Use the second method much simpler, but more expensive.
First you need to mark your floor and see if you need to level it at all. The easiest way to do this is with the laser level. It is enough to install it in one of the corners of the room and measure the distance from the laser marks on the walls to the floor. If this distance is the same or the deviation does not exceed 5 mm, you can do without preliminary alignment. Such curvature is quite simple to eliminate already in the process of laying tiles.

If there is no laser level, you have to tinker.
Visually identify the highest angle in the room. From it, using a normal mounting level, draw a horizontal line along the wall. Then extend her in a circle on all the walls of the bathroom, constantly using the level.
In the center of the room between the opposite walls, pull two pieces of rope so that they intersect in the center. If the rope does not touch the floor anywhere and the distance from the highest point of the floor to the mark on the walls does not exceed 2 cm, then this line will become the new level of your floor. If the rope in one or several places touches the floor, lift it a couple of centimeters and mark the walls at this level.
Now you can proceed with the installation of beacons. This is done the same way as on the walls, only it is necessary to constantly ensure that the guides are installed at the marking level. You can check their location by a long level or rule. Set a rule between the marks on the walls and make sure that the beacons touch it. Perform all further actions as on the walls.
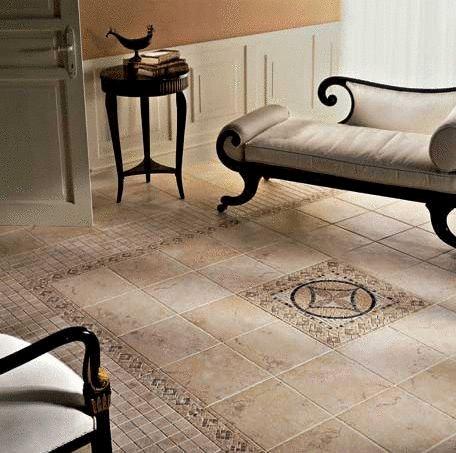
Ceramic tile laying options: pros and cons
Existing layouts allow emphasizing the advantages of ceramic coating and the most beneficial use of the geometric features of the room. Consider the most common styling schemes, and also give an assessment of their applicability in practice.
Direct way
The simplest, easiest and most economical option is when the tile is laid in even rows that are parallel to the line of walls and floor. In this case, you can use both square and rectangular tiles. The latter is best positioned in such a way as to visually expand the space.
Scatter
The pattern of laying ceramic tiles inversely resembles a drawing of brickwork, in which each subsequent row is displaced relative to the previous one by half of the structural element. This option is especially beneficial when using rectangular tiles with an aspect ratio of 2: 1. The advantages of this method are the same as with direct layout, however, there is a drawback in the form of an increase in the amount of waste.
Diagonal
When diagonally laying, tiled rows are located at an angle of 45 degrees to the line of contact of the walls and floor. A very effective, but also more complicated installation method is good on large surfaces - where the eyes can cover a wider panorama of intersections of diagonal lines. But in a confined space, this method should not be used, since it visually reduces the room. The disadvantages of the method include the complexity and complexity caused by the need to trim the material. The latter also affects the cost, since diagonal laying is the leader in terms of waste.
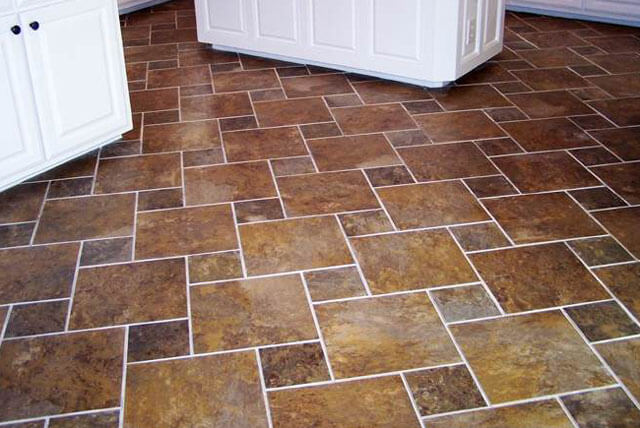
Modular
If you want to make the styling unusual, then a modular scheme has been invented for you. Using a multi-sized tile (best with multiple sides), you can get an original, modern pattern. The only difficulty is to correctly calculate the amount of material. To do this, you will have to draw up a layout diagram on a scale, always considering the thickness of the seams.
Tile Adhesive - Dry or Ready
Sooner or later, everyone has to decide the question of which glue to use for laying ceramic tiles - a dry mixture or a finished composition. And here I would like to advise my readers not to follow the marketers' lead regarding the convenience and speed of using ready-made adhesive solutions. Dry mixes surpass them in a number of factors. Firstly, the presence of cement in their composition makes it easy to veneer the surface of any curvature - self-prepared glue can be used as plaster. Polyurethane adhesive "from the bucket" will require you to prior alignment. As for the cost, the price of the first and second options sometimes differs by an order of magnitude. And who wants to pay more, especially when it comes to laying tiles on an area of tens of square meters?
Of course, some of you may say that, they say, the adhesion force that polyurethane compositions give is far superior to the capabilities of bagged mixtures. I can not disagree with this. And yet, let me note that modern dry compositions have properties sufficient to ensure that even the most dimensional ceramic tiles reliably held on a vertical wall. If after some ten to twenty years you want to change the design, you can easily knock down the tiles from the wall with the usual chisels and chisels. With a polyurethane compound, such a number will not work - it holds the material with a dead grip. To remove the finish, you have to use the punch and spend more than one hour breaking the tile into small fragments and removing it from the wall in parts.
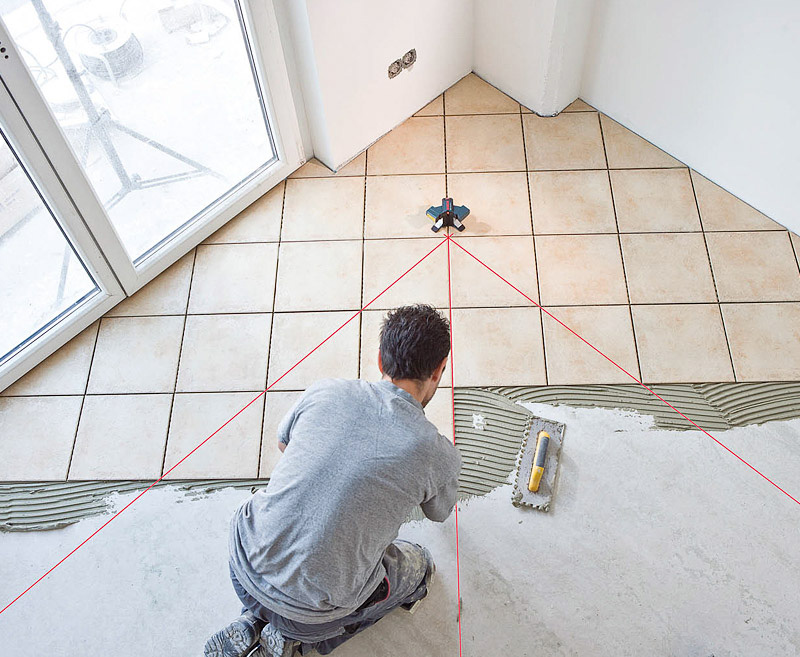
Step-by-step instructions for finishing
The preparatory work is over, and you can begin tile laying. We start from the walls. First of all, it is necessary to measure the height of the wall and divide it by the height of the tile. If as a result you get an integer - you are lucky again - you won’t have to cut the tile. But, unfortunately, the height of the wall is a multiple of the height of the tile quite rarely. In this case, the integer obtained by dividing is the number of whole rows.
When calculating the number of whole rows, it is necessary to take into account not only the height of the tiles, but also the distance between them. As a rule, it is 3-5 mm.
For your convenience, you can use our online calculator:
From an aesthetic point of view, it is better to make the trimmed tiles located below, so they are less visible, but you can not start laying from above. In this situation, the use of a horizontal starting rail will help. From the floor it is necessary to measure the height of the “scraps” and fix the wooden rail at this level, making sure that it is located strictly horizontally.
Solution preparation
Pour the required amount of water into the prepared container for the solution, and then pour the dry mixture in small portions, constantly mixing with a construction mixer. By consistency, the glue should turn out like thick sour cream, so that it does not drip from the tile, but at the same time easily "stretches" over the surface.
Laying tiles on the wall
Using a notched trowel, apply the composition to the tile and gently press it against the wall so that the glue is evenly distributed. The bottom edge of the tile we "stands" on the rail, and the side for confidence can be checked by level.

Take the next tile and repeat the process. In order for all the gaps to be the same, we use special crosses. The gap between the tiles helps prevent material cracking as a result of thermal expansion. So do not neglect it. And plastic crosses will help to make seams the same and more aesthetic.
After the bottom row is completely laid, on both sides of it it is necessary to install vertical strips, checking their position with a level. At a distance equal to the height of the tile from the first row, it is necessary to pull a horizontal thread between the planks - a guideline for laying the second row. This method will save a lot of time, since there is no need to check the level of the location of each tile.
If the width of the wall is also not a multiple of the width of the tile and there is a need to lay pieces, it is better to do it in the corners - so the violation of symmetry is less evident. Use tile cutter to cut tiles. If there is a need to make a small incision or groove (for example, in the place where the pipe comes out of the wall), help grinder.
The key to high-quality tile laying is strict adherence to the level. Even a slight skew can spoil the impression of the most expensive tile.
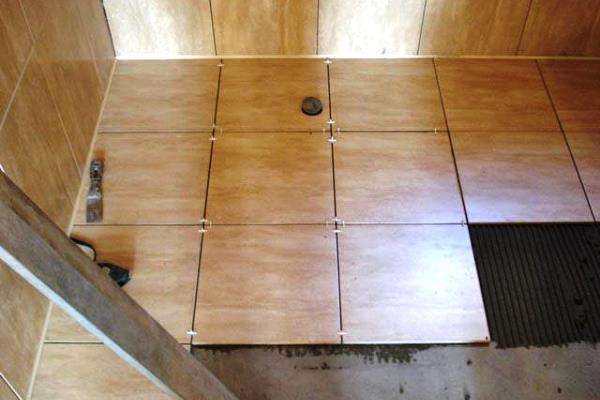
Laying tiles on the floor
When asking how to tile a bathtub, you probably meant not only the walls, but also the floor. And although this process is quite simple - if everything worked out on the walls, there will be no problems with the floor - it is necessary to take into account some nuances. You need to start from the far wall and move towards the door.
Pull the nylon threads to help prevent slipping. Use a rubber mallet to set the tile to the desired level. If you overdone it and the tile “drowned” you have to remove it and lay it again.

After laying the tiles, the question arises of choosing a grout for the joints. Our next article will help you with this:https://floor.expertexpro.com/en/pol-pokritiya/plitka/kak-zatirat-shvy-na-plitke-video.html.
Final chord - grout
When the last tile has taken its place, you need to clean it of the remnants of the adhesive mixture and allow the solution to dry and gain strength. At this time, it is advisable not to enter the room (at least a few days).
Now we begin to grout the seams. It would seem a trifle, but this trifle fundamentally changes the appearance of the room. In order for the grout to look good and serve long enough, you should not save on it. It is better to immediately buy an expensive fine grout than to change it after a few years.
After grouting, try to remove excess immediately. This is especially true for tiles and decors with textured patterns.In some cases, hardened grout can be very difficult to clean.
Video instruction
They say it’s better to see once than to hear 100 times. Maybe this video will help you better understand all the nuances of laying ceramic tiles yourself.

8 comments