
Porcelain flooring - step by step instructions for laying porcelain tile
Porcelain tile is a modern finishing material, which is made by mixing quartz and feldspar with clay and mineral dyes. The resulting composition, in accordance with the manufacturing technology, is pressed and fired in furnaces. The result is a tile of extreme strength, which by its external data and quality almost does not differ from natural stone. Porcelain floors are characterized by high durability, strength, wear resistance and moisture resistance. Therefore, the competent installation of porcelain tiles will be a guarantee that your floor will last you several decades, without changing its perfect appearance. We invite you to consider the technology of laying porcelain tiles, starting from the moment of calculating their number and ending with grouting of the joints. So go ahead!

We calculate the required number of plates
To begin with, we measure the surface area on which the granite will be laid and, based on 1 m2 area, determine the required number of plates. This number will not be final, since the laying of porcelain stoneware will inevitably result in the appearance of waste - cut pieces, battle. It is necessary to insure yourself against these troubles and additionally include them in the calculations, adding to the figure calculated over the area of 8-10%.

We prepare the surface for laying
Porcelain tile is a durable, stiff material, so it is not suitable for curved floors. Such floors must be pre-leveled, for example, apply a cement screed or pour a self-leveling mixture.
Before laying porcelain tiles, the prepared base must be cleaned of dirt and dust, and then apply a primer. This is especially important for porous surfaces such as plaster and cementitious screed.
Natural stone has been and remains one of the most durable, durable and, importantly, beautiful coatings. About how to make a floor more luxurious, read the article:https://floor.expertexpro.com/en/pol-pokritiya/plitka/napolnaya-plitka-iz-naturalnogo-kamnya.html.
Choosing the right glue
The technology of laying ceramic granite slabs is not much different from the similar action with ceramic tiles. The only thing for porcelain stoneware is to choose the adhesive mixture very meticulously, which will be able to quickly and firmly adhere to the surface. For these purposes, cement mortar is completely unsuitable. Use only special adhesives with increased fixation, that is, with a high content of polymer additives.

We make a marking of a floor
When laying porcelain tile (and any other) tile, it is necessary not only to fix it correctly on the base, but also to withstand symmetry with respect to opposite sides of the room. In other words, if the left side of the floor ends with half a tile, then the right side should end with the same half.
For this, two coated cords are pulled parallel to the walls so that they intersect in the center of the room.The first stretched cord should be parallel to the long walls of the room - it stretches between two central points on the short walls. The second cord is placed perpendicular to the first, parallel to the short walls. Then the cords are "beaten off", that is, lowered to the floor so that a coated trail remains from them. In this way, axial lines are applied along which the porcelain tile will be laid.

Clinker tiles are made of baked clay and are much lower than natural and artificial stone. You can find out more about this facing material here:https://floor.expertexpro.com/en/pol-pokritiya/plitka/poryadok-ukladki-klinkernoj-plitki.html.
After that, it is determined which parts of the tile will remain from the edges of the lined surface. The easiest way to do this is by laying the tiles dry, or using the ruler. After that, you can start facing, starting from any quarter of the room, moving from the axial center to the walls.
Technology and stages of laying
When laying porcelain tiles, it is necessary to ensure that voids do not form in the adhesive layer. Otherwise, under increased load, the part of the tile located above the void may burst. To avoid this, the glue is applied in two layers, that is, on the tile and on the floor.

Adhesive solution well mixed until uniform is applied to the surface of the floor and tiles. The adhesive layer is first leveled with a smooth spatula, and then serrated to form furrows.
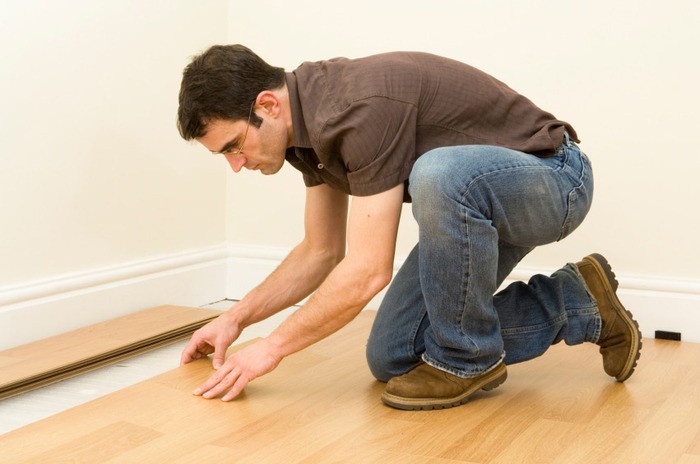
When laying the tile, first put on the edge, and then gently lower the entire surface to the base, greased with glue. In order for the seams between all the tiles to have the same width, special plastic crosses with a thickness of at least 3 mm are used.

After laying it is necessary to wait 3-4 days for the glue to freeze and gain its final strength. After that, it will be possible to proceed to the next stage - grouting.
Grouting between tiles
For porcelain tiles laid on the floor, grout of gray shades is most often used, but this is not important - you can use any color that suits the design of the room. Apply grout evenly with a special rubber spatula. It is better to fill the gaps around the heating pipes, between the walls and the surface of the tile, not with a regular grout (it may crack), but with silicone sealant.
How to choose the right adhesive for the tile and calculate its consumption? We will talk about this in our material:https://floor.expertexpro.com/en/pol-pokritiya/plitka/vybiraem-klej-dlya-plitki.html.

After finishing work, you must wait until the grout is completely dry, and remove all traces of glue and sealants from the surface of the tile. To do this, you can use a cloth soaked in plain water or acidic oxidizing agents.

Do not rush to immediately operate in full force the freshly laid porcelain tile. Wait until it is strong enough - about three days. Only then can you put heavy furniture on the porcelain tile, walk on it and even arrange a home dance floor. The main thing is to strictly comply with our proposed tile laying technology, as a result of which you will get a durable and, importantly, beautiful flooring made of porcelain stoneware.
4 comments