Clinker tiles - installation procedure and tips for use
Clinker tiles made of baked clay are an alternative facing material, the cost of which is much lower than the finish of natural and artificial stone. In the manufacture of clinker tiles, the method of single or double firing is used, which affects the quality characteristics of the material. Pressed single fired tiles are characterized by high strength and low coefficient of water absorption.
Products resulting from double firing have a more porous structure, since during the manufacturing process, the bound water is completely removed from the material. Therefore, porous tiles have higher coefficients of water absorption and vapor permeability. These parameters also depend on the features of the front surface of the clinker tiles.
Content
Types of Tiles
- Narrow and tall tiles with a glazed front surface, having standard sizes of 120 × 65 × 8 mm and 280 × 85 × 9 mm, are called “wild boar”. Such tiles are used for facing building socles, as they can withstand wetting from melted snowdrifts.
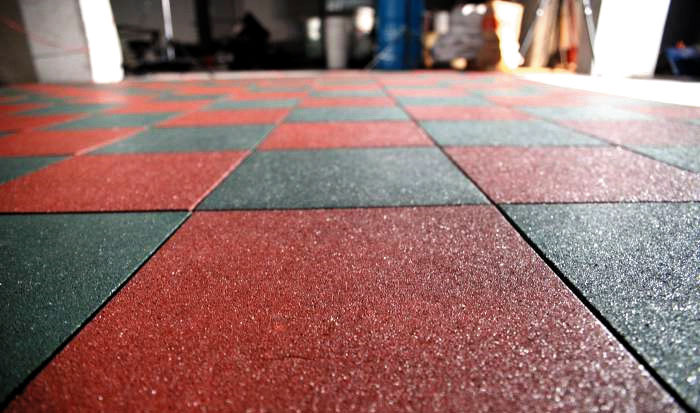
- Square tiles, producing with a glazed and unglazed surface in sizes of 600 × 600, 450 × 450 and 300 × 300 mm, are called porcelain tiles. They are made by pressing under the influence of a single firing. Facades are faced with porcelain stoneware, the dimensions of which are 1200 × 3600 mm.
- Clinker is called unglazed tiles that resemble a “wild boar” in shape, imitating the front surface of a conventional brick.

Natural stone has been and remains one of the most durable, durable and beautiful coatings. About how to make a floor more luxurious, read the article:https://floor.expertexpro.com/en/pol-pokritiya/plitka/napolnaya-plitka-iz-naturalnogo-kamnya.html.
Quantity calculation
When carrying out facing works, two types of tiles are used: planar and angular. Calculation of planar cladding elements is carried out in square meters, and angular - in linear meters. To calculate the surface area to be covered, multiply it by the height. After that, the area of areas not subject to facing is subtracted from the obtained result: windows, doors and other openings. Clinker tile manufacturers indicate the number of planar elements in one square meter, while tile joints (fugues), each of which is 10-12 mm, are necessarily taken into account. If during installation the seams will be thinner, then you will need to count the number of tiles in a square meter.
Important! Try to comply with the size of the seam specified by the manufacturer, as this is a prerequisite for reliable and long-term operation of the facing surface.
Preparatory stage
Clinker tiles can be laid on any foundation - wooden, concrete, stone. At the stage of preparing the walls for facing, it is necessary to achieve the perfect leveling of their surface. It is advisable to knock down all the protruding hillocks and plaster the recesses. The time spent on the preparatory phase will pay off by the quick and high-quality installation of clinker tiles. The beauty of the facade cladding is completely dependent on the quality of the preparation of the foundation.Clinker-tiled house looks like a powerful brick building.
Important! At the preparatory stage, a clinker tile laying scheme is selected from existing options that allow you to simulate various types of masonry and brickwork. It can be very difficult to make many of them out of brick due to the need to comply with the technology of dressing with the wall.
Installation of clinker tiles
- Marking and cladding work should begin from the location of the natural “faults” of the facade (window and doorways). This approach will allow to place whole tiles on the most visible places of the facade of the house. The cut clinker will be located closer to the base and the cornice. Clinker laying should be started from the corners; for this, special corner types of tiles are used, which allows you to get perfectly even corners.

Among the whole variety of grouting for tiles, two main types can be distinguished: cement and epoxy. Read more about the choice of grout in the material:https://floor.expertexpro.com/en/pol-pokritiya/plitka/kak-vybrat-zatirku-dlya-plitki.html.
- The adhesive solution is applied using a notched trowel so that grooves remain. When working with lightweight tiles, use a spatula, the height of the teeth of which is 6-8 mm. Heavy tiles need a thicker layer of glue, which is obtained by using a spatula with longer teeth (10-12 mm).
Important! When performing facade cladding, gaps of the adhesive mixture under the tile must not be allowed. Before starting work, experienced craftsmen conduct a test: apply glue to the base, apply tile and press, and then immediately tear it off. In this case, the entire wrong side of the tile should be evenly coated with glue. The presence of voids is not permissible.
- A small amount of glue is applied to the wall so that it must be covered with clinker tiles for 20-30 minutes. Do not allow the adhesive to dry out, as this may affect the adhesion deterioration. If you can’t adapt because of the low speed of laying the tiles, then it is better to apply glue not on the wall, but directly on each tile. You can correct the incorrectly laid tiles within 10-15 minutes after installation.

Important! In hot weather and in strong winds, the drying of glue is accelerated, so the area of application of the mixture is reduced to several tiles.
- Alignment of rows is more convenient to carry out on the lace, stretched for every second row. Vertical seams form by eye or use a piece of tile that is inserted between two adjacent tiles. For these purposes, you can use a special cord that is produced to facilitate the facing work.
- After the brick tile is laid over the entire surface of the wall, proceed to grouting. A solution from a metal scoop is applied to the inter-tile seams with a tool called a “joint”.
- Residues of dried grout that have fallen on the tile are removed with a stiff brush and then with a softer brush until the dirt is completely removed. Glazed tiles are cleaned with a damp cloth.

Sometimes it becomes necessary to make a hole in the tile for communications or installation of fasteners. On how to properly drill the tile, you will learn on our website:https://floor.expertexpro.com/en/pol-pokritiya/plitka/kak-prosverlit-kafelnuju-plitku.html.
Thermal insulation and thermal panels
In severe climatic conditions, facade thermal panels with clinker tiles are used, which allows to achieve not only the decorative design of the facade of a country house, but also the insulation of its walls. Thermal panels consist of two layers, one of which is a heat-insulating substrate made of polyurethane foam insulation, and the second is made of clinker cladding tiles. The weight of the thermal panels is insignificant, so their installation does not require strengthening the erected foundation.In addition, the load is evenly distributed over the entire area of the wall.
Clinker tiles are appreciated for:
- high resistance to external influences;
- rich variety of surface textures;
- variety of colors.
Polyurethane foam, used as a heat-insulating substrate in thermal panels, has several advantages:
- high environmental qualities;
- resistance to solvents, alkalis and acids;
- adapted to street conditions;
- resistance to damage by fungus and rot;
- non-combustible material.
Important! Thermal panels reduce by 40% the cost of heating a country house. At the same time, in winter they help to keep warm in the house, and in summer they prevent the building from heating under the influence of scorching sunlight.

Clinker-type thermal panels are attached to load-bearing wall surfaces using special screws. Since the installation of thermal panels is carried out without the use of "wet" work, the facade cladding speed increases. There are also no restrictions on seasonal installation work. Thermal panels can be used all year round.
Clinker Tips
- Order clinker tiles immediately for the entire cladding area to exclude the possibility of deviations in the color of the material.
- Take the tiles from four to five boxes so that there are no areas with a sharp color deviation.
- Protect tiles from dirt and dust when storing.
- Before laying, the clinker tile is pre-moistened with water.
- To align the masonry structure, clinker tiles are sawed off with a special tool.
- Use adhesive solutions, including branded ones, which are recommended by the manufacturer of the facing material.
The article and the video talk about how to lay clinker tiles correctly. During the work, you can not deviate from the manufacturer's recommendations, which can be taken at a store that implements clinker tiles.