Grouting of ceramic tiles: we understand what and how to grout seams
The modern market of building and finishing materials pleases with a variety of choices, however, undoubted leaders in this area have been determined for a long time. Ceramic tile is one of the best facing materials tested by time. The tiled surface is practical and lasts a long time, and the presence of material of an unlimited color palette allows you to realize the most sophisticated design projects. In addition, the popularity of tiles is also explained by the fact that, in principle, you can finish walls with tiles yourself, and the necessary recommendations can be easily found on the global network. For example, we want to offer you the most useful information on how to wipe seams on a tile.
Content
Tile grout - a modern market offer
After laying the ceramic tiles, the finishing touch is grouting, without this procedure, finishing the walls of the floors with tiles cannot be considered completely. In addition to practical value, the seam also has a decorative feature - it complements the general pattern on the wall or floor. Moreover, manufacturers produce many color additives.
Two types of grout: based on cement or epoxy
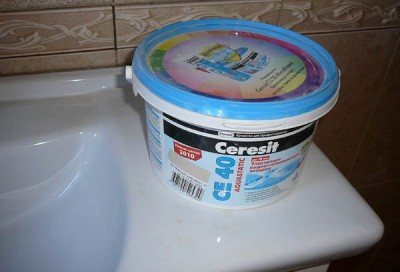
Cement-based grout It is supplied in the form of a dry mixture, which is brought into operation by dilution with water or liquid latex. Although you can find ready-made grouts in the retail network, however, their price is an order of magnitude higher. Cement grout for tile joints in the vast majority of cases is based on Portland cement, and the distinctive components are special additives that are part of the composition. All grouts of this type are divided into three groups:
- based on industrial Portland cement;
- based on dry hardener;
- based on a mixture of latex with Portland cement.
Interesting! Portland cement is a special type of cement that got its name for the reason that it was very similar in color to the building stone that was mined on the English island of Portland.
Epoxy groutIt includes epoxy resin and hardener, and gives the joints increased impact resistance and resistance to various chemical influences. Such grouting is of high cost and, as a rule, is used in the arrangement of premises for industrial or commercial use.
In addition, excessive viscosity is characteristic of epoxy grout, therefore only a specialist can successfully work with it. Moreover, there are certain restrictions on its use: tile thickness - from 12 mm, and the minimum width of the seam - 6 mm. Otherwise, such a grout simply cannot penetrate into narrower joints.
Attention! In order to avoid serious problems with independent work, carefully read the manufacturers instructions.Only in this way can you determine which grout for the tile is best suited to your specific situation.
Is sealant required?
Tile grouting - a video instruction of the process, by the way, is at the end of this article, it also involves the treatment of seams using sealant. It will protect the surface of the tile from excessive absorption of moisture, and also protect it and the seams from stains. If the surface is finished with unglazed tiles, then it is completely covered with liquid sealant. Such a specific substance in its composition has acrylic, varnish or silicone. Therefore, it is necessary to choose it focusing on the type of tile and grouting material.
Distance between the two
By and large, the width of the trowel joint depends solely on personal preferences. Many people prefer narrow seams, which visually suppress the tile. If the surface is made of elements measuring 10-30 cm, then the most optimal is a seam of the order of 3 mm. Sometimes a tile of 60 cm in size is also laid according to this scheme. If the tile is irregular in shape, it is advisable to make a wider seam, but it should not be larger than 12 mm.
Attention! The wider the seam, the more likely it is to crack. To grout it, it is necessary to apply a grout with the addition of sand, however this can not always provide a seam from deformation.
On the other hand, do not make the grout too narrow, as this will greatly complicate the grout process, and as a result, it may turn out to be leaky, that is, water will leak under the tile. According to professional veneers, the seams should be of sufficient width so that they can be easily filled with any of the selected grout.
Only in this case they will become waterproof and will perform the function of peculiar shock absorbers in the process of compression or expansion of the tile. If the seam has a negligible width, then it will not have similar parameters.
Toolkit and supporting materials
- Respirator (performing work using cement-based grout).
- Protective glasses.
- Latex gloves.
- Roller, rubber spatula or scraper with rubber nozzle.
- Bucket.
- Sponge.
- Plywood.
- Stitching, sharpened at one end of a wooden stick or toothbrush.
- A piece of clean cloth.
- A small brush for painting or a paint roller.
Short plan
- Grout mixes.
- The solution is aged to the required level of water absorption.
- The grout is re-mixed very carefully.
- The solution is distributed.
- Surplus is cleared.
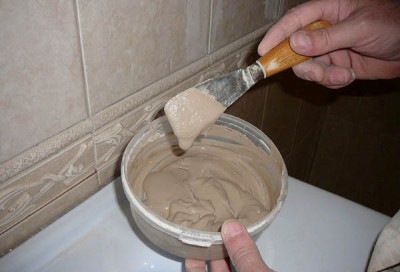
Solution preparation
As a rule, dry grout is mixed with either water or latex liquid additives that replace water.
Note! Dry polymer grouts can only be mixed with water.
When using any type of liquid, it is necessary to add only such an amount that is sufficient to prepare a plastic and easily distributed mixture. This aspect is extremely important, since excess moisture can cause a weakening of the grout. In order to do everything correctly, the solution must be mixed strictly according to the proportions indicated on the grout packaging. The container in which the solution will be mixed must be dry and clean.
When mixing the grout, the dry ingredient is added to the liquid. Moreover, about ¾ of the norm of the liquid indicated in the recipe is initially used. After all dry components are introduced into the solution in small portions, the remaining liquid is added, not forgetting to control the consistency of the mixture.
Important! The process of grouting can be influenced by such external factors as the temperature regime in the room, relative humidity, and in addition the component composition, for example, the presence of a dye.
To mix the solution, it is recommended to use a trowel or an electric mixer. If preference is given to the “automation” of this process, then the mixer should be completely immersed in the solution during operation, so that air will not enter it. After all, air bubbles can also weaken the grout. For this reason, the speed of the blade should not exceed 300 rpm. At the end of the mixing procedure, the solution must be left alone for 8-10 minutes, and then you can safely use it for its intended purpose.
Ceramic Tile Grouting - Direct
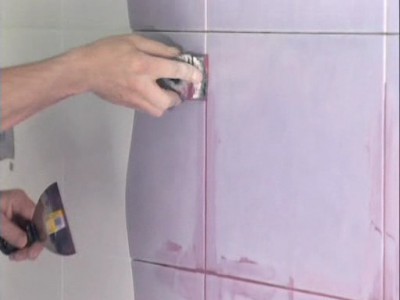
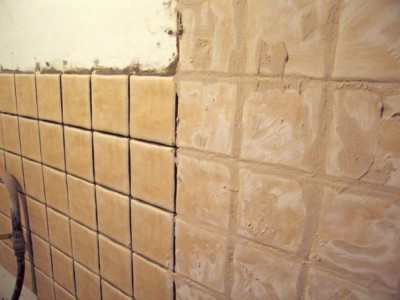
Grouting of ceramic tiles begins with laying the mortar on the surface of the tiles. For proper distribution, it is best to use a special grout. She holds at an angle of 300relative to the surface of the tile and is applied diagonally. Grater you need to go through the treated area 2-3 times, moreover, not just covering the inter-plate distance, but trying to rub the solution into the seam with an effort to completely fill it. Naturally, the greater the resistance, the greater the density of the seam filling, and, accordingly, the stronger it will be. The main idea of this work is that all the voids and corners around the tile remaining after laying it should be filled as much as possible. When applying the grout, the liquid will leave it, and the seam will be filled with particles of cement and sand. Thus, after solidification in the seam, a solid body will be obtained.
No need to grout the entire surface at the same time. The best option is to distribute the solution in a small area, about 1-2 m. In the process, it will be found out how quickly the grout sets and if there is a need for frequent stops associated with cleaning the surface. In some cases, it is possible to wipe 9-10 square meters. m, and then engage in cleaning the working area. If the solution quickly sets, then only a small area is overwritten.
What is a grout bag?
If the lined surface has such a structure that its cleaning process requires considerable effort, for example, imitation of old brickwork, it is recommended to use a special grout bag. This “tool” visually resembles a pastry bag with which housewives decorate cakes. A tip is attached to the end of the bag, the diameter of which is related to the width of the grout. Then the bag is filled with a solution, which is squeezed out with force directly into the seam.
When using a trowel bag, the tip is placed at the top of the seam and then advances along as it fills. As a rule, first all horizontal seams are filled, and then vertical. In the process of applying the grout, it needs to be squeezed out a little more than, it seems at first glance. After some hardening of the mortar, it is compacted using a joint or a small piece of a smooth metal tube, the cross-sectional diameter of which is larger than the size of the seam. Then within 30 minutes it is necessary to allow the grout pressed in the seam to seize and then the excess will be removed using a stiff brush.
Wet grout removal
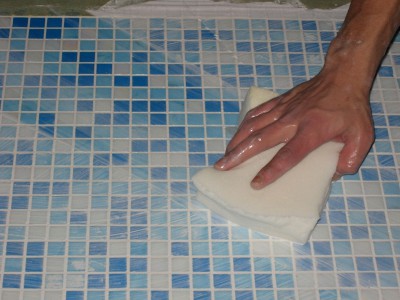
When it is visually determined that the grout is sufficiently frozen, a wet cleaning of the lined surface is performed. To do this, take an ordinary sponge dipped in ordinary clean water. In a circular motion, the excess grout is removed from the tile, and do not forget about the frequent washing of the sponge in water, which must be changed as it becomes dirty.
Dry grout removal
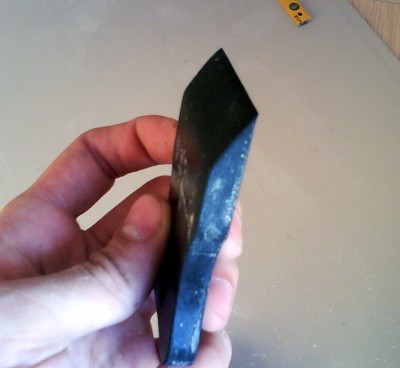
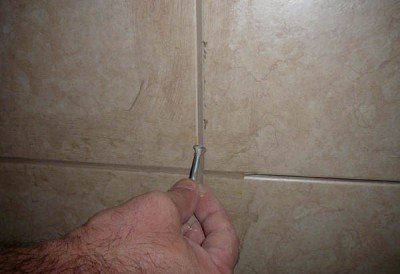
The seams must be leveled and smoothed out using a joint, that is, a wooden stick with a sharpened end or the end of a toothbrush handle. Then the edges are trimmed with a sponge.The resulting seam should be smooth and non-convex, in the vast majority of cases it turns out to be slightly concave. All seams should be of the same shape and depth.
We hope that our detailed instructions will help you to properly perform self-grouting of joints on a ceramic lined surface. If some points require clarification, then we suggest you familiarize yourself with the training video clip.


7 comments