
The device of the floor from the tongue-and-groove boards: recommendations for choosing and laying floorboards
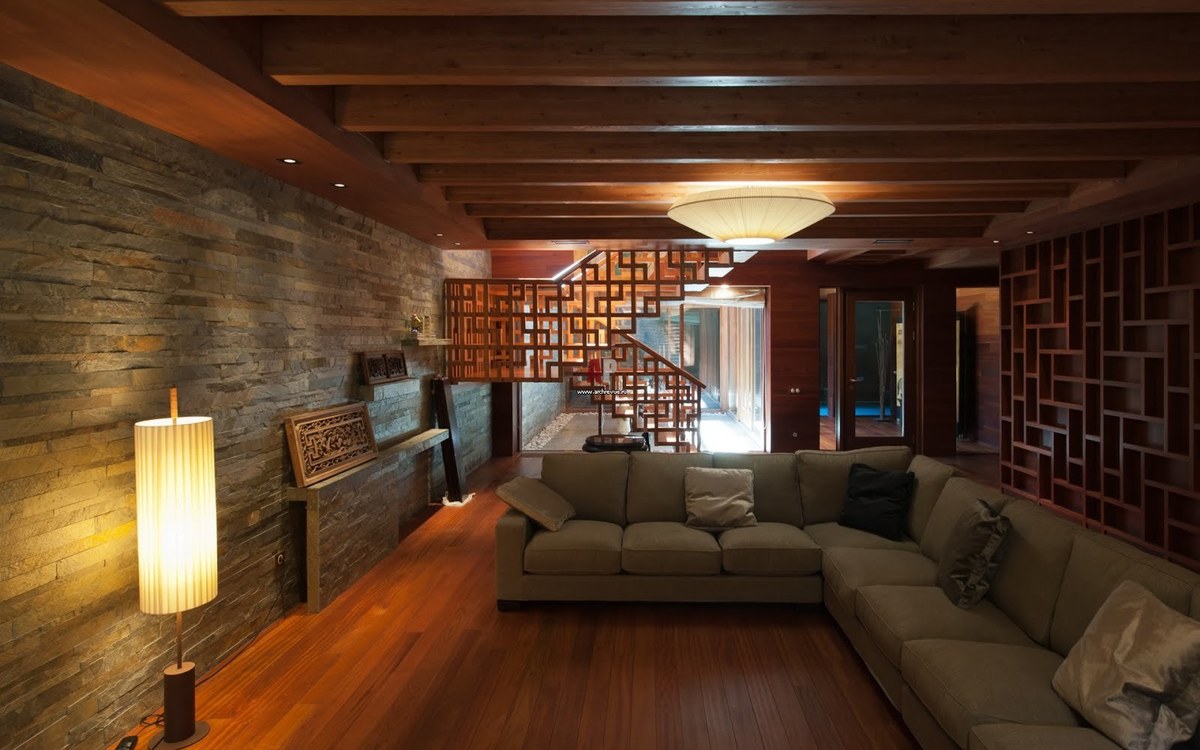
High-quality installation of a plank floor is a difficult task. But it can be simplified if you apply for assembly not an ordinary board, but a sheet pile. The presence on the lateral edges of the spikes and grooves allows you to connect such boards to each other, such as parts of the designer. The result is a flat, environmentally friendly floor without gaps and, if necessary, without the visual presence of fasteners. For the result to be just such, you need to know how to choose the grooved boards, how to stack them and connect them together, how to replace failed floorboards. Let's talk about this in more detail.
Content
What is a dowel board?
A groove is called a floorboard, on one edge of which a longitudinal groove is cut, and on the other - a groove (spike, crest). When assembling the floor, the adjacent tenon is inserted into the groove of one board. The connection is tight, with virtually no gaps.
Unlike edged, the grooved side of the grooved board is sanded to smoothness and does not need additional alignment and processing with a planer. The wrong side may not be processed, but in any case special grooves for ventilation are provided on it. They provide free air circulation in the floor space, respectively, prevent rotting of wood.
With proper installation and rallying of tongue-and-groove boards, the gaps between them are completely absent. This prevents squeaks and quick wear of the wood flooring.
A disadvantage of a grooved floor is a high tendency to deform (warping, swelling) with humidity fluctuations in the room or when installing wet boards.

Vapor barrier in a wooden house will avoid dampness under the floor, and this, in turn, will make housing comfortable for living. Learn more about this from our article:https://floor.expertexpro.com/en/ustroistvo-rmnt/paroizolyaciya-pola-v-derevyannom-dome.html.
Choosing a good building material
To avoid problems with the finished floor, you should responsibly approach the choice of grooved boards and how to store them.
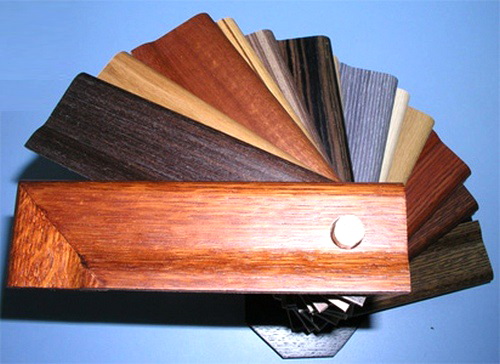
Aspect # 1 - wood species
The first thing you pay attention to is the quality and species of wood. Grooved boards are made of:
- Spruce and pine - inexpensive, easy to process rocks. Their main advantage is a low price. In addition, they have excellent heat capacity, so the floors of spruce and pine always seem warm. However, for floors in rooms with high traffic it is better not to use them. Women's heels, furniture legs, dropped objects - all this can leave noticeable dents on the wooden surface. Mandatory varnish treatment.
- Larch trees - solid conifers, characterized by moisture resistance and durability. The larch board has a beautiful, clear structure, rich color. Due to this, it is not necessary to cover it with stains and varnish.
- Oak and Ash - durable, hard rocks. Their wood has a pronounced texture, rich shade. Ashen and oak boards are considered the most reliable and durable.However, they are also the most expensive.
Aspect # 2 - board sizes
The dimensions of the grooved boards should also be taken into account. They can vary significantly. Ideally, the length of the boards should match (or be slightly less) the length of the wall along which they will be laid. Reliability of the coating and price depend on the thickness. The standard sizes of tongue and groove boards are:
- length - 1-6 m;
- width - 70-200 mm;
- thickness - 18-45 mm.
Aspect # 3 - quality class
Dowel boards are sorted by quality class. There are 4 classes in total:
- Extra - the upper class, or, as it is also called, the European dowel. This is the most expensive material, without knots, cracks, with a uniform structure and shade.
- A - material without cracks, knots, a certain heterogeneity of the shade is allowed.
- B - single spots and cracks are allowed.
- C - economy class, with the presence of multiple knots, single through holes, cracks. Typically, class C boards are used for mounting a subfloor.
Here's what it looks like:

Aspect # 4 - Humidity
The ideal moisture content of tongue and groove boards is 12-16%. If the boards are poorly dried, then the deformation of the finished floor is inevitable. Often there are cracks, warping boards. There will almost certainly be gaps between the boards, so the floor will have to be rebuilt.
The humidity of the boards can be determined using a moisture meter. If this device is not available, you can do with simpler evaluation methods:
- When tapped with knuckles, dry (suitable for the floor) wood makes a clear, well-audible sound. A wet board, on the contrary, sounds muffled, barely audible.
- If you touch a damp board, you can feel damp. On a dry board there is no sensation of moisture.
- The color of a wet board is darker than that of a dry one. Also, after high-quality industrial drying, the surface of the board acquires a noticeable shine. The wet board remains matte.
- There should be no condensation inside the packaging film. Moisture droplets on the film always indicate excessive moisture on the boards.
Additional recommendations for choosing a grooved floorboard are given in the video:
On which base is it better to lay the tongue?
After buying the tongue-and-groove boards, you can proceed to their installation. As the basis, you can use:
- Wooden logs fixed on top of any coating - screeds, plywood, wooden floor. Logs can also be laid on brick supports.
- Concrete floors with screed.
- Moisture resistant plywood.
- Old wooden floor.
- Draft floor from grooved boards or low grade lumber.
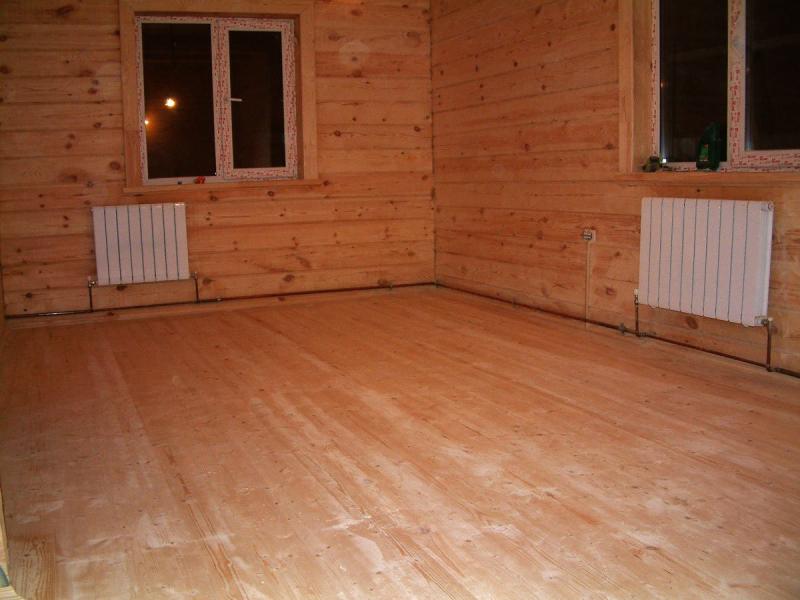
The gold standard in construction is considered laying tongue-and-groove boards on previously fixed logs. They allow you to qualitatively tighten the boards during the installation process and prevent the further occurrence of floor deformations. Therefore, we recommend that you stop at this option.
Technology for mounting tongue-and-groove boards on logs
It is important that the installation of tongue-and-groove boards is carried out in two stages. Initially, boards are mounted with partial fastening (usually fastening is performed only for each 4-5 boards in a row). After six months or a year, the floor is trimmed with the fastening of each board. Such measures are necessary, since the boards usually dry out a little during the first six months of staying in the room, small gaps between them arise. Therefore, the boards have to be laid again, rallying them more tightly.

Bark beetles and fungi like to settle in wood. To avoid this, special impregnations are used - antiseptics and flame retardants. We talk about them in the material:https://floor.expertexpro.com/en/ustroistvo-rmnt/antiseptiki-i-antipireny.html.
To assemble a grooved wooden floor, you will need:
- grooved boards;
- fixed logs - as a basis;
- self-tapping screws (or nails);
- screwdriver;
- hammer;
- level;
- staples or stops, wedges (or screw jacks).
Next, we consider the order of work.
Step # 1 - laying the first board
The first board is selected as even as possible, equal in length to the length of the wall.The board is laid with a spike to the wall, at a distance of 10-15 mm from it. This will allow the wood to expand freely under the influence of temperature and humidity. In the future, the gap will be blocked by the baseboard.
The first board is fixed as tightly as possible, by vertically screwing the screws tightly through the entire thickness into each lag. Instead of screws, you can use nails, hammering them into the board and lag with a hammer.
Step # 2 - installation and rallying of subsequent boards
The next board is placed next to the previous one. A hammer blow, through the block-gasket, put a groove on the tongue. 3 more boards are laid in the same way, without fastening. In the lower part of the groove of the fourth board, holes are drilled at an angle of 45 ° above each log. Screws are screwed into the holes. Such fastening is temporary and requires a floor overhaul with fastening of each board (and not just the fourth) after the final aging of the wood.
To ensure tight cohesion of the boards during fastening, they are pulled together. You can do this in the following ways:
- Using staples and wedges. 10-15 cm from the board into the lag clog bracket. A wooden gasket is applied to the board - a piece of the board 50-70 cm long. Two wedges are driven between the gasket and the bracket. Wedges are set against each other with sharp ends. Striking the free ends of the wedges with a hammer (or two hammers at the same time), the boards are pulled together. The tongues are tightly in the grooves, there are no gaps. Then screw the screws.
- With emphasis and wedges. Coalescing is performed similarly to the previous method. The difference is that instead of staples, wooden stops are used. An emphasis is an ordinary whetstone or a board which fastens on a log with nails or self-tapping screws. The distance from the top of the stop to the stacked board should be equal to the total thickness of the narrow parts of the two wedges.
- Using wedge-shaped compression with a movable bracket and wedges. The squeegee is fixed on the lag, two wedges are hammered between its supporting parts with a hammer. There is a rallying of boards.
- Using a screw jack. At a small distance from the laid floorboards, a base board is nailed. The heel of a screw jack is laid on it, which is laid along the log. The board is pulled through a piece of sheet pile board (gasket).

Step # 3 - laying the last row
The last board is laid in place, a wedge is hammered between it and the wall. After rallying, the board is fixed with screws (nails) tightly through the entire thickness. The wedge is taken out.
If the last board does not fit the width, it is cut along with a circular saw. A deformation gap of 10-15 mm should remain between the wall and the board.

When installing a wooden floor, do not forget about possible problems. With incorrect design and installation, the process of rotting boards can begin. You can find out why this happens and how to avoid it here:https://floor.expertexpro.com/en/ustroistvo-rmnt/sgnil-pol.html.
Repair of grooved floors
The grooved floors are reliable enough, but during operation, one or more boards may spoil. Then they are removed from the general monolith of the floor and replaced with new ones. To do this, the crests of the boards are cut with a circular saw with a rounded end of the blade. You can also use a jigsaw or a hacksaw with a narrow blade.
Board replacement is carried out as follows:
- A few cuts are made along the board to be replaced with a saw, jigsaw or hacksaw. The depth of the cuts is slightly less than the thickness of the board, that is, without through cuts.
- Using a chisel, the crests of the boards are punched through the slots.
- Remove the damaged board, the remains of the comb from the groove.
- In place of the removed board, insert a new one.
Thus, replacing damaged boards as necessary, you can extend the service life of the grooved floor for many tens of years.
3 comments