
How to lay a tile on a wall - consider the process in detail
Each of us has a moment in life when, having assessed the interior of such important rooms in a house as a bathroom, toilet or kitchen, one has to conclude that it is time to make repairs. Of course, this is terrifying for many millet, but is it as problematic as it seems at the beginning? Of course, the cost of an event called Repair is immediately scary, but in this case, emotions should be set aside, but you just need to take a calculator and roughly calculate the upcoming costs. And if the amount received seems too intimidating, then you need to think about how to reduce it. For example, a lot of work can be done independently, even those that I have never done before. And as a result, the planned repair costs can be reduced by 30 percent, or even halved. And if you don’t know how to lay a tile on a wall when facing surfaces, then read this article to the end, we guarantee you will not have any insoluble questions.
Content
Laying tiles on the wall - video instruction
Aligning walls for tiles - surface preparation
In reality, everything is not so difficult - preparing walls for laying tiles does not require serious professional skills. If the bathroom is taken into development, then we remove the old plumbing and arm ourselves with a hammer and a chisel - it is necessary to bring down the old tile. Of course, we must not forget about the safety of performing such work, therefore, we take certain measures:
- protect the hand with gloves - to avoid cuts on sharp edges;
- to protect the eyes we put on glasses - protection from dust and small pieces of tile.
 How to lay tiles on a wall - surface preparation

After all the tiles are removed from the surface of the walls, with the same chisel, we get rid of the remnants of tile glue. It is worth noting that this work relates to the initial stage of surface preparation.
Attention! It is important to understand that laying the tiles on the wall will be done correctly if the surface is well prepared beforehand - 80% of the success belongs to a flat surface.
The verticality of the walls and the correct angles
So, we need a perfectly flat wall surface, how to make it like that? First, we determine the quality of the plaster. If its main ingredients are sand and cement, and in some places it itself has swollen and falls away, then again you will have to use a chisel and a hammer. There is nothing to be done, it is necessary to clean the surface before masonry. If the obtained wall area is strong enough, then you can begin to determine the geometric parameters.
For measurements, you will need a plumb line, which, in fact, is a simple device consisting of a heavy load attached to a cord. The kit is used to check the verticality of the walls. This procedure is performed as follows: the cord is unwound to the height of the room and fixed under the ceiling close to the wall - we determine how much the wall goes to the side. In the case when the deviations exceed several millimeters, it will not be possible to do without leveling the wall surface using the plaster method.

Attention! In no case should you think that you can do without leveling the walls.The principle of “and so will do” in this situation is categorically unacceptable.
Tile - not a wallpaper, and it’s impossible to just pull it out in the right direction. If you skip the stage of leveling the walls, then after laying a whole series of tiles to the ceiling, at the exit you can find that a gap has formed a few centimeters wide, and there’s nothing to fix it.
The next operation is the measurement of the mutual perpendicularity of all walls. If the angle is not equal to the cherished 900you will also have to plaster. Here, it is probably worth explaining the importance of this circumstance. The thing is that if a washing machine is supposed to be in the corner, then there will not be any special problems, although one side of it will be adjacent to the wall, and the other will stand at a decent distance. But if in the crooked corner according to the project the bathroom will be located, then a gap will form, which will constantly let water through.
When working with ceramic tiles, cut rows cannot be avoided. The need for cutting tiles arises when facing walls around doorways, utilities and other obstacles. Let's talk about how to cut tiles in various ways here:https://floor.expertexpro.com/en/pol-pokritiya/plitka/kak-rezat-plitku.html.

Now it remains to check the walls for concavities and bulges. Here you need to use the water level. It is very important that it be at least 1 m long. If, as a result, slight deviations are found (a couple of millimeters per 1 linear meter), then it is also better to get away from them by leveling the surface.
Note! You can not ignore the floor - bumps are unacceptable. And horizontality is also worth finding out with the help of a level. If it turns out that the floor is falling to one side, then if it is not leveled, this will lead to a large gap between the wall and floor tiles, and this is at least unaesthetic.
Wall alignment
To complete this work, you will need the following set of tools:
- Mixing tank - a simple plastic bucket will do.
- Drill with a special mixer - quick, high-quality mixing of the composition for leveling the walls.
- Water level - surface condition control.
- Master OK.
- Grater.
- Several spatulas of various sizes - 1 large about a meter long, 1 small auxiliary 10-20 cm long.
 How to glue tiles on the wall - a set of necessary tools

If the preparation of the walls for the tiles will be carried out using a sand-cement mortar, then it is poured onto a small section of the wall and, using a grater, it is dispersed in a circular motion until an even layer is obtained. If a solution based on special ready-made dry mixtures is used as a working material, then with a large spatula we simply apply it to the area equal to the length of the spatula. And then, slightly pressing, we stretch along the surface of the wall. The result should also be a uniform layer. In the process, do not forget to control the evenness of the wall with a water level.
Floor leveling
Before as glue the tile on the wall sufficient attention must be paid to the floor surface. If it is concrete, then most likely you will need a special building mixture or the already familiar sand-cement mortar. If preference is given to the latter, then the process of leveling the floor does not have fundamental differences from the technique of plastering walls. If the technology of bulk floors is used, that is, so-called self-leveling mixtures are used, then the necessary instructions can be read on the packaging of the composition. To improve the adhesion of the base to the leveling mixture, the base must be treated with a primer. If microcracks are found on the floor, we recommend putting a layer of waterproofing.
In that case, if the room has a wooden floor, then not everything is so simple, and the complexity of the work depends on the state of the flooring itself.Since wood is not very stiff, all old and rotten boards must be replaced with a thickness of at least 25 mm. In addition, new wood must be impregnated with a special substance that will protect it from mold, fungi and rot. Then we lay the required layer of waterproofing, and at a height of 0.5 cm from the surface of the base of the floor we lay the building mesh. And now we fill in a layer of a solution prepared either from sand with cement, or from a dry special mixture. It will be possible to start work in this room no earlier than in a month, when the screed finally hardens.
Floor tiles are very popular for flooring in bathrooms, bathrooms, kitchens and other rooms with high humidity and unstable temperatures. How to put it right and what secrets can be hidden in this process? Read about it in our article:https://floor.expertexpro.com/en/pol-pokritiya/plitka/kak-klast-plitku-video-i-foto.html.
We get materials

Naturally, before you go to the store for tiles, you need to measure the room and decide what area is to be finished. When choosing a tile, it is worth considering the fact that there are 2 types of it: floor and wall. Even a layman can easily identify this difference by visual inspection. Floor tiles are stronger and have a rough top surface.
Important! When choosing a tile, it is better to give preference to material of the 1st grade, since tiles of 2-3 grades may have heterogeneity in color and other minor defects.
When purchasing a tile, you should buy it with a margin, because during the laying process, individual elements can be broken, incorrectly cut, etc. And then to buy a small amount of tile can be problematic - it simply may not be in stores. Immediately with the tile you need to buy decorative tiles with a pattern, borders and other interior details. Facing the walls with ceramic tiles involves the use of special adhesive dry building mixtures, which are prepared according to the manufacturer's instructions. In this case, we are talking about mixtures specially designed for masonry tiles. Also, when choosing, pay attention to the fact that for rooms with high humidity (for example, a bathtub), one type of mixture is suitable, and for exterior wall cladding, a mixture for outdoor work is intended. Do not forget to find out the maximum permissible layer thickness, it is also indicated on the package. With a very limited budget, tiles can be laid using "grandfather" mortar - on cement with sand.
For facing work, it is important to make the correct calculation of the tile. Using the example of a bathroom, we will help you make the right calculations:https://floor.expertexpro.com/en/pol-pokritiya/plitka/skolko-nuzhno-plitki-dlya-vannoj.html.
Tile Laying Technology
The beginning of laying tiles on the wall begins with the preparation of glue. The dry mixture is added to a certain amount of water in small portions and mixed with a pre-prepared mixer. The result is a medium density composition: not too liquid - so as not to float along the wall, not too thick - so as not to be difficult to stretch it over the surface.
Now you can start laying. The work is carried out in the direction from the bottom up, that is, the first row is laid out on the floor. And then one by one and so on for each wall and to the ceiling. To obtain strictly even rows, a rail is placed on the floor, which is aligned in level. Just the first row lies on this rail. In order for the following rows to lie evenly and nicely in the corners, the rails are vertically nailed, which are aligned vertically. At the level of the 2nd row and higher in the next rows, nails are stuffed onto the slats, between which a kapron thread is stretched. This will allow you to lay the rows of tiles strictly horizontally.

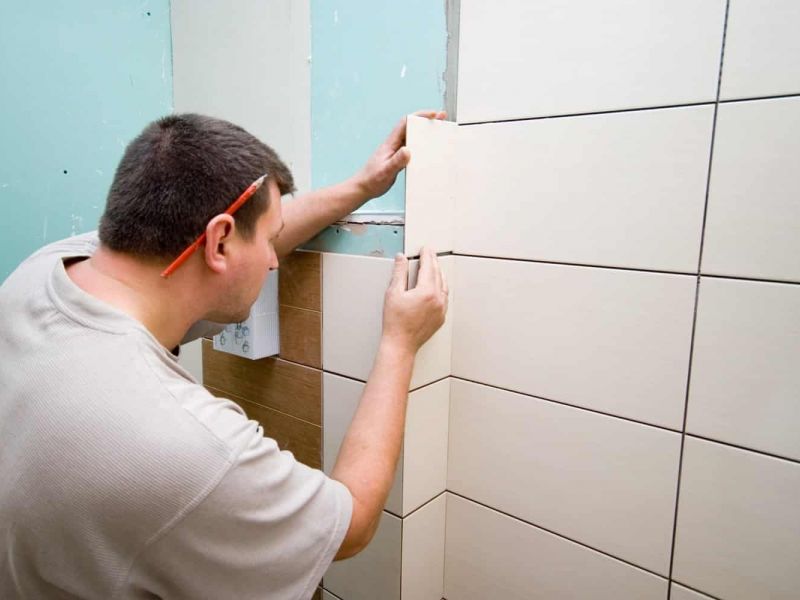
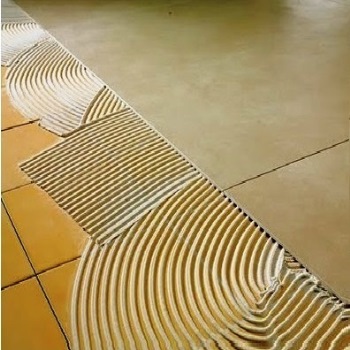
We apply an adhesive composition to the tile with a notched trowel and apply it to the wall surface. Press down its tile a little and make sure that the solution is evenly distributed on its surface. The same manipulation is carried out with the next tile, and then crosses are inserted between them. It is recommended to leave a seam 2-4 mm thick. Such a trowel joint is not only a decorative feature, but also has quite practical significance. It will not allow the tile to remain cracked or split off from the wall surface during thermal expansion. The quality of the masonry is constantly monitored by the level, and if in a row a whole number of tiles does not fit, then we adjust the dimensions with the help of a tile cutter. The final stage of laying tiles on the wall is to grout the joints by applying a fugue with a rubber spatula. Then the surface is cleaned and on this the process of laying the tiles can be considered finished.
We hope the whole process of laying tiles is described in an accessible and understandable way. And the question of how to put tiles on the wall no longer causes fear and skepticism. If you have any doubts, we recommend that you watch the training video, which will help to fully understand the information received. As the reviews of visitors to our site show, most of them were able to personally clad rooms in their homes. It will turn out for you too - do not hesitate!

1 comment