
Do-it-yourself tile laying on the floor - how professional laying is done
Ceramic tile is undoubtedly one of the most popular materials for surface finishing. It is strong, durable, beautiful. The attractive appearance of the material is successfully complemented by a number of extremely important qualities: for example, resistance to abrasion, ease of maintenance, etc. But only the correct, high-quality laying of tiles on the floor and walls will help the coating fully “reveal” all its advantages, demonstrate its indispensability and reliability .
In this article we will tell you about how to lay a tile on the floor, consider all stages of the process, as they say, from A to Z.
Content
Foundation preparation
Stage One - The Most Responsible. Why? Indeed, in order for the tile (yes, by the way, and any other coatings) to look perfect, it is necessary that the base under it be perfect, or rather perfectly even.
Instructions on how to level the floor under the tile:
1. In the “processed” room all doors and windows must be closed - no drafts during the pouring of the mixture!
2. Watch the temperature of the base - it should not fall below five degrees Celsius.
3. All leveling work requires the surface to be clean and dry. Take care of this. Vacuum or sweep floors thoroughly.
4. Traces of paints, oils and other substances present on the floor must be removed without fail - they interfere with the full adhesion of the mixture to the base. Over time, potholes, cracks and other defects may appear in these places.
5. To obtain a high-quality base for the tile, it is necessary to determine the difference in the height of the floor with the help of a level (water or laser) and “eliminate” it with a screed.

6. Fill the floor with a primer with a thin layer, the resulting puddles and drips should be leveled.
7. The preparation of the mixture is of no small importance. Detailed instructions for diluting the solution are present on the package - do not neglect to read it, since in practice there is a tendency to experiment with the amount of “injected” water.
8. Start pouring the solution immediately after its preparation. According to the recommendations of specialists, it is best to do this by forming strips with a width of about half a meter, followed by distribution of the mixture over the surface.
The pouring process should be neat but fast. Also consider the manufacturer's recommendations regarding the recommended screed thickness.
9. Dries the floor in about 12 hours. You can start the key process - laying tiles - after two to three days.
Choosing a floor tile
The durability of the coating will depend not only on the quality of the screed, but also on the performance characteristics of the particular tile you choose.

Bathroom tile
The permeability of the bathroom, in the vast majority of cases, is low. Therefore, the outdoor tiles for this room can be selected with the lowest abrasion class.For the bathroom, a more important characteristic of the material is its resistance to household chemicals and, of course, moisture.
Do not look at the glossy tiles - yes it's aesthetically pleasing, but you don’t want to jump out of the shower right onto the ice rink? And with the gloss it will be so, believe me.
Due to the variety of offers, the choice of tiles can drag on for weeks to months. We will help shorten this process by understanding the basic rules for choosing a tile and its effect on the design of the bathroom in the article:https://floor.expertexpro.com/en/pol-pokritiya/plitka/kakuyu-plitku-luchshe-vybrat-dlya-vannoj.html.
Kitchen tile
For the kitchen, the third class of abrasion is optimal. The kitchen floor is subject to regular attacks of "falls", "spills", "spills" of something. Therefore, the floor tiles in this room must have exceptional resistance to mechanical and physical stress.
So that cleaning the kitchen floor was always a joy, do not get textured or porous material.
Hallway Tiles
This is an unusually high traffic area. Therefore, for the entrance hall (lobby) feel free to purchase tile material with the fourth class of wear resistance.
How to lay tiles on the floor - step by step
Required Inventory
So, the floor is leveled, the tile is acquired. Now you can proceed directly to the installation.
You will need:
- ceramic tile itself;
- tile cutter;
- saw;
- adhesive solution;
- level;
- protective gloves;
- pencil;
- scapula;
- roulette;
- scraper with nozzle;
- sponge;
- rag;
- primer for floors;
- bucket.

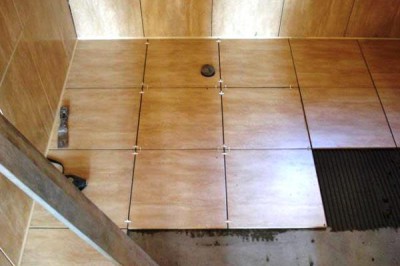
Technology for laying tiles on the floor
1. It is allowed to lay out the material on the floor before starting work in order to estimate its best location.
2. Do you need to cut a tile? Such areas are better to "hide" in the corners.
3. To maintain equal and even intervals use special "crosses".
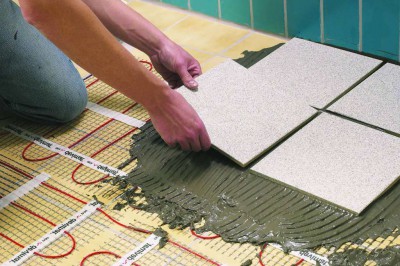
4. Apply adhesive to the floor surface (no more than one square meter at a time) - using a spatula or spatula.
All excess solution must be removed immediately!
5. Tile the floor is made from the center of the room with a reference to the transverse lines. Use tightened cords for continuous monitoring of straightness.
6. Start laying trimmed tiles after finishing laying whole.

Sometimes it becomes necessary to drill various holes in ceramic tiles. Not everyone can do it right and beautifully. We will tell you about the procedure and help to avoid mistakes in a special article:https://floor.expertexpro.com/en/pol-pokritiya/plitka/kak-prosverlit-kafelnuju-plitku.html.
Actual advice in the process of work:
- the number of the spatula should be chosen depending on the size of the tile. The larger the tile, the larger the size of the teeth should be;
- for laying floor tiles on warm floors should use the so-called reinforced solutions;
- to apply glue with even strips, a comb spatula is always used;
- tiles should be laid as quickly as possible (but, of course, not at the expense of the quality of work);
- the coating elements are aligned with a rubber mallet in height;
- recessed tiles in relation to neighboring tiles should always be removed and mortar added;
- during laying, the flatness of the surface and the coincidence of the edges of the tiles are checked constantly;
Worth to know! It is wrong to use tiled “scraps” on all walls in order to save. Yes, and it looks unaesthetic. If you already started a repair, then do not skimp on the purchase of 10-15% of the supply of tiles (the exact figure depends on the area for decoration, as well as on the method of installation).
- do not start laying tiles on a mortar that has already had a little grasp - the adhesion between the tile and the base will be weakened
Material cutting
For cutting floor tiles (if necessary) use a tile cutter.Individual elements are marked, mounted on the base and pressed tightly to the ruler. Cut by yourself. Light pressure on the lever to break the tile.
Through the use of a special tool, the seam is smooth and the surface is holistic.
If it is necessary to lay out a space near a door or any object that has a unique predetermined shape with a tile, then a profile is used to draw outlines on the tile. Cutting in this case is carried out by a special saw.

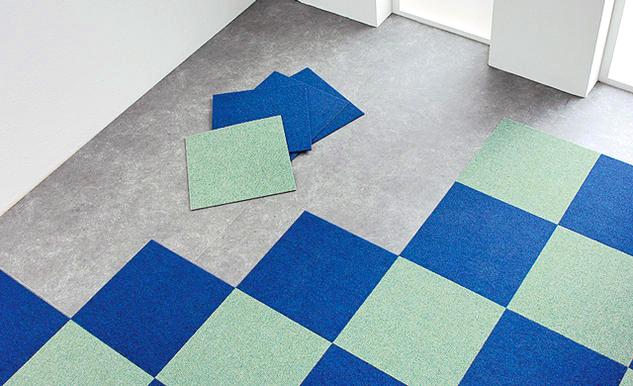
Laying ceramic tiles on the floor - popular options
First option
The most popular type of masonry is “seam to seam” (“butt”) masonry, that is, when the tile is adjacent to one another almost flush. Multi-colored tiles can be staggered.
Second option
The type of masonry "inverse" implies a shift along the seam in each of the rows.
Open-seam laying facilitates the installation of multi-colored ceramic tiles. Indeed, when laying end-to-end, difficulties may arise when fitting adjacent tiles, there is a risk of tearing, uneven seams, which, in turn, will lead to damage to the appearance of the lined surface.
A clear separation of the tiles, achieved by masonry with an open seam, makes any minor irregularities in the coating completely invisible.

When laying tiles, the butt joint is narrow, its dimensions are unstable; such a gap is extremely difficult to fill. In addition, filling can very often occur non-uniformly, as a result of which the filler exfoliates and any liquids calmly get into the resulting voids: water, aggressive detergents, etc.
You can learn more about self-laying tiles on the floor from the material on our website:https://floor.expertexpro.com/en/pol-pokritiya/plitka/ukladka-napolnoj-kafelnoj-plitki-svoimi-rukami.html.
How long does the tile dry on the floor
In most cases, a tiled floor can be used after a day, but its absolute resistance is achieved only after 72 hours. Hardening of the adhesive occurs evenly if the surface is not exposed to premature stress.
Laying Tiles On The Floor - VIDEO
We sincerely hope that the theoretical information presented by us, supported by cognitive video instructions, will save you from the question of how to lay a tile on the floor and will help all doubters to decide to carry out the process with their own hands.
3 comments