
Preparing the floor for a laminate: how to identify and remove surface flaws?
Finally, the flour of choosing the flooring was left behind - you purchased (sincerely hope that high-quality) laminate. But, before you start laying, pay attention to the quality of the rough surface - after all, the service life and appearance of the coating will directly depend on this parameter. Laminate is a whimsical material and this is not a secret. Moreover, his "whimsicality", contrary to popular belief, is not so much in the quality of exploitation and moodiness in terms of care, as in the exactingness of the foundation. All kinds of tubercles, cracks in the wooden floor, cracks in the screed, if they are not timely addressed, will soon lead to damage to the coating and, as a consequence, to new time and material costs. That is why the preparation of the floor under the laminate should become an integral, carefully carried out stage of arranging the floor structure.
Why is flat surface important?
Differences in the rough surface are serious “provocateurs” of the release of their system of laminate locks - the sore spot of this outdoor product. Due to the bumps and pits present under the cover, the forces from your movements will be transferred to the junction of the plates, thereby substantially “overloading” them. The result - the occurrence of cracks and swelling in problem areas. Rotten boards and cracked screeds “threaten” the laminate with constant contact with moisture coming from below. What it is fraught with, it is not difficult to guess.
The strength of a floor made on the basis of a self-leveling mixture significantly exceeds the strength of even a concrete screed. How to choose the composition of the mixture and perform the work is described in the material:https://floor.expertexpro.com/en/viravniv-stazhka/vyravnivanie-pola-samovyravnivayushhejsya-smesyu.html.
Leveling a concrete floor under a laminate
Are you dealing with a "humpback" concrete base? You can not do without pouring a self-leveling mixture. The sequential action in this case should be as follows:
- general cleaning of the surface: concrete should ideally be vacuumed;
- glossing over cracks in the screed (best with glue for tiles), knocking down bumps and sag;
- floor treatment with deep penetrating primer;
- preparation of the mixture according to the manufacturer's instructions. If you evaluate the density of the solution by eye, then its consistency should resemble sour cream. The mixture should be brought to absolute homogeneity - no lumps should remain;
- pouring a self-leveling screed. The filling should begin from the highest point of the floor - the mass will “spread” by gravity along the surface.
- uniform distribution of the solution with a spatula;
- rolling out the mixture with a roller - in this way the air that gets under the mixture is expelled, which can provoke many small holes on a new surface;
- the leveling mass dries in about a day - but by itself laminate flooring should be postponed for a few more days.

Do not forget about the hydro and thermal insulation of the finished base - get high-quality substratecapable of performing both functions.
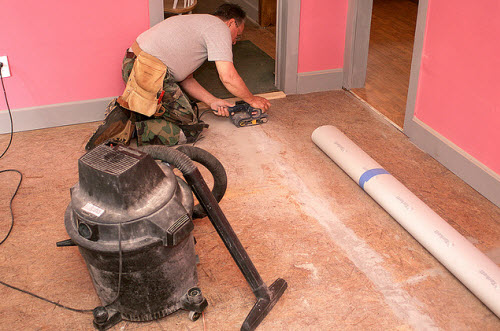
Work with a wooden base
If the concrete floor is more or less clear, then the nature of the preparation of the wooden floor raises many questions. One of them is where to start?
We answer - of course, with the coverage audit. The wooden floor should be carefully inspected in order to verify its strength, to identify rotten or cracked elements.Then it is necessary to evaluate whether it is possible to isolate the problem areas (if present) without completely dismantling the base. At the same stage, evenness of the surface is checked. Differences in height of two to three millimeters are quite acceptable.

Significant differences will have to be aligned. How?
- replace damaged boards or their sections;
- Drive flush / remove protruding nails;
- pull all the floorboards to the lags;
- lay and fasten plywood (thickness about ten millimeters).
Preparation of wooden floors under the laminate implies a thorough protective treatment of wood. For these purposes, the usual (but high-quality) drying oil is suitable. Also, the floor can be polished, and all the cracks to gloss over with a special tool.
We will detail the leveling of the wooden floor under the laminate in the article:https://floor.expertexpro.com/en/viravniv-stazhka/vyravnivanie-derevyannogo-pola-pod-laminat.html. Comparison of three methods: dry floor screed; plywood, fiberboard, particleboard and OSB; adjustable lags.
This video demonstrates yet another way to level wooden floors (having slight differences) - surface treatment with acrylic sealant.
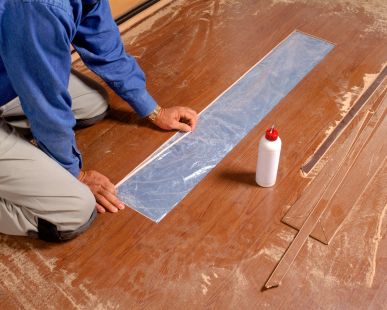
The use of cement-bonded particle boards
You can even the floor under the laminate using DSP sheets. To do this, lay out the level of the foundation - construction boards. Under the boards, if necessary, lay sheets of plywood; the design is well fixed. Cement bonded particleboards are cut to size and placed on top of it. Then flatness of the surface is carefully checked and each of the elements is fixed with self-tapping screws.

On the installation of electric, water and film floor heating with your own hands, read the article:https://floor.expertexpro.com/en/tepliy-pol/montazh-teplogo-pola-svoimi-rukami-video.html. Overview of the nuances of installing various types of heating.
And can make a warm floor?
This is a recent addition to the installation of laminate floors. Installation warm floor requires observance of a special technology of work performance and accurate weighted calculations - alignment and preparation of the foundation in this case will be more specific. See them in our section about underfloor heating.
In the process, try to avoid the typical mistakes of inexperienced homeowners. For example, attempts to align impressive differences with a substrate laid in two layers. Proper preparation of the base for the laminate floor is the guarantee that the coating will delight you with its aesthetics and wear resistance for many years.
2 comments