Do it yourself wooden flooring - technology from A to Z
The right choice of flooring affects the perception of the house as a whole. Both comfort and the appearance of the room depend on this. Natural, environmentally friendly materials are increasingly popular with consumers. They allow the house to "breathe." Therefore, wooden floors remain the most popular flooring for residential premises. Do it yourself anyway. But without the availability of relevant experience, advice or recommendations of professionals can not do.
Content
Choosing wood for wooden floors

The first step in laying a wood floor is the choice of wood. In this case, it is necessary to take into account the financial capabilities of the family, the climatic conditions of residence, the degree of expected loads on the floor, the type of room where the floors will be laid.
For small residential buildings, it is recommended to choose coniferous wood: spruce, larch, pine, fir or cedar. Boards made of these wood species are notable for their low cost, special strength and wear resistance. From wood of the middle price segment, oak is universal. Aspen and alder are also widely used in the device of floors, especially they are suitable for bedrooms and children's rooms.
What should be remembered when choosing wood?
- The wood must certainly be dry. A wet board will subsequently lose shape. Overdried wood is also able to deform.
- Carefully inspect the boards for visible defects: cracks, tar spots, splits. Wood with such defects should not be bought, even if you are offered a discount on it.
- Buy a board with a margin: it is better to take 15% more.
- Choose a board with a length of at least 2 m.
- Make sure all boards are from the same batch. Then you will be sure that the processing of the material was carried out in the same conditions. So, both the pattern and the color scheme of the boards will approximately coincide.
- To make the flooring of wooden floors, it is better to use grooved and edged wood, which does not need additional grinding.
Types of wooden floors
For laying wooden floors use:
- solid wood board;
- a parquet board made of solid wood, which has grooves on all sides (and not two, like a standard board). The length of such a product is 0.5-2 m, the recommended thickness is 18 - 25 mm;

- glued parquet board, which does not differ in size and appearance from a solid parquet board made of solid wood. However, it retains the same performance. It consists of at least three layers glued under high pressure. Valuable wood species are used to make the top layer. Its thickness is 4-5 mm. Two other layers are made from less expensive breeds. Therefore, the cost of glued boards is relatively small;

- parquet (planks of small size with dowels and grooves on all sides).

If your apartment has a cold floor, then often an ordinary wooden coating is not enough to provide comfort and there is a need for additional insulation. About how to better insulate the floors in the apartment and choose the material for this, you will learn from the article:https://floor.expertexpro.com/en/ustroistvo-rmnt/kak-uteplit-poly-v-kvartire.html.
Technology for laying wooden floors
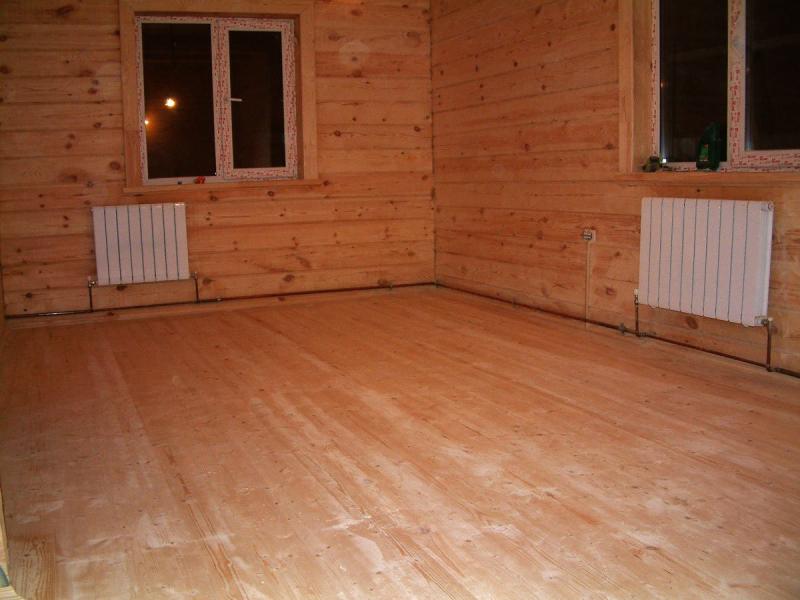
Modern society is already tired of plastic and other polymeric materials. Increasing preference is now given to traditional wood. Although it is not as practical, strong and durable as many modern materials, it is the most acceptable option for human health. The flooring in wooden houses is made of parquet staves, panel parquet or plank flooring.
Features of the design of flooring in houses made of timber imply two-layer. First, the preparatory layer is laid - the base. The next stage is wood flooring.
Flooring in a wooden house can be done in two ways. The first method involves laying on the ground with the use of lags, the second - on the floor beams.
Any of the methods has advantages and disadvantages. The choice of method of laying the flooring depends on the preferences of the owner and the design of the building itself.
Wood processing
Before starting work, boards for flooring, logs and laying should be treated with flame retardant (a substance to increase refractoriness), as well as bio-impregnation to protect against fungus and putrefactive bacteria.
Waterproofing
On the basis of the future floor, waterproofing is mandatory. It can be dense polyethylene or penofol. The second option is preferable, since penofol provides hydro- and noise insulation, and also serves as a kind of shield from electromagnetic radiation.
Subfloor equipment for wooden floor
Lag base

The most common method is laying the wood flooring on the logs. Among the advantages - the ability of such a design to hide floor level differences, the ability to conduct under the base of communication. For this purpose, it is rational to use a wooden beam (50x100 mm). It should be noted that the arrangement of such a foundation requires an additional space of 7-9 cm, therefore this option is not suitable for low rooms.
Before laying the logs, you need to bring it into the room and leave it there for several days. When laying, they are placed at such a distance that subsequently exclude the deflection of the boards.
Marking and laying lag
First, lay out two logs at the same level at opposite walls. Between them kapron threads are pulled every 1.5 meters. The remaining lags are installed, focusing on the threads. The voids between the lags must be filled with insulation or fiberboard in two or three layers.
The distance for the arrangement of logs intended for laying boards with a thickness of 30-40 cm is 80 cm. If the boards are thinner (for example, up to 30 cm), then it is 50-60 cm. For boards that are thicker than 40 cm, they can be placed on distance to 1 m.
Lag setting
The height of the lag must be adjusted using wooden wedges made of thin plywood. Logs and wedges are attached to the wooden base with long nails or wood screws. To install the log on a concrete base, an anchor or dowel is used. After fixing the lag, fiberboard boards are laid.
Features of decking on logs
The dimensions of the boards are selected so that each of the joints is at right angles to the edge of the board, in the center of the log. The first row of boards on the logs should be laid along a stretched line, retreating from the wall by one and a half centimeters. Boards are attached to each lag. It is necessary to pre-drill a hole with a thin drill for self-tapping screws.
The gaps between the wall and the floor can easily be masked with a skirting board. For greater reliability, it is sometimes advised to use staples: boards are joined first with brackets, and then with nails.So the surface of the flooring will look neater.
One of the drawbacks of multi-storey buildings is the noise, which is everywhere. The most effective way to increase comfort is to insulate the floor. About how to choose materials and make noise insulation, you can read here: https://floor.expertexpro.com/en/ustroistvo-rmnt/shumoizolyaciya-pola-v-kvartire-svoimi-rukami.html.
Plywood base
Plywood base is an excellent option for performing rough floors in a living room. During operation, plywood is almost not deformed. Therefore, this type of framework is quite reliable and durable. Flooring plywood on a wooden floor will also be appropriate if the old plank floor is loose or cracked. If necessary, it is not difficult to dismantle a floor covering made on a plywood basis.
Plywood base does not require additional work. The new coating is laid directly on its surface. It is not recommended to use plywood as a basis in rooms where frequent temperature changes and high humidity (in the bathroom or unheated rooms) are possible.
Before proceeding with the leveling of the floor, sheets of plywood are placed on the floor and a diagram is drawn with chalk, as they will be laid. Given this scheme, lags will be laid. Leveling the floor usually begins with the installation of beacons throughout the room. To do this, the surface is divided into squares with a side of 20-30 cm, in the corners of which screws are screwed.

They are exhibited using a level and a screwdriver. Then lay logs on which plywood will be laid. The thicker the plywood to be laid, the more there may be gaps between the bars. On average, this is 40 cm. Sometimes crossbars are installed between the lags, the distance between them should be no more than 50 cm.

If the logs suddenly sag, it is necessary to put pieces of plywood, greased with parquet glue. The lags themselves attach to the base in different ways. It can be anchors, self-tapping screws, corners, plywood pads lined with glue. When using anchors, their hats are recessed in wood by 2-3 mm. The whole structure is additionally glued with glue, otherwise the floor will crack.
From above, to protect against condensation, the lags can be covered with a roll-up glass, and only then lay plywood. In this case, it is necessary to ensure that the edges of the plywood sheets lie on the lags, and between the sheets themselves a small gap of 1-2 mm remains. This is necessary in case the plywood deforms under mechanical action. Plywood is laid after the glue dries.
Plywood is fastened with screws. For fixing one sheet, you will need 8-9 screws. To avoid bumps at the joints, these places need to be sanded.
Concrete base
If the concrete floor is perfectly flat (screed has already been completed), then the wooden layer is laid directly on the concrete base. But direct contact of the board and concrete must be avoided. This will help soil mastic or foamed polyethylene. In the second case, the material is laid with an overlap, it will serve as a good waterproofing.
Laying a wooden floor: recommendations
How professionals spend wooden flooring - a video will tell novice builders.
In order to lay wooden floors with your own hands and avoid mistakes, follow this sequence:
- First, the polished boards are placed on the bars for marking. The flooring is made so that the age-old rings of wood look in opposite directions.
- After trying on the boards, you need to number them, in order to comply with the order during the final installation. This will help to avoid additional grinding and the need to constantly adjust the dimensions of the material.
- Laying starts from the wall, leaving a gap for ventilation. Subsequently, this gap will be closed by the baseboard. It is better to hammer nails into the board at an angle, driving a hat deeper.
- After laying the first board at a width of 4-6 cm from the edge, the brackets are driven into the bars, leaving a small gap. A safety rail of small thickness is placed in the gap thus obtained. Then a wedge is driven between the bracket and the rail (a little more than the gap). When wedging in a wedge, the edges of the boards will be closely pressed together, which will help to avoid gaps.
- Next, the boards are nailed. Now the brackets can be removed. Again they lay a couple of boards, press with the help of a rail and a wedge, nail them to a bar. Wood is fastened using a punch and nails. Each of the following boards is sealed with a mallet, and then fastened with nails. Density of laying boards is difficult if the tongues are machined incorrectly.
- Sometimes, at the very wall, the ends of the boards are filed so that the bottom is slightly shorter than the top. There are often problems with installing the last board. It is possible to facilitate the installation of the last board by leveling the upper part of the tongue with a planer. Then the board is glued, and after that they are nailed with nails with a secret hat closer to the edge. Do not worry about the appearance: the nails will hide under the baseboard.
- After completion of the flooring, the joints are polished. To eliminate irregularities and differences even during installation at the joints, you can put a little cardboard, roofing felts or roofing felt under the bars. It is better not to stack wood chips.
- The previously formed gaps between the wall and the wooden flooring are masked with skirting boards with grooves or bevels, a fillet.
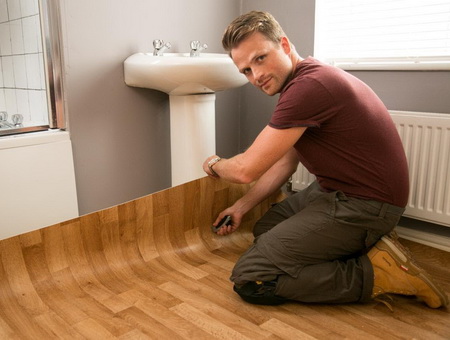
- After these works, it will be possible to carry out and laminate flooring on a wooden floor, and parquet, and parquet boards.
Toning will help to “repaint” your floor from relatively inexpensive wood species and give it noble shades. We will tell you about special tinting compounds - stains, with which wood can be given any color, in the material:https://floor.expertexpro.com/en/ustroistvo-rmnt/morilka-svoimi-rukami.html.
Surface treatment
It is known that due to the influence of natural factors (humidity, the action of microorganisms, various mechanical damage, the consequences of improper use), a coating that shines with freshness and purity begins to deteriorate, becomes unusable, losing its decorative and functional properties. To prolong the durability of wood and improve the quality of the coating, proper care is necessary.

If you want to leave wooden floor without any coverage, the final step will be to process it:
- grinding;
- soda leaching (ointment soap treatment);
- primer with a mixture of drying oil and vegetable oil;
- painting or varnishing.
During the application of impregnation, varnish or paint, move parallel to the wood fibers. So traces from the passage of the brush or roller will be less noticeable.
Fans of natural shades will certainly be interested in such an old way of processing as fumigation of wood with smoke. Depending on the type of wood and the quality of the wood, various specific shades are obtained.
In custody
When choosing material for flooring, many are guided by aesthetic considerations, their own concepts of comfort, value for money. Therefore, today, when many new materials appeared on sale, all who can afford it choose wooden floors.