
Art Vinyl flooring review: an attempt to combine design and practicality
New flooring, appearing on the construction market with enviable regularity, does not cease to amaze consumers. Meet me! Art Vinyl - PVC tile with unusual properties enters the global arena of floor innovations. The inventor of this innovation was the company Tarkett (Russia), which is famous for its creative approach and the pursuit of new opportunities. Art Vinyl flooring is just that, because it combines the advantages of laminate, linoleum and ceramic tiles.
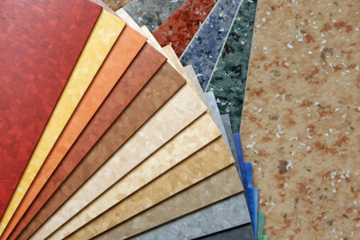
In its invention, Tarkett relied on a design that can satisfy the tastes of any consumer. Art Vinyl coating is an excellent “chameleon”, which is able to convey the colors and textures of any other flooring: wood, natural stone, ceramic, plastic.

All this variety comes in two forms: in the form of rectangular planks and square tiles. Laying technology allows you to combine these two modular forms in one coating as you wish, creating unique combinations. At the same time, in order to achieve an original effect, you may not have a designer flair, but rather use existing, standard styling options. They exist not so little already - as many as 10 pieces! All of them are described in the instructions that accompany each pack of Art Vinyl products. It will be easy to deal with the schemes, as well, and lay the Artvinil floor cover on your own.
Content
Substrate preparation for flooring
Planks and tiles Art Vinyl is a plastic and fairly thin coating, the thickness of which does not exceed 3 mm. Accordingly, when laying it on an uneven surface, you will be disappointed: all the flaws will clearly appear on the vinyl coating and will become clearly visible. Therefore, the manufacturer warns not in vain: Art Vinyl needs to be laid only on a perfectly even, specially prepared base.
It is strictly forbidden to lay Art Vinyl tiles (planks) on linoleum, wooden floor, plywood, chipboard or fiberboard. All these surfaces are more or less subject to deformations from moisture or mechanical stress, therefore, the PVC coating will not stick to them.
The best foundation is strong concrete floors leveled with screed. Moreover, this screed should be perfectly smooth, which means that ordinary cement mortar will not work for these purposes. Take advantage of modern bulk (self-leveling) mixtures. They can be cement, gypsum or polymer. The last option is the most worthy. Polymeric bulk floors allow you to create the thinnest layer even and smooth, like glass, surface.
If you decide to use a used screed as a base, then this is also quite realistic. The main thing is to completely clean it of the remnants of paints, putties, pollution. All detected defects, even small cracks and sinks, need to be cleaned and puttyed. Bulges - sanded flush with the main surface. It is advisable, for complete confidence in the quality result, to putty the entire floor with finishing putty, and then, after drying, polish it. The same action should be carried out for fresh screeds, specially dipped for Art Vinyl.
At the last stage of the preparatory work, it is necessary to remove dust and apply a primer to the base. Sweep away all the dust with a broom, and then use a vacuum cleaner. Ventilate the room so that dust particles do not soar in the air. For priming polymer screeds, give preference to two-component polyurethane impregnations, and for concrete floors - water-soluble. The soil will provide a stronger adhesion of the adhesive to the screed and additionally fasten the upper layer of the base. Accordingly, it will increase the durability of the vinyl coating.
Laying Art Vinyl can only begin after the base has dried to 5% humidity, otherwise the coating will become wrinkled and peel off. Direct laying is a very simple process and even a layman will cope with it in a matter of hours. Judge for yourself: floor with an area of 40 m2 can find a new, “vinyl” life in just 1.5 hours
Features of surface marking
Laying any modular coatings needs high-quality floor marking. First of all, axial lines are drawn on the floor, at the intersection of which is the center of the room. To do this, the middle is marked on one wall with a tape measure and a guide is drawn from it to the other wall. Then there is a center on this axis and at an angle of 90 ° a line is drawn perpendicular to the other two opposite walls. Thus, the room is divided into 4 parts. Fixation of vinyl modules will begin from the center center line, according to the selected laying pattern. In the event that the figure provides a diagonal layout, bisectors are drawn between the axial perpendicular lines, which must also intersect each other at an angle of 90 °.

Drawing "acrylic coupling" and laying of elements
Acrylic adhesive is used as a fixing composition for PVC coatings. It is applied using a notched trowel, arcing evenly distributed over a small surface area. In order for the glue to acquire the desired properties, it is usually dried within 8-10 minutes, and only after that they start laying the tiles. Acrylic adhesive retains its working condition for about an hour, after which it is no longer able to hold anything. If this time has expired, and you did not have time to lay the Art Vinyl flooring, the unused glue must be completely removed from the base, and put in its place fresh.

Unfolding Art Vinyl modules is necessary from the center of the room, gradually moving to the periphery, taking into account the selected pattern. On the back of the tiles, the arrows indicate the laying directions - they must be followed when building the correct floor pattern. Laying is carried out in a direction away from yourself, moving along the already finished coating.

Each coating element is laid on a base smeared with glue and pressed tightly to it, ironing the tile from the center to the edges. Tiles are placed without gaps and seams, that is, close to each other, so that even a minimal displacement is impossible. After 10-15 minutes, it is advisable to smooth the edges of the already glued modules again in order to finally fix them and prevent the edges from sticking.
Laying a modular base is not possible without trimming elements. This also applies to PVC tiles Art Vinyl. If cropping is necessary, fix the module on the base face up, mark the place of the cut and use a trapezoidal knife to make an incision. Then bend the material along the line and finally cut it.

At the end of the installation, immediately remove any glue that might remain on the surface. This is easiest to do with a cloth dipped in alcohol.

Finishing cleaning will only have to start after the glue holding Art Vinyl is completely dry. Usually this is about three days, after which it is necessary to carry out wet cleaning using any detergent to care for PVC coatings. You can use the same tool regularly - for daily wet cleaning.
4 comments