
How to nail a skirting board: the nuances of working with wooden and plastic planks
Skirting performs two important functions in the arrangement of space. This structural element hides the technological seam laid around the perimeter of the room, and participates in the formation of the interior picture as a finishing touch to the finish. If the baseboard is equipped with a technological recess for cable placement, it also masks the laying of communications. If the contractor does not know how to nail the baseboard, none of the duties assigned to this part will be performed with dignity. In the worst case, the consequences of illiterate intervention will have to be addressed.
Question: nail the baseboard to the floor or to the wall?
Answer: to the surface to which it is easier to nail. If there are wooden floorboards or parquet on the floor, and the walls are concrete slabs, it will definitely not be as difficult to drive nails or self-tapping screws into the wood as bothering with drilling holes in concrete for installing plastic dowels or wooden corks. And vice versa: if the floor is covered with cement screed, and the walls are made of timber, attaching the baseboard to the wood will be much easier.

Important. To partitions made of gypsum plasterboard, to walls lined with lime or gypsum plaster, to surfaces lined with soft stone, the baseboard can be carefully beaten only with yellow finishing nails with miniature hats. Dowels, self-tapping screws and standard nails will not hold in them.
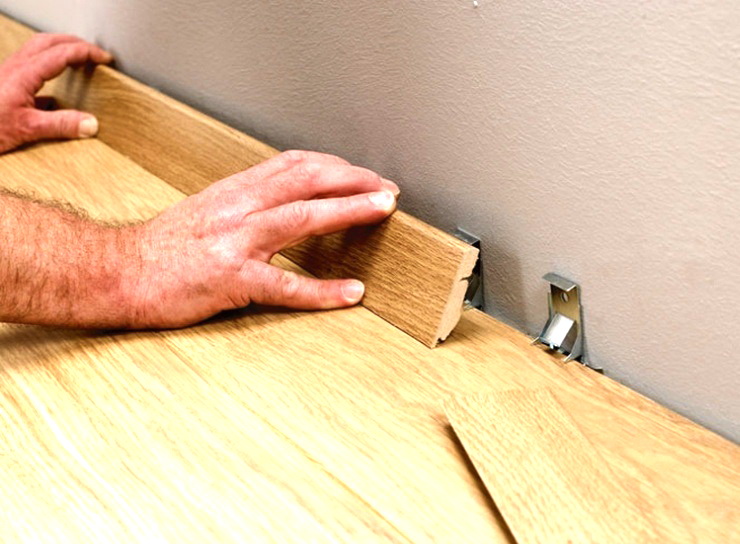
You can, of course, attach the baseboard, “planting” it on liquid nails, but this option is applicable if you do not intend to alter the interior, since subsequent dismantling will be unnecessarily complicated. There is another way - fastening to special clips, but without experience you should not take it: both the clips will be damaged, and the plinth planks will not adjoin the wall.
Plastic or wood?
With the advent of progressive finishing materials, many owners abandon the usual products from pine, fir, oak, spruce, beech, larch, etc. However, the parquet floor and the surface laid out by the parquet board are in better harmony with the noble plinth of GOST 8242-75. It is still actively used, despite the presence of defects acceptable by the standards.

Bulk polymer floors, carpet, laminated coatings, linoleum are perfectly combined with a plastic skirting board that imitates expensive solid material. Plastic strips are usually equipped with corners, plugs and fasteners to facilitate installation. The technological advantage of the synthetic profile is that there is no need to file joints and adjust parts. Therefore, if there is no desire to tinker with installation, it is better to choose a progressive option and feel free to take tools in hand.

How to nail a plastic baseboard
To a wooden floor or to a wall, a profile made of plastic is simply nailed with nails or self-tapping screws, which are deepened through a longitudinal groove of the baseboard into one of the structures.
Note. If it is supposed to hide a cable in a special recess in the baseboard, the wire is laid in the space provided for it during installation. The cable should be located below the fasteners hammered into the wall.

To fix the plastic baseboard to the concrete base, perform the following operations:
- stack the profile strips, choosing one of the corners of the room as the starting point, continue in the direction of the standard clockwise movement;
- mark the points of the future fixture on the baseboard (the step depends on the presence of unevenness of the floor or wall and on the power of the baseboard);
- Drill holes at the marked points, the size of the drill for forming holes should be less than the diameter of the screws;
- plastic dowels are inserted into the holes obtained, having previously slightly shifted the baseboard;
- return the slats in place;
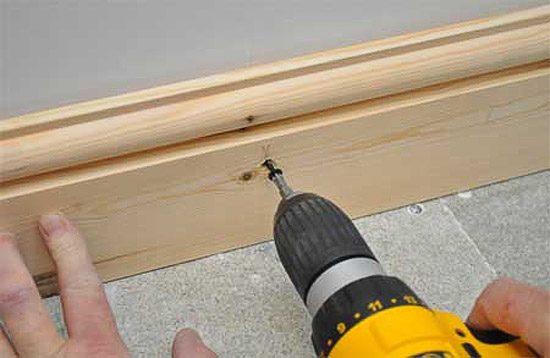
- Screws are screwed into the dowels through the hole;
- the ends of the plastic profile and the outlet of the fastener are closed with special plugs.
Tip. To obtain holes of equal depth on the drill, it is recommended to make a mark.

At the first stages of installation, the fasteners are not thoroughly tightened, only the “screws” are screwed. Finishing tightening is done after the baseboard is laid along the entire perimeter. There is an important caveat: do not be too zealous in tightening the fasteners. Plastic may crack or warp.
We nail a plinth of wood
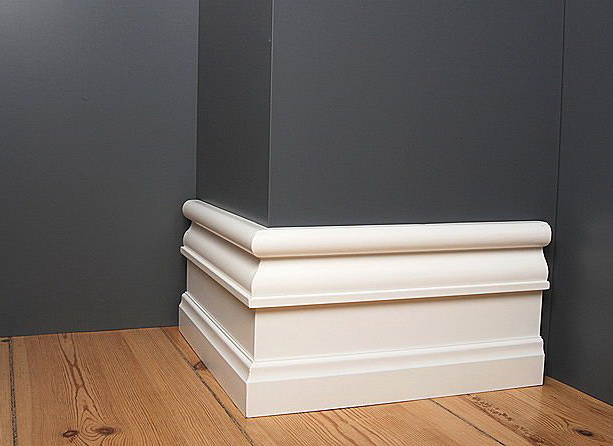
Before installing a wooden baseboard, you need to make careful measurements and, using the same ruler or tape measure, set aside the distances on the molded material to saw off the elements. To form butt joints, sawing is done at an exact angle of 45º.
Note. An unsuccessfully sawn corner can be carefully masked with sealant and then coated with a tone.
Planks are attached to wooden structures in the traditional manner. Nailed to the floor, the profile should be firmly pressed against the wall, the baseboard attached to the wall should not “hang” above the floor plane. The step of the fastener depends on the curvature of the walls.

Tip. To finish hammering ordinary nails into a wooden baseboard, it is advisable to use a chisel. It is necessary in order not to spoil the wood with an accidental blow.
Fixing the baseboard to the concrete base
- Nails are driven into the bar prepared for installation, the tips of which should come out from the back of the baseboard by a couple of tenths of a millimeter.
- The profile is installed at the planned location in order to use the nails to mark the location of the wooden corks. To do this, lightly hit with a hammer on each hat.
- Marked points are marked with a pencil, then in these places drill holes with a drill.
- Corks of wood are inserted into the holes, into which nails are hammered without problems.
If dowels are used instead of wooden corks, the whole process is similar to the method of fixing a plastic baseboard with screws. First, holes are drilled in the baseboard, then points are marked through them. After drilling with concrete, holes are made for dowels, plastic devices are inserted into them, strips are applied and fastened.
Important. Holes for plugs or for dowels need to be drilled before wallpapering.
Video with a good example of work
Still, you need to thoroughly prepare for the not too complicated work on installing the baseboard. Do not take on the implementation without having thought through the process and not having foreseen all possible difficulties. It will be a shame if, as a result of ill-considered actions, you have to buy the material again and eliminate the errors.
4 comments