
3D self-leveling 3D self-leveling floors in 6 steps: a review of technology
Just twenty years ago, the only way to make floor decor unusual is to use the “chintz” method. In this case, the fabric was simply laid on the floor and varnished - it turned out beautifully and unusual. Over time, such stylish floor coverings as linoleum and laminate completely replaced the “valuable ideas of the co-workers”, and they forgot about the possibility of creating something exclusive for a long time. But modern manufacturers took the idea into circulation, but only with their proven building materials and other work techniques.
And today 3D floors are a wonderful revival of ordinary interiors, a harmonious combination of new technologies and home comfort. Dreaming of such? You can realize this idea thanks to our portal!
Content
Three-dimensional illusions: from the streets - to luxury homes
So where did such an amazing idea come from? Well, let's start from the beginning. Many centuries ago, one noble count decided to make fun of his guests, and asked a friend of the artist to depict non-existent doors, windows and furniture on the walls. The idea was a success - the guests got confused and tried to push the nonexistent curtains. And all because everything was drawn very believably - this is how the new style in the interior design “mannerism” was born.
After several centuries, the city artists created the baton to create optical illusions with the help of art - they painted the walls of buildings, streets, objects in a similar style, as if "removing" the wall. And once a new style was born - Madonnari, or Street Painting. These are drawings on asphalt, which are made with such an idea that from a certain distance the image seemed three-dimensional, real. But from other angles, something stretched and absurd was visible. Interesting, isn't it?
And it has been a long time before the breathtaking Madonnari style appeared in public buildings, then in residential buildings, and today manufacturers of bulk floors have taken up the lucrative idea. They hide the secrets of technology quite carefully, but everything will ever become clear, and it was our portal that was the first to really put everything on the shelves for you.

This art has always struck the imagination with the realism of the idea - the very sharks that “burst” through the asphalt made it possible to take stunning photos. Today, toothy predators are already waiting for guests and their owners in bathrooms, corridors, a mini-pool - to cause the same “wow effect” that modern interior designers like to create.
It's all about the picture!
Why do not everyone order such a work of art, if nothing is better for an ordinary apartment to come up with? It is only a matter of price. So, a 3D coating from the company will cost you at least 5 times more expensive than laying tiles and 10 - laminate. Yes, floor filling - A really complicated process, but the price here is so high just because of ... the picture.
You will be very surprised to find out that most of the price for 3D floors comes from the production of the image itself! Yes, it’s true - many of those who have fired up with such an idea turn over thousands of sites on the Internet, but can’t find a detailed description of the technology itself. So to take it - and you're done. How to make the base layer, how to prepare the base and what varnish you need to fill in is not difficult to figure out, but how to make the dolphin in the bathroom really look like it is alive - this is the secret. But let's say this: you are really lucky that you got to this site!
So, let's take a look at what 3D really is. In simple terms, 3D is the picture that our eye sees and perceives as three-dimensional. As an example, any 3D program on your monitor is just a two-dimensional image that creates an illusion. This is the main task of the designer who makes the layout for 3D floors - is to create the illusion of volume, which already has its own functions of modern aesthetics. Look at such a selection of 3D flooring photos - isn't that awesome? Isn't it worth building something at home to shock guests and cheer yourself up in the morning? Can furniture or wall decor cause such a “wow effect”?

So, there are three methods to make 3D from ordinary floors: these are photorealistic images, small objects embedded in the floor like shells or coins, or an optical illusion. In all three cases, you will perceive the flooring to be voluminous. Let's take a closer look at how such ideas are implemented.
3D floor: technology from A to Z
So, 3D floor - step by step!
Stage I. We select a picture
So, for starters, select the 3D image that you want to fill in the floor of your house. Yes, at first it will be the most ordinary photograph or painting that you will make illusory-voluminous. Have you chosen? And now you need photoshop. Look at our step-by-step photos on how exactly such illusions are created, and follow the step-by-step instructions provided. Pictures on 3D should have a high resolution of at least 300 dpi. And there are enough of these on a variety of Internet photo banks - choose!
So, the most effects are 3D drawings with the effect of depth: it is water, abyss, descent. Especially the maritime theme, where, thanks to a special technique of airbrushing, really impressive realism of such images is achieved.
But here we highly recommend that you do not use 3D pictures for the floor:
- All images where the dynamics are felt. That is, the illusion of movement. For example, something falls, or the wave covers.
- Aggressive, predatory and evil. True, sharks do not apply here - if in life you have not had to deal with them and they are associated exclusively with command and adventure horror movies. After all, this is really funny when, by the pool in the bathhouse, a guest unexpectedly notices an absolutely natural toothy fish. But monsters, what really scares you, do not use it better - this will not be reflected in the subconscious in the best way.
- Too bright, bulky, with an abundance of red elements. For the reason that it is a strong irritant for the psyche. In such a room it will be difficult for you to concentrate, unmotivated aggression will arise and you will fall asleep badly.
- Small items enlarged to awkward shapes. The huge tangerine in the kitchen, thanks to an optical illusion comparable in size to a table, is not only tasteless, but also quickly tired. On the very first evening.

Stage II. We change the perspective
Step by Step Process:
- Step 1. So, the picture is selected, get to work. First of all, take a picture of the room where the 3D floor will be made - naturally, from the “right” angle. But remember that many cameras seem to distort the perspective a little - try to choose the distance so that the photo was exactly what you see from the threshold with your own eyes.
- Step 2. Now, in Photoshop or a similar graphics program, overlay your favorite picture on the floor photo - exactly the way you want to place it in reality. So you have already created that 3D illusion for which construction companies take such fabulous money! Now fix these two images into one - now you should see the image of your room with a real 3D volumetric floor.
- Step 3. Now crop everything except the floor with the picture. You will get a trapeze, as it were: expanded (at the front), narrowed at the top (behind) - because this is how we see the room according to all laws of perception.
- Step 4Use the Perspective tool to correct the trapezoid into a perfectly even rectangle. If you can’t cope with such a function, simply stretch its narrow part in a regular editor.
- Step 5. Now you see how it will be necessary to print the image for the floor. Another option: upload the image to Photoshop, click the Vanishing Point filter and Create plane tool, which is responsible for fixing the perspective. Drag the center markers with the cursor as you need. Export image. Save the file with the extension * png.
This is how it looks:

That's exactly what Madonnari painters draw on asphalt. They print out a distorted picture, divide it with a pencil into squares, and then divide the asphalt with chalk. Further, it is a matter of technology: each of the squares is neatly sketched according to the original.
Look carefully at the process itself:

If you are experiencing difficulties, or even do not know how to use graphic editors, contact any familiar designer, or find one on freelance portals. Yes, this is also waste, but in the end you will still spend on the manufacture of such a floor at least 4-7 times less money than when contacting a specialized construction company.
Stage III. We print the image on banner fabric
So, as soon as the desired file is already on your flash drive, contact any outdoor printing agency. Why exactly there? Firstly, they have experience with similar graphics, and secondly, you will need material for filling the floor, which will not lose its properties and color when in contact with varnish or a transparent polymer. And this is a banner canvas, which is designed for rain with its impurities, and for snow. By the way, such a banner is not expensive at all - about $ 20 per m2. And companies today most often such images really print on vinyl self-adhesive film and on ordinary banner fabric.
Tip: just first, be sure to print the same image for a small fee, but on plain paper and black and white - to put it on the floor and evaluate whether the distortion angle is correct, the dolphin really seems voluminous and alive. If necessary, adjust the perspective. And only after that - pay already a real banner-canvas in color.
The companies involved in the production of such floors themselves print their images on a two-layer polymer fabric, and fill it with a transparent polymer layer. Note that you will not find exclusivity in such companies: although their catalog contains many images, they are not willing to work with new ones. After all, as you already understood, calculating the desired angle of distortion is a little difficult, although everyone can do it.

Pay attention also to this point: printing on a banner or paper that you order should be done with non-fading paints. After all, the sun will constantly shine on your floor, plus, when using polymer solutions, they heat up a little due to mixing.
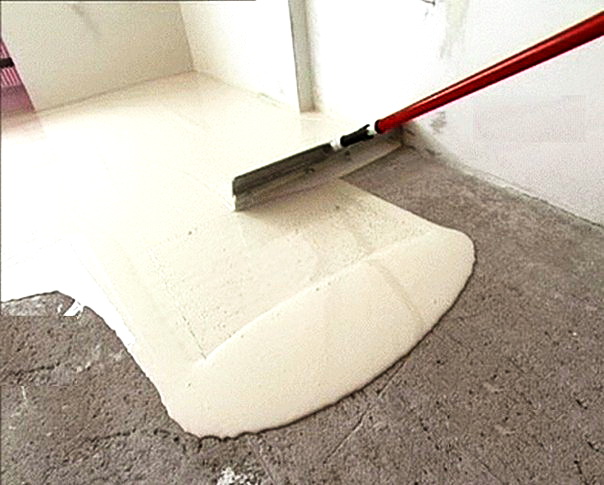
Stage IV. Preparing the foundation
So the foundation. On our site there are already many articles on how to fill the polymer floor. And here is the same polymer floor, but with a picture and a transparent finish layer:

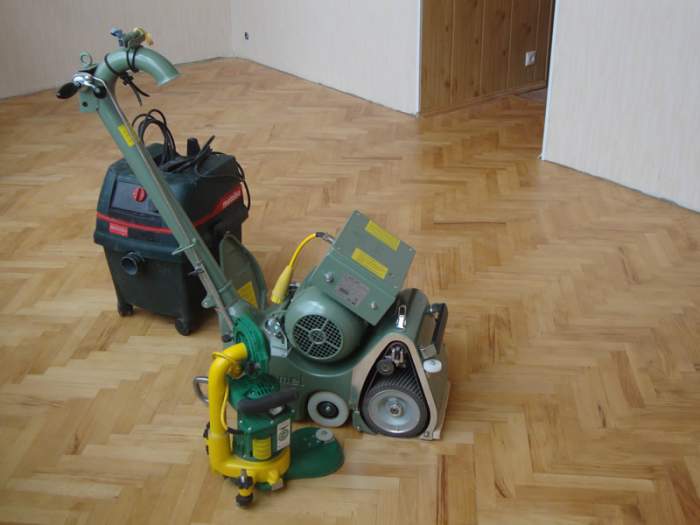
The most important thing that you should not miss in any way is no stains on an old concrete base from engine oil, grease, detergent or bitumen. And it’s actually possible to remove oil stains to their entire depth - it is for this purpose that there are methods such as milling, grinding or cutting.
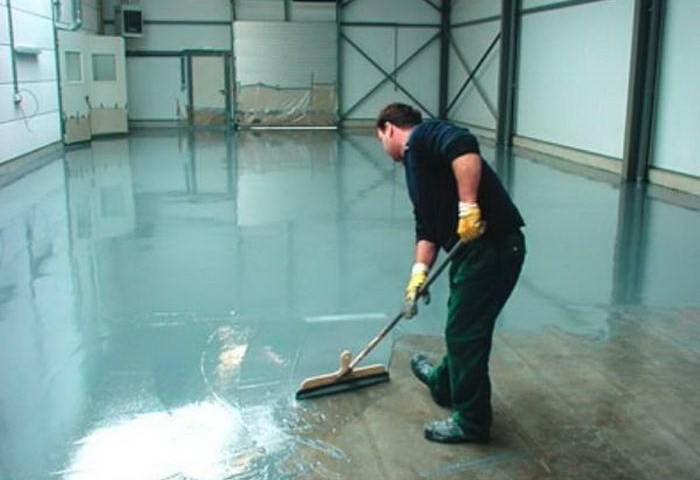
Stage V. Glue the picture
A photo fabric or special paper with a pattern is glued to the base polymer layer, after which it is poured with the so-called super-transparent plastic lens and a final wear-resistant layer. A special volumetric effect can be achieved with the help of special super-transparent lenses - you can order them at an advertising agency.
Stage VI. Finish layer
So what basis to fill in your drawing? We recommend the most suitable PUR Aqua Top polyurethane varnish (M or SG) for this, which is the most abrasion resistant of all known, and therefore your 3D will never fade. Pay attention to the letter in the name: M is a matte layer, SG is a silky-glossy layer. Another option: fill not with varnish, but with “CFS Eneklad”, one layer under the image, the second on top after three hours. This coating will dry after 4 hours. Choose what suits you best and what fits into your planned budget.
As for the transparent layer on top of the 3D image, give preference to imported brands - such floors are much more difficult to scratch, and they delight with their appearance much longer.

Optical illusions: a step to the left - is there no effect?
So, a 3D floor is a flat picture under a transparent base, which at a certain angle seems voluminous. And here there is a certain subtlety, pay attention: on the street to create something like this is much easier - you still come to take a picture with a toothy shark to the distance you need to make it seem real. Therefore, the artist is freer in terms of distortion of the original image and scaling. But at home, you and your guests will always see the picture only from a certain point and at a certain angle. For example, on the doorstep or from a sofa angle. Many people just don’t like this in modern 3D floors: they say, step aside a little, and everything will be distorted and ugly ...

In fact, professional interior designers, like landscape designers, are well aware that there are just two or three important focus points on a certain space, and it happens that one. You do not look at the room for the first time, standing at the window or in the corner, but only from traditional points - most often at the doorstep. And as you move, you certainly do not first get acquainted with the image of the floor - but switch to wall accessories or other people. The 3D floor decor is just designed for this.
In addition, they get used to the interior, and literally on the third day you will not care from what angle you need to look so that the lily on the floor is stretched as much as possible. The floor will simply be bright and beautiful, although it will once remind you of Picasso’s painting from the “wrong angle” if you suddenly decide to take a closer look. And the 3D drawing itself is more designed for guests and friends, their “wow effect” and admiration, and for the first time they will see it right from the doorway.
In perspective
Modern manufacturers working with 3D floors are very interested in the stereo stereo technique at the moment: when several pictures of one volumetric object are taken from all sides, and the images are applied to microprism ribbons that give their image at different angles. This is something like the very Soviet calendars with the illusion of movement, called "vario".
This is how it is possible to make the 3D floor look equally impressive from different angles, and not just from one. But while there is one catch: any transparent top layer completely fills these ribbons. Although it is not surprising that in the next ten years this problem will be solved, and toothy sharks and huge chasms, equally impressive from all angles, will forever settle in our bathrooms.
6 comments