
Beacons for leveling the floor: analysis of all possible options for any screed
Any modern flooring suggests that it will be even. If the floor is covered with potholes, cracks, ledges, elevations will be striking, then on this basis not only the most beautiful and expensive coating will not look: unevenness will cause deformation and breakage of plates, erasing and tearing on linoleum and, as consequence, faster wear of materials. Therefore, the key stage in the installation process of floors is their alignment. Using beacons to level the floor and different types of screeds, they achieve that the floor is perfectly flat. It is the beacons that limit the screed along the height of its plane.
There are several ways to level the floors. The screed can be dry, semi-dry or wet (cement-sand or concrete), etc. Use the so-called self-pouring mixture. The dry mixture is diluted in water to obtain a solution of the desired consistency. Such a solution spreads itself, creating a smooth surface. And even in this case, with the help of lighthouses you can check whether everything is fine and whether the floor will be even. About how to put beacons on the floor and how to level the floor with beacons with different types of screeds, and we will go further.
Content
Zero Level Detection Technology
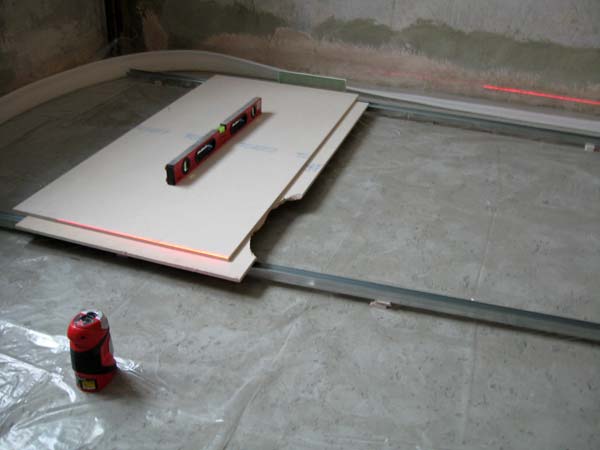
Before the floor is filled with beacons, you need to install them correctly. To do this, using a building or laser level, make marks on the walls around the perimeter of the room. The more often, the better. Then connect them with a solid line (AB).

To do this, you need a cord and a pencil. Given the height of the future screed, set a zero level - a line relative to the horizon. To do this, with the help of a rope, measure the same distance down along the entire perimeter, connect the marks and thus mark the highest floor level (CD). They are guided by this line, exhibiting beacons.

With different types of screeds, profile beacons are installed 20-30 cm from the walls. To do this, draw lines with chalk on the floor along which beacons will be installed.
The second method is to tighten the screws, set them at the required level and pull a thread between them, along which slides of mortar will be laid out to secure the beacons. The profile is laid on slides and “recessed” in the solution to the desired level so that it touches the stretched cord.
The distance between the beacons themselves should be 10-15 cm less than the rule you use. The rule must rest against the lighthouses and slide on them. Therefore, lighthouses are also called guides. Most often they are placed parallel to each other along the entire room.

With wet (semi-dry, cement-sand and concrete screeds) materials that are easily amenable to deformation are not used as gaskets: cardboard, plywood, fiberboard. With dry screeds, these materials can be safely used. Such bases are needed every 25-30 cm, otherwise then the profile can bend under the pressure of the rule.
Before proceeding with the leveling of the floor, it is necessary to beat off the horizontal level of the room, which can be guided in the process of work. Read more about how to do this in the article:https://floor.expertexpro.com/en/viravniv-stazhka/kak-otbit-uroven-pola.html.
Lighthouses for dry floor screed
Option 1 - “U-shaped profile”
As known, dry floor screed provides for the pouring and subsequent leveling of dry bulk material. Expanded clay is most often used for these purposes. What to choose beacons for floor screed using dry technology? They can have any form. When performing a dry screed, the beacons remain lying in a layer of expanded clay or other material. Therefore, the height of the beacons should correspond to the height of the future screed. With dry backfill, this is at least 3 cm. In this case, the profile is chosen strong so that it does not bend and thereby does not provoke an error when leveling the floor.
A thin profile can also be used. But then, in order to consolidate it, a whole preparatory process and a ton of additional building materials will be needed. Attaching the profile to the ceiling itself with self-tapping screws also does not work, so we will damage the waterproofing layer.

The distance between the edges is covered with expanded clay, and the profile itself, touching the gypsum boards only with the edge, does not violate the soundproofing properties of the floor. Such beacons are installed at a distance no greater than the length of the rule. Following the rule on the lighthouses, the excess material is removed, thereby leveling the dry layer.
Option 2 - “Ceiling profile for drywall”
This method of installing beacons with a dry coupler involves the use of more weighty profiles, for example, a ceiling profile for drywall (60X27 mm). Such beacons will already more resemble logs that are installed for a wooden floor. In addition, they are installed more often (on average - 7 pieces per 3 meters), which then allows you to settle GVL sheets for 2-3 profiles. This will provide additional strength.
Beacons for semi-dry, cement-sand and concrete floor screed
To align the screeds of cement and sand using several options for lighthouses.
Option 1 - “Profile on the basis of the solution”
The most common - drywall profile (27X28mm). It is installed upside down on coasters made of wooden blocks, bricks, mortar hills.
Fix the profile on the stands with plaster (alabaster) or cement-lime mortar. Cement-sand mortar is not recommended due to the fact that it dries for a long time, and will have to wait 2-3 days to continue work.

You can start further work only when everything is dry. Instead of profiles for these types of screeds, even ordinary pipes are used, which, after leveling, are removed and used for their intended purpose.
Option 2 - “Profile on self-tapping screws”
For this, dowels are driven into the surface of the base after 20-30 cm. Profiles for lighthouses are mounted on them using self-tapping screws. Since self-tapping screws are easily adjustable, it is not difficult to set the required level. To carry out screeding on the ground, you can hammer wooden blocks over the surface area, and screw screws into them.
These pegs should be approximately 1.5x1.5 cm, and 14-15 cm long. Screws (91 mm) are screwed into them, which are then set to level. First, they do this with extreme points, then with average points.

You can familiarize yourself with the general rules and tips for installing floor screed of any design in a special article on our website:https://floor.expertexpro.com/en/viravniv-stazhka/ustrojstvo-styazhki-pola.html.
Option 3 - “Combined”
On the semi-base, after 1 m, holes are drilled and the dowels are clogged. Then they are twisted and set at the level of self-tapping screws. In the center between the screws, a slide is laid out of the solution, it should be slightly higher than the level of the screws. Then, with the help of a reiki or the same rule, the solution is pressed to the desired height.
Option 4 - “Wooden bars”
This method can already be called "old." Instead of profiles, previously used wooden blocks with a wall thickness of 30 mm. Before using such beacons for a cement-sand screed, they are carefully soaked, otherwise they can adversely affect the cement screed.
Option 5 - “Lighthouses from the solution”
Install screws at a distance equal to the length of the beacon. Between the screws pull the wire in several rows. A cement-lime mortar is laid along the wire, forming something like a wall from it. Take a long rail and, moving it perpendicular to the stretched wire, while touching the screws, level the horizontal platform, which will serve in the future as a beacon. Before proceeding with further work, such lighthouses should be allowed to dry. But they have an advantage: they do not need to be dismantled.
Option 6 - “For semi-dry screed”
There is an option in which a semi-dry screed is carried out practically without beacons. To do this, in the corners of the room, already on the prepared surface, two heaps of the solution are poured and form platforms from it according to the required level. The distance between such sites should not be greater than the length of the rule. After such beacons have dried, the space between them is filled with a solution and aligned with the rule, focusing on them.

Option 7 - “For Floating Screed”
This is the name of a cement-sand screed laid on a layer of foam. This option allows you to additionally insulate the floor. With such a screed, it is more convenient to use self-tapping screws twisted into a half-base. Styrofoam is laid on top of them, they are pierced in the places where the screws are attached. After filling the screed, leveling the floor, drying it out, such beacons are twisted, and the holes are filled with solution.
This also applies to other types of beacons used with wet screeds. After the screed dries, they need to be dismantled, and the grooves wiped with a solution.
When installing a concrete floor in rooms, the finishing step is grouting the screed. You will learn about how and how to do this on our website:https://floor.expertexpro.com/en/viravniv-stazhka/chem-zatirayut-betonnyie-polyi.html.
Beacons for bulk floors
Option 1 - “Whip Beacons”

When installing bulk floors, beacons are not always used, because it is understood that the material itself will flow as it should. But experienced craftsmen do not rely on materials, but rely on their own experience, and therefore use pin beacons on tripods for bulk floors, the so-called benchmarks. In the center they have a rod that moves and along which they determine the level of the screed. Before you put the beacons on the floor, it must be primed. Only after 4-6 hours have passed, can you start pouring floors. Lighthouses are set at a distance of 1 meter from each other.
Option 2 - "Self-tapping screws"
Instead of benchmarks, you can use twisted in dupels and set the level of self-tapping screws.In order to make it more convenient to track the level of the bulk floor, pieces of punched tape are attached to the screws. After the required floor level is filled, without waiting for the mortar to solidify, the screws are twisted.

Beacon logs for a wooden floor
When installing wooden floors, both for leveling the floor and for fixing the board, logs are used. These are long bars that are set at the required height, taking into account the zero level. To do this, before laying them, screws are screwed on the entire surface of the floor (squares with a side of 30 cm should form). Self-tapping screws set in level. Oriented to them and lay the lags.

Putting beacons is a long process and requires special scrupulousness. After all, this is what subsequently affects the quality of the floor. Therefore, it is necessary to measure the level with installed beacons both in the longitudinal and in the perpendicular direction, both individually and relative to each other. If the level shows a flat surface, it means that you have achieved what you wanted and you can start the subsequent work.
2 comments