
Cement-sand floor screed: step-by-step briefing on the work
A cement-sand screed is indispensable for the construction of a strong and high-quality foundation for industrial facilities, and serves as one of the best options in private construction. Its trump cards are the porosity of the structure, which provides excellent sound and heat insulation, minimal shrinkage due to the limited amount of water and the availability of manufacturing materials. And how to make such a screed with your own hands and technologically correct, we will now tell.
It is cement-sand that is considered the most reliable and durable screed with base drops of no more than 3 cm. It is simple, affordable even for a beginner, and is inexpensive.
Cement-sand screed is mainly produced by semi-dry technology, but we will consider both options.
Content
Stage I. Calculation of the future screed
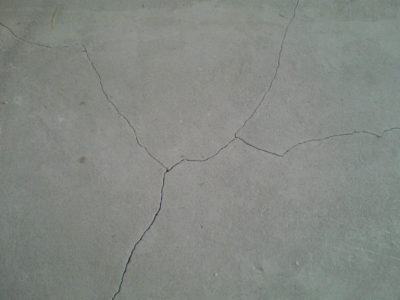
On compacted soil, its thickness should be at least 12 cm, and on an already old concrete base - from 7 cm. If you make a cement-sand screed thinner than 3 cm - it will soon crack and begin to peel off from the base. Its optimal layer is 5 cm.
But, if the surface of your floor has differences from 10 to 20 cm, and you are planning to make a cement-sand screed anyway, then use expanded clay as a leveling base. Mix it with a solution - get expanded clay concrete. The sound insulation of this floor will be wonderful.
But the main disadvantages of cement-sand screed, which must be taken into account when calculating screed:
- Long drying - about a month in the dry summer, and much longer if the work was carried out in the winter.
- A lot of dirt and dampness in the process.
- Serious increase in floor load.
- Screed thickness limit is only 5 to 7 cm.
- Ready mixes are often sold of poor quality, with obscure additives, often come across a fake.
And with all these disadvantages, the screed is still quite popular among builders. Therefore, if these problems are not problems, we proceed to the immediate process.
Stage II. Determine the curvature of an existing base
To help you will be a linear level, plumb or more modern devices, like optical or laser levels. There is only one goal: to determine the topography of the base, mark the zero mark, find the highest point of the floor and calculate future costs - how much will you need to buy to make such a floor screed.
The simplest floor measuring device is the level. They do not need special skills for use - this is a simple glass bulb with an air bubble, which they are guided by. The bulb is mounted in a wooden ruler, which we pick up.
Stage III. Floor screed preparation
Now put the beacons. These are special guides along which we will align the plane of the screed. Any even linear material is suitable - pipes with a diameter of 15-32 mm, mounting rectangular profiles or timber. The main thing is that the lighthouses do not bend while laying the screed - i.e. were tough enough.
But there are several ways to set beacons:
- Method number 1. We take the rack level and measure the horizontal along the length of each lighthouse and between them.And in order to set all the guides evenly, you will need to pull the network of threads at the height of the future screed. All this takes a lot of time and requires some skill.
- Method number 2. We use the most primitive laser level. First, we beat off the lines of the lighthouses, then we set them strictly parallel to each other and so that the first one is at a distance from the wall from 20 to 30 cm. Indent between the other lighthouses so that later it is convenient for you to rest the ends of the rule on two neighboring lighthouses. You will then level the solution with it. Usually it is 1.5 meters, and the rule for such work is better to take a two-meter.
Drill the screws on the broken lines. For each such lighthouse, three pieces will be enough: on the edges with an indent of 10 cm and in the middle. We set the laser level according to the highest broken line.
After the level is repulsed, fix it on the walls according to the marks of the screws. Pull the threads on them around the entire perimeter of the floor - these will be your beacons. And so that the threads do not sag, in the center of each of them make additional supports using the same screws or bars.

Stage IV. Preparation of cement-sand mortar
The cement-sand mixture can be obtained in three ways:
- Method 1 Order the finished solution in the mixer. Of the advantages of this method you will appreciate the quality and reasonable price. But the disadvantages will also be significant: for a sufficiently large floor area per day, the solution cannot be transferred from the mixer. And to order the same composition several times, in parts, is both difficult and expensive. The only option for spacious rooms is the concrete pump service, which is even more expensive.
- Method 2 Order the finished mixture in bags, and dilute it with water in place. But there are a lot of such bags.
- Method 3 Independently mix cement and sand right on the spot, according to the selected recipe. This is a time-consuming, but most rational budget option. Choose the method that suits your space and future finish.
Here is how the mechanized supply of cement-sand mixture occurs:

First, let's learn how to prepare a cement-sand mixture using wet technology. So, the recipe is quite simple: sand + cement in a ratio of 3: 1, and water to this mixture in a ratio of 50/50. Those. to prepare a cement-sand screed, take one part of cement and three building sand. And then - according to the instructions:
- Mix sand with cement with a trowel.
- Pour water into the container and carefully introduce the dry mixture.
- Knead the solution in a deep container with a volume of up to 30 liters, using a drill with a mixer nozzle.
- Add a plasticizer to the solution, if desired, to improve the ductility of the future screed.
- As soon as the consistency of the solution looks like thick sour cream, take a little mixture to check for a fist. It should neither spread nor disintegrate. Pour the solution directly onto the floor, and level it well. For an hour and a half, it must be fully used.
And now semi-dry. For the screed device, take cement grade M-400. About 7-8 bags will be spent on one room if you make a screed 4-5 cm thick.
Knead the solution directly on the floor, placing a sheet of metal in this area. This method is called "volcano", and it is on it that a semi-dry cement-sand mixture is made:
- Step 1. Pour a 50-pound bag of sand, on top of it - 1/3 bag of cement, and mix it all with a shovel. We are not adding water yet.
- Step 2. For all this, pour a second bag of sand and the same amount of cement as the first time. And so - the third time, and only then mix the whole mixture.
- Step 3. In the resulting hill, we form a “crater” with a shovel, and pour water into it. Mix well and proceed to laying the screed.


The right cement-sand mixture should have a gray color - and yellow or red shades indicate that there is too much sand in the solution. Of course, special plasticizers can also give their color.Such additives allow the solution to harden better and subsequently not crack.
Stage V. Preparatory work
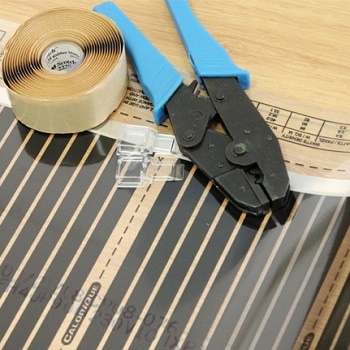
To separate the screed from the walls, a damper tape is attached. Calculating its amount is easy: this is just the perimeter of the room.
The process itself is simple. In a row you need to put lighthouse rails. Set the first beacon from the wall at a distance of several centimeters, and each subsequent one with a step of 50-100 cm. After installing the beacons, lay out the mixture and level it with the rule. After the mixture is so solid that it can be moved freely, remove the rails.
Lighthouses for the sand-cement mixture can be made independently. To do this, buy at a hardware store inexpensive stucco beacons of 10 mm and 30 kilograms of gypsum plaster for them. For each lighthouse we make four props of gypsum - and this will be enough so that nothing bends during operation by the rule. And the most durable grip of the lighthouses is from Rothband, if you knead it in small portions. Just put the solution in small flip flops next to the screws, between them, and a little higher. Then fasten the lighthouse, slowly lowering it, until it touches everyone. Check the resulting plane.
You will be surprised, but many masters of their craft manage to arrange such screeds without any lighthouses:


Stage VI. Screed
To lay a cement-sand screed, start from the corner that is the opposite of the exit. First put the solution in half a meter, and then pull it towards you as a rule - everything is easier than it seems at first glance.
Pour the prepared mixture from the corner of the room, and try to fill all the cracks as much as possible. Smooth the solution with the rule so that it moves along the guides as easily as on rails. Go from the far wall to yourself and pull the solution above the beacons. Stripes that are opposite the doorway, fill in last.
Now with a metal spatula we knock down all the tubercles from the already hardened screed, and overwrite everything with a wooden grater until the surface becomes homogeneous and rough.
Prepare a grout. We knead for this well-dried sand sifted through a sieve, cement in the same amount and water. During grouting, constantly moisten the screed with water from the spray gun.
And finally, we check the obtained quality of the screed by the rule and level, removing all the noticed irregularities. We withstand such a screed for 12 hours, and only after this time it will be possible to walk on it.
Stage VII. Finishing work
As soon as the screed grabs enough to support your weight, remove the guides. You can fill the voids after them with the same solution, then the screed will turn out to be monolithic.
Such a floor will dry out from 10 to 30 days, depending on which particular recipe of the mixture you used. Only after this can you start laying the topcoats. No additional leveling is needed, which is one of the most valuable advantages of cement-sand screed.

3 comments