
Sanding a wooden floor: a step-by-step guide for working
The fashion for natural building materials that has emerged in recent years makes many return to the roots. And what can be more traditional and more natural than a wooden floor? Whether it is parquet or plank flooring, wood fits perfectly into any interior. In addition, modern technology allows you to give it any shade, while maintaining the pristine texture of the material. Whatever the designer's final intention, the first step in the preparatory work is always polishing the wooden floor. And only then it can be tinted and covered with a protective compound. It doesn’t matter if you installed a new floor or decided to restore the old one, you still have to grind it.
What will be required to complete the work?
Unfortunately, it is almost impossible to cope with wood polishing with improvised means. A special machine is needed, and preferably two - one for the main area, and the second for the corners. The cost of such equipment is quite high, and there is no point in buying it for domestic use. What to do? There are two ways out of this situation:
- Hire a specialist who will polish your floor in a short time, but take an impressive amount for it;
- Rent equipment and start work on your own.
Of course, the second option will require significantly lower costs.
So, here is a list of tools and materials that you need to prepare before renting a grinder, so that it does not stand idle during the paid time while you run around the city in search of missing trifles:
1. Cycle - a special tool for manual processing of hard-to-reach spots.

2. Sandpaper - you can calculate the required amount of this material based on the fact that one charge of the machine is enough for 15-20 m2 surface. In addition, you need to consider that you will have to grind several times, constantly reducing the grain size of the paper.
3. A small manual machine for processing corners will greatly facilitate the work. You can rent it in the same place as a large grinder.

Preparatory phase - foundation preparation
Before you start sanding a wooden floor, you need to carefully prepare for this process:
- Take out all the furniture from the room;
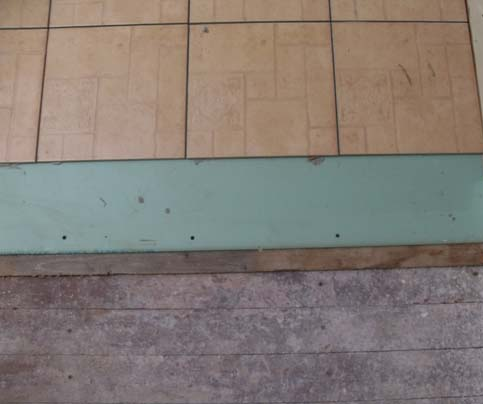
- Remove the skirting boards;
- Make sure that there are no protruding nails or self-tapping screws on the floor surface. If there are any, be sure to drown them in the wood with the help of a damper. If you need to grind the old parquet, check if all the dies are firmly attached to the base.
Important! All professional parquet grinders are equipped with a bag for collecting dust, but even this device will not save you from it completely. If you do not want dust to get into other rooms, hang a doorway with a wet cloth.
Proceed directly to grinding
First you need to fill the machine with sandpaper. For the first pass we use the roughest abrasive, as a rule, this is No. 40. The first pass is best done diagonally to the direction of laying boards or parquet.

At this stage, it is important to correctly adjust the pressure of the drum of the machine to the surface using a special screw. Insufficient pressure will lead to a significant deterioration in the quality of grinding, and excessive pressure will create too much load on the engine. A signal that the engine can not cope will be a change in the sound of the machine and a decrease in speed.
Important! The grinder consumes up to 2.5 kW / h. Make sure that the wiring and circuit breakers in your home can withstand such a load. The significant starting load created by the engine of the machine should also be considered.
As the abrasive is worn, you need to change it. Turn the engine on and off while moving. When the machine is stopped, visible traces may remain on the floor, which will then be very difficult to remove.
For each subsequent pass, move the machine half the width of the drum.
The second time the surface is ground with a smaller abrasive. Choose it depending on the quality of the coating and the number of planned stages of grinding. So, for the four stages, use the following sequence: sandpaper No. 40, then No. 60, then No. 80 and the final grinding No. 100 or No. 120. When sanding a floor with small bumps and a thin layer of old protective coating, one of the steps can be released. Then the sequence for changing the abrasive will be the next No. 40, No. 80 and No. 120. The second and subsequent steps are performed moving along the wood fibers.

Before finishing sanding, fill the cracks between the boards or parquet tiles. You can use a ready-made paste of the appropriate color or a mixture of PVA glue with fine wood dust obtained as a result of initial grinding. The drying time of the finished mixture is indicated on the packaging, and the PVA dries for several hours.
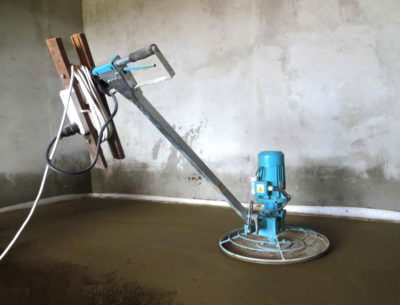
Inaccessible places
It is very convenient to use the so-called “boot” to process the floor in the corners, under the batteries and stairs. This is a small hand grinder for hard to reach areas. It is better to carry out such polishing in stages: they finished one passage in the center of the room - processed the corners.
That's all. Your floor is prepared for applying varnish. It remains only to vacuum thoroughly. Apply the first coat of varnish on the same day.

4 comments