
The nuances of the technology of laying the floorboard + analysis of popular errors
Even the most high-quality and beautiful material can be spoiled by unmarked installation - this is the bitter truth of life. Although it is almost everyone who wants to pay almost the same price as for a purchase, not everyone is eager for the construction team: is it really so difficult to lay a parquet board? Not at all - the main thing is to know the important nuances and do everything step by step. And how exactly - now we'll figure it out.
First things first - if you do not like to read, or you just do not have time for this - here is a video where everything is described in a simple and clear way:
If, after viewing, there are questions - we read on.
Content
Laying technology: step by step
Let's say right away: laying a parquet board is not laying parquet or laying laminate. There really are subtleties and nuances.
Stage I. We get quality material
Today, more than a hundred types of wood are used to make a parquet board, and the initial quality is completely different. Therefore, we will give you valuable advice: buy a parquet board only from those companies that themselves are engaged in similar repair work. They will not order material from manufacturers, which then does not fit together and creates a lot of problems. Such a subtlety. As for the type of flooring, the most popular today is a three-layer one. From the name you already guessed that it really has three layers: the upper, also called the front, middle and lower:
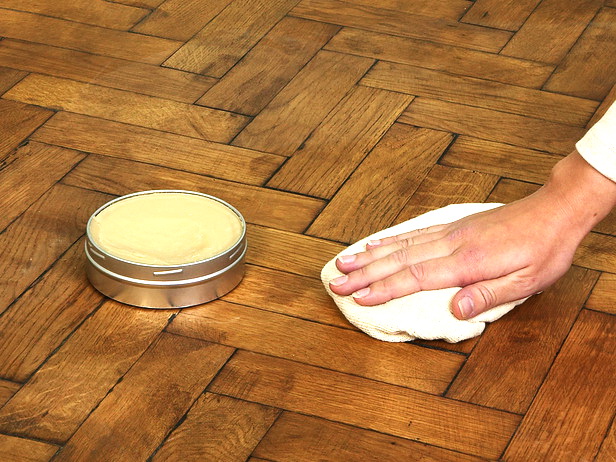
- The upper working layer has a thickness of 1 mm to 6 mm (the one that is thicker will always withstand more grinding than thinner). This layer must be varnished or special oil.
- Medium usually consists of short coniferous plates, or less often - of special moisture-resistant plywood. It is in the middle layer that all the connecting elements for coupling parquet boards are usually found.
- The bottom layer is already made of pine or spruce plywood in 2 mm thick. The main task of the bottom layer is to prevent the parquet board from bending or deforming.
If you are going to lay a parquet board in such a way that it resembles a massive one, then take the material with a solid front layer. The planks of such a parquet board can be glued in the form of "Christmas trees", "braids", "squares" or "decks". But the most durable is considered the castle connection at the Swedish parquet board - Khars company. The manufacturer claims that such a connection can withstand up to one and a half tons per gap.

Stage II. Preparing the foundation for laying
The most important thing in this matter is to properly prepare the base for the board. So, according to unverified data, up to 90% of subsequent problems with the appearance of the laid parquet causes the quality of the rough floor, and not the marriage of the material itself. So, what is still permissible:
- 1-3 mm differential per linear meter
- humidity up to 2-3%. To check this value, use a modern moisture meter.
If the base is clearly uneven and even has bulges, use special leveling materials (only on the basis of dry mixes). Carefully inspect the old screed and work with flaking areas, defects and dirt.If the humidity value turned out to be more than the permissible value, then put a vapor barrier film on the floor with an overlap, then glue the joints with construction tape or apply a special primer.
Specialists recommend laying the floorboard at a humidity of 40-60% and a temperature of 20-25 ° C. Note that the parquet board behaves more stably in comparison with the massif: it is less responsive to changes in temperature and humidity, more resistant to static and dynamic loads.

Stage III. We put a special substrate
To lay the parquet board in this way, you definitely need a substrate that will separate the unprotected board from the base. She will immediately perform several important functions:
- Smoothes out small irregularities and defects of the base.
- Will serve as an additional waterproofing.
- Will make the floor of the parquet board even warmer.
- It will become a useful cushioning layer, valuable while walking.
And finally, the substrate performs another valuable function, which is rarely mentioned: it does not allow crawling on the base in case of temperature changes. After all, the screed or gypsum has its own expansion temperature, and it differs significantly from the same parameter in the coating. This is the danger of not having a substrate on the screed: literally a year after such invisible movements, the accumulated cement or gypsum dust begins to seep through the cracks.

As a substrate, you can use foamed polyethylene, extruded polystyrene foam, sheet cork or six-felt board. This is from long-known materials. But today professional is gaining popularity laminate substrates. Here is a master class laying on just such a basis:

Parquet board is also often laid on cork backing. After all, this natural and environmentally friendly material still has excellent noise protection. And the technology of gluing such a substrate is extremely simple - as with wallpaper: polyurethane adhesive is applied to a clean dust-free surface and the cork is rolled up. After that, you can immediately stack the boards. However, during such work do not overdo it with glue - otherwise the cork will warp and swell with bubbles.
Stage IV. Getting ready for styling
When laying a parquet board on an old wooden floor, be sure to measure its moisture content - this material is hygroscopic. You can direct parquet boards as you like, but more often they are oriented along the length of the room for the sake of harmony of the whole interior design. Although the designers themselves often use the texture of the floor to visually expand or lengthen the space. If the room is perfectly square - lay in the direction of the light. You can even diagonally - however, then there will be a lot of waste.
Tip: if in a box with a parquet board you find specimens with defects or heterogeneous coloring - leave them for trimming.
Stage V. Learning to connect boards
Different manufacturers produce their parquet board and prefer a certain type of bonding:
- Insertion method;
- Castle connection, also called "click";
- Using fixing brackets or tightening straps.
The most convenient, of course, is the castle connection. The grooves and plug-in ridges are joined in this case without any other means - you just need to insert the crest of the board at an angle into the groove of the other, and gently lower the first board to a horizontal position. After that, a couple of easy strokes are enough, and that’s it. 
Here are the main advantages of this method:
- Speed of laying;
- No need for additional equipment or facilities;
- Wood has room for thermal expansion.
If in some place of the room you cannot raise the board for docking, then just use a hammer with a bar. Yes, a lot of accuracy and accuracy will be required here. Tip: when joining the cover with the door frame, start laying with the board wound under the jamb.

The insertion method, of course, loses the previous one: with this installation, you always have to use a block and a hammer, and replacing damaged boards in the future will take a lot of time. But near heating systems and door frames such boards are easier to put, and grooves and push-in strokes are less likely to be defective.

But laying parquet boards using brackets or a belt fastening system is more used for parquet boards, which have a thickness of 15 to 21 mm. The boards themselves still need to be glued together, and in the future it will be difficult to disassemble the floor.
Stage VI. We lay a parquet board
So, they lay the parquet board today mainly in two ways: glue and floating. Glue The glue method involves fixing the boards on the base by gluing. So they put it on a cement-sand or concrete floor, on a gypsum screed and a level mass. If you chose this method, be sure to pay attention to the recommendation of the board manufacturer himself - what requirements he puts forward. All this can be found in the attached instructions. Here's how to lay a parquet board in an adhesive way:
- Step 1. Prepare the base: check for evenness, completely dedust and process with a synthetic primer (water is undesirable). In total, it should take you a little more kilogram per square meter (it all depends on the screed and the quality of the primer itself).
- Step 2. Lay out the parquet boards from the first two boxes in the order that you will install them. Apply glue.
- Step 3. We put the first board. It should have a length greater than its width. Between the wall and the floor we leave an expansion gap of 6-12 mm.
- Step 4. We knock the second board to the first - through a special bar. Boards need to be glued in time for ten minutes.
- Step 5. When you will cut the last board, immediately use the rest of it to start the next row.
- Step 6. Insert small wedges or spacers into the expansion gap between the wall and the floor (you see them in the photo).
- Step 7. After gluing several rows, carefully check for gaps.
- Step 8. When all work is completed, close the seams with acrylic sealant or cork chips. As an option, you can also put a special metal sill.
Tip: for convenience, use a square - only with it you can draw really straight lines.


The so-called "floating" method of laying parquet boards has many advantages. Most importantly, important gaps remain for ventilation and invisible changes in the shape of the board when the temperature changes. As evidence: in winter with good heating, you can notice small gaps between the boards - and in summer they are not visible. Moreover, the wider the board itself, the more noticeable. These are important processes! And, if you chose a parquet board with a high-quality lock, then it will last much longer than the usual glued one. You can consider the process itself in more detail in this photo-instruction: 
The "floating" floor from the parquet board is laid in two ways: using the same glue and the "castle". In the first method, the boards are not glued to the base, but between themselves, and in the second, they are joined without glue. Lock joints also have sub-types: with a “turn and click” or with a “hit and click”. Let's say the speed of such an assembly is really impressive - just a couple of hours.
You can lay everything yourself:
- Step 1. Start from the left corner of the room with the so-called “latching side” to the wall.
- Step 2. Take a board with both hands, and, keeping it at an angle, lay it on the edge of the board of the first row. The edge board, which will be adjacent to the walls, should not have grooves - cut them with a plane.
- Step 3. Start the second row with the remainder of the first row. But, if it turned out to be less than 30 cm, cut the new board in half.
- Step 4. When you are laying the parquet board at the threshold, check all the time - is it easy to open the door, as before.
If necessary, just cut the bottom.In addition, there should always be at least a centimeter of distance between the door sill and the wall. It is also important - to tightly connect the boards to each other, use a wooden or rubber mallet, just tapping them lightly. Do not take the usual - damage the floor.

On sufficiently large areas, this method of laying is not very suitable - the integrity of the entire coating is violated. The floor will creak and even bend. Therefore, in spacious rooms and halls, a parquet board can only be glued. That's all!
Difficult laying - floor heating and logs
If you are going to lay a parquet board on a warm floor, first of all find on sale such material that would suit the future temperature regime. Indeed, not all species are sufficiently resistant to deformation, especially maple and beech. Better give preference to oak or walnut. But keep in mind that the maximum temperature that any parquet board is designed for is 26 ° C. And in order to understand whether your chosen parquet board is generally suitable for a warm floor, look at its packaging for a special icon “suitable for warm floors” and instructions for such laying.
All this can help you find and consider a seller or sales manager. If there is nothing of the kind on the material, don't take a word. If you can choose, then water heated floor for such a coating is better than electric - heating occurs evenly, and the wood expands quieter. True, it will be necessary to raise the floor level high.
If you still decided to lay on electric, ease and speed of installation will please you. You will place the cable on a heat-insulating material (preferably foil), and on top you can attach a parquet board immediately. Convenient to place under the floorboard is also popular infrared film floor: minimal thickness, perfectly even coating and easy installation. But not many people like its radiation. In any case, laying a parquet board on such a foundation can only be done in a “floating” way - because of the heat the wood will slightly change its parameters. Below is the styling process in the photo.

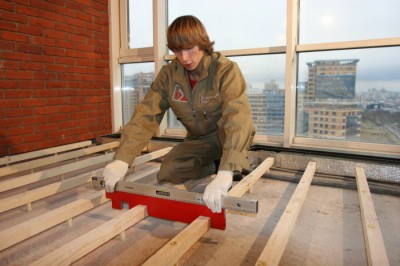
If you lay the parquet board on the beams or logs, be sure to ensure that they are dry and as durable as possible. Miss this moment - over time, the floor will be unpleasant to creak, and even deform. It is also important that under the lags there is good ventilation and water vapor does not accumulate. In general, these are all difficulties. The best way to lay the floorboard on the logs is as follows:
- Step 1. We prepare logs, check for humidity and integrity.
- Step 2. We lay a layer of durable plywood.
- Step 3. We put the parquet board: glue or on the cork, which will help to slightly remove the static load on the logs themselves (prevention of squeaking).
Less commonly, but they also practice this method: a parquet board is attached directly to the lags themselves using brackets or nails. Then the logs should go in increments of 60 cm, and take the parquet board itself quite thick.

And finally, we will tell you about a newer technology for preparing the base for laying boards - this raised floors. Minimum time and cost: special lags on plastic bases are simply used, which not only slightly raise the floor, but also allow you to conduct the necessary communications under it. Thermal insulation is obtained, of course, much better than a conventional concrete base. Feel free to experiment!
3 comments