General technology for applying bulk floors: what you need to know when working with this base?
Do you like perfectly smooth glossy floors, which today can often be found in a variety of offices or cafes? Then we have good news: you can make such a foundation with your own hands - right at home. And how exactly - this article will tell. Polymeric floors in the room are poured only when all other installation and finishing work is completed. You can make a bulk floor yourself immediately from ready-made mixtures - today they can be purchased at any hardware store. It is important that you follow the instructions that accompany them as closely as possible.
Content
Stage I. Getting Ready
Despite the fact that in most photos you will see the masters while working on filling the floor completely without protective equipment - this does not mean that it is so right. Do not take risks - observe the necessary personal safety measures, and then you will not have to be treated for an allergy that has never come from:
- Protect the polymer container from direct sunlight.
- Wear respirators.
- Protect your hands with rubber gloves and feet with hard-soled shoes.
- If the polymer composition gets into your eyes, rinse them quickly with plenty of water.
- If you get on your hands - rub this area of the skin with a cloth dampened with gasoline.
- And, finally, do not open a metal container with a polymer with a metal object - if a spark arises from this, the composition may catch fire.
So, let's list the main tools that you will need when pouring a polymer floor:
- Needle Aeration Rollerwith which you will remove air bubbles in the base layer.
- Low speed drill with a paddle - this mixes the floor components.
- Sinteponovy rollerswith which it is convenient to prime a zero surface.
- Raklya - it is with this tool that the epoxy compound will need to be applied.
- Spatulas - they level the floor in the most inaccessible places.
- A vacuum cleaner - they need to clean the entire surface of dust and excess quartz sand.
- Personal Protective Equipmentand they cannot be neglected.
- Paintbrushes - needle soles for shoes in which it will be possible to walk quietly right on the newly flooded floor.
Tip: look, or these special soles hold fast to shoes - it’s bad if they “walk”.
Stage II. Preparing the foundation
This is the most important stage on which it depends directly on how your gender will turn out. You can start work on almost any basis - concrete, ceramic tiles and simply dry and clean floors, which subsequently will not shrink and does not contain moisture.
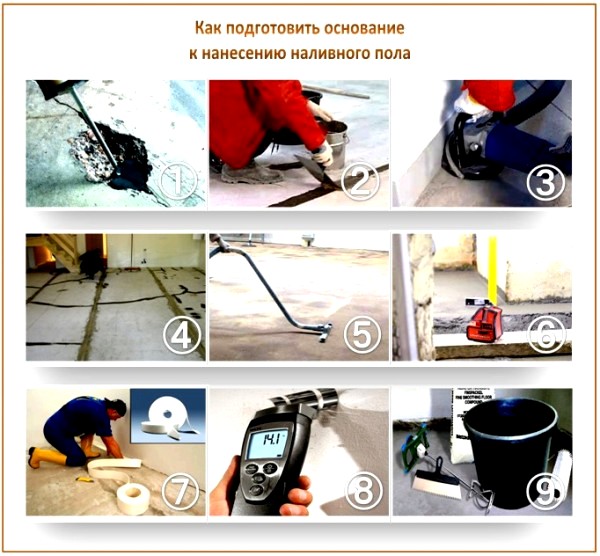
We check the basis for suitability
To begin with, using the level, check the existing base for evenness - the deviation should not be more than 4 mm, otherwise the building materials will then go unmeasured. If the floor is uneven, correct the notches with a putty mixture and a grinder. If humidity is high, apply a waterproofing layer.
By the way, the fact that the bulk floor can be done on absolutely any basis is a myth. The rough floor should be dry, even and not “playing”. And therefore, if you do not want to pre-fill the floor with a screed, you can use aluminum plates. The screed itself, of course, is much better - it makes the floor much more rigid and increases its soundproofness. But the weight of this floor is already more, which is not always suitable for light frame frame houses.
Subtleties of pouring on wood, tile and screed
If you will fill the floor with wood, then sand it in advance, sand it and degrease it. Its final humidity before repair should not exceed 10%.
The concrete floor should have a moisture content of not more than 4%. Close all cracks and chips well in advance, and level the entire surface. And the applied primer will completely cover the porous concrete layer. In addition, sprinkle the soil with quartz sand, which will improve adhesion to the self-leveling floor.
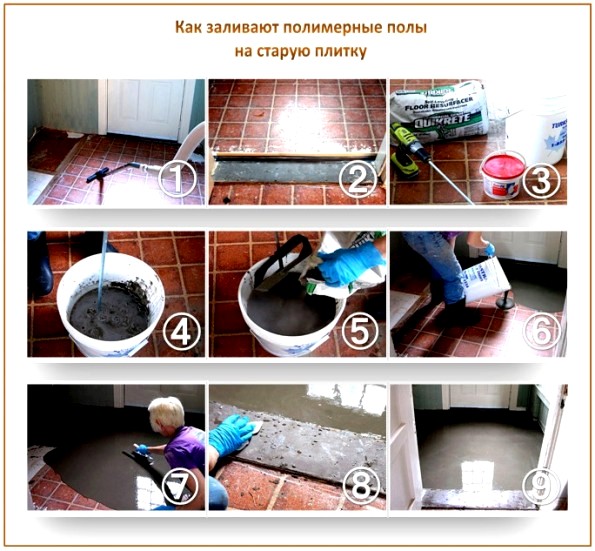
If you will apply a polymer floor to the tile - be sure to check whether all the plates hold well. If you find a marriage - remove and putty these places.
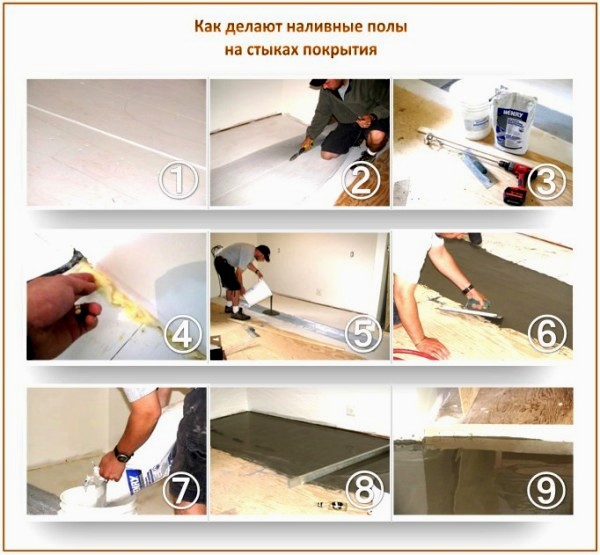
And if you lay the bulk floor on a surface with noticeable elevation changes, then pour the mixture in two stages: first, a thick layer, and after drying, smooth out all the irregularities with putty and fill the finish. If there are also joints, do as in the photo instructions:
Tip: for all the beauty and practicality of a modern polymer floor, its price, of course, does not please. But because many use a slightly different technology for the device of such floors, without losing quality. This is polymer concrete, in which the base layer is cheap aggregate, on which the floors are poured.
We work with concrete screed
The concrete base of the floor for pouring a bulk polymer coating has its own requirements:
- The compressive strength of the concrete floor should be at least 25 MPa, and the thickness at least 60 mm.
- Concrete base must fully comply with SNiP.
- The surface should be perfectly smooth, free of dust or cracks. Use a vacuum cleaner to be sure.
- The difference in floor at 2 meters cannot exceed 2 mm - this is important.
- The moisture content of the concrete base at 20 mm depth should not exceed 6%.
- The quality of the concrete itself is very important - lime materials are not permissible in it.
- The optimum temperature for filling the floor is not lower than 15 ° С, and the relative humidity is not higher than 75%.
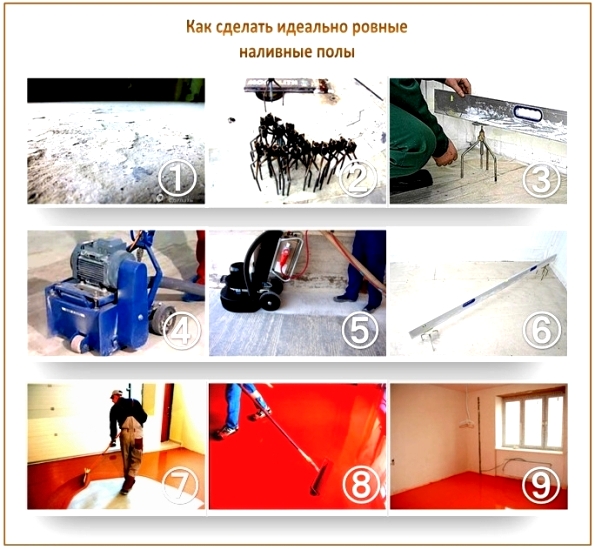
According to experts, the top layer of concrete is quite soft - because of the cement milk present in it. And therefore, even if the concrete base seems perfectly smooth to you, it is still necessary grinding. There is no need for strong grinding - just remove the cement milk itself. And for this, a grinder with a diamond cup is suitable at home.
Here are the ways to prepare the base for polymer flooring:
- Machine or manual shot blasting, which immediately eliminates the most visible surface defects and pieces that were held weakly.
- Grinding, which removes even hard-to-find defects, but forms a lot of dust. It clogs in microcracks, and adhesion to the next layer will already be weaker - pay attention to this nuance!
- A vacuum cleaner that can solve the previous problem.
- Crack sealing with putty polyurethane compound.
- Protection of the base with special impregnation - impregnation, using a roller or spray gun. If possible, add quartz sand to the impregnation - so that it better sets with the bulk composition due to roughness.
And finally, here’s how you can simply check the residual moisture of the concrete base and make sure everything is ready for further work. So, take masking tape and stick on the base one whole piece of plastic film (1x1). Look the next day: if condensation has formed on the film or the base under the film has changed color a bit, you cannot work with the bulk floor yet.
Stage III.Level and primer for adhesion
Normally, the primer should be completely absorbed - the only way it will strengthen the top layer of concrete.
Stage IV. Preparing the mixture for pouring
You will be able to calculate how much it will be necessary for the mixture to work. For example, for every square meter for a thickness of 1 mm, you will need one liter for pouring. This is offhand. After all, it’s not so easy to determine the required amount of bulk floor to the last gram - different manufacturers have different mixes of different mixes, and therefore, having the exact parameters of the room on hand, it’s more advisable to consult an experienced seller right in the store.
The most optimal temperature regime for solidification of the floor is from 5 ° С to 25 ° С. It is in this gap that the mixture hardens quickly enough. The temperature of the very base of the floor is also important - it should not fall below 4 ° C. Do not heat the mixture - the maximum to which temperature it can reach is 20 ° C.
So, take a drill with a nozzle or a construction mixer, which have the function of rotation in the reverse and forward direction. Mix all components twice. After the first time, leave the composition for a few minutes, and mix everything again. If you use additional filler - add it at the second mixing. Prepare so much material that you have enough for exactly one hour of work.
Stage V. Fill the base layer.
Now gently form the underlying layer. Align everything well, and remove the air bubbles with a needle roller. After all this, apply the front layer. We use raccles in order to distribute the composition as evenly as possible in the front layer.
Tip: Use quartz sand as a base layer. This will save you twice as much filling.
The thickness of the polymer floors itself is no more than 5 mm, and therefore, when the floor height should be greater - fill in the leveling screed with a draft version, and only then 2-3 mm of the bulk floor of any color.
An example of the work on the video:
On the issue of dismantling. Yes, the bulk polymer coating really very firmly adheres to the concrete screed, literally eating into it. That's why when changing the cover, dismantling is not even a question - why? Such a floor is a wonderful foundation for any other!
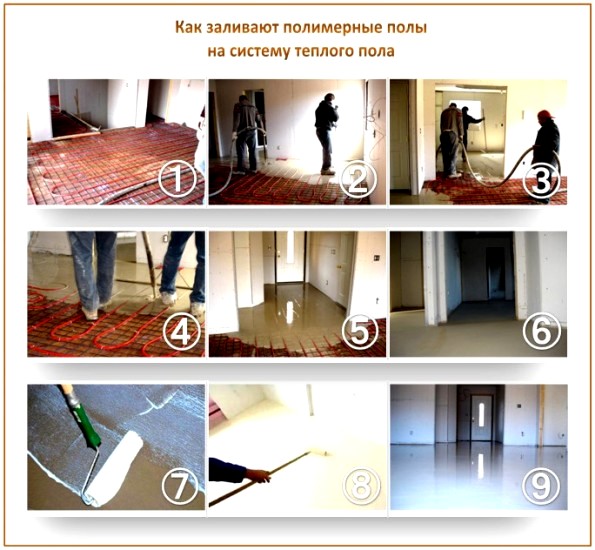
How to make a polymer "warm" floor
First of all, consult your supplier well, which polymer floor will be absolutely environmentally friendly with a little heating. But remember that the concept of “warm floor” is relative. If such a floor actually heats up - it is simply incorrectly arranged. Let's see: the temperature of the human foot is 36.6 ° C, and everything that has a temperature below this, the skin perceives as cold. But in the range from 30 ° C to 36 ° C, the floor seems quite comfortable. And, of course, this is not too much heating for some toxic substances to begin to be released directly from the polymer - there aren’t any such substances in a high-quality mixture. This is a concern for some.
So, how to make such a floor:
- Step 1. Prepare the base by cleaning and degreasing it.
- Step 2. Lay the heating (which is conceived).
- Step 3. Use a special primer if possible, if your base is wood. It will improve adhesion to concrete.
- Step 4. As soon as the primer dries, pour the first layer of polymer cement.
- Step 5. Now let the cement sit and grab for about an hour.
- Step 6. After that, fill in the second, already finishing layer of the polymer bulk floor.
- Step 7. After a few hours, the floor will look like a perfectly flat skating rink, which does not slip at all.
And here water-based floor heating can do this technology:
- Step 1. The first step is a concrete screed.
- Step 2. We check for horizontal: if the floor is uneven, we level all differences in height with rubble.
- Step 3. Again, pour concrete screed.
- Step 4. We put Ecofol - this is foil poliropylene.
- Step 5. We lay the pipes of the future warm floor.
- Step 5. Now "Skorline".
- Step 6Next - cover with polyurethane primer.
- Step 7. Finally, lay out the polyurethane floor.
- Step 8. Leave to dry for two days.
Read more in our other articles.
Tips from experienced craftsmen: how not to spoil the coating?
Will you do the bulk floor for the first time? Then heed the advice of more experienced ones. Indeed, in the technology of laying such a floor - a lot of nuances:
- If the base was not prepared for subsequent pouring, the polymer floor will crackle and become cracked.
- If you close the cracks badly, then when pouring the polymer composition air will begin to escape and bubbles will appear.
- Allow mumps, insects or hair in the solution - never pick them out of the floor afterwards. That is why the work team from serious companies always works only in special suits that completely cover both the warmth and the head. Plus, the so-called "wet tines" for wet coating.
- Mix the components poorly - the hardening of the composition will be uneven. There will be spots that will never dry again, and will stick to shoes.
- Knead and do not roll the material in time with a roller - it will slightly float and harden unevenly.
- A special primer has a rather pungent odor, but it dries quickly. If possible, do not breathe it. Also, after drying, the polymer floor - epoxy, polyurethane or methyl methacrylate - becomes completely safe for humans. And so much so that it is used in medical and food industries. But in a liquid state, they really better not breathe.
- Mix two floor components at the smallest rpm - not more than 300 rpm. It is better to use a nozzle for mixing paint. If you are in a hurry and use large revolutions, you will have to get rid of air bubbles for a long and tedious period of time, which will fill the solution.
- If possible, fill in such a floor together - while one assistant kneads the composition, the second puts the previous part. So you will not accidentally freeze anything, there will be no fuss and haste.
- It is most convenient to fill the floor with zigzags, and then level it.
- Pay attention to the level of air humidity - during work, it should not exceed 80%. To check, hang on the wall an ordinary hygrometer. Artificial devices for heating the air, and walking drafts should not also work at that time.
That's all! Thanks to a reliable polymer layer, a high-quality polymer floor can be used for several decades - and it will not lose its appearance and will not become worse in performance.

4 comments