
How to remake old linoleum anew - recycling and troubleshooting
A poorly laid linoleum is immediately noticeable: in some places swellings, waves are visible, the panel comes off from the base. Apparently, cheap glue was used in the flooring, or the workers tinkered with it, acting “through the sleeves”. As a rule, these defects do not appear immediately, but after several months of active use. Often, in this case, a decision is made to completely replace the coating that has become unpresentable. However, this is not the only way out - it is much more practical to “upgrade” the floors by re-remaking the old linoleum panels.
Removing old linoleum from the base of the floor
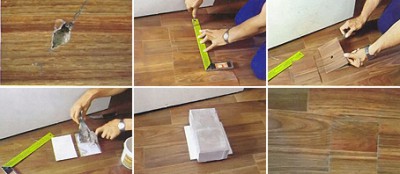
To remake linoleum, you must first remove it. If the installation was carried out without a glue method, then for this it will be enough to dismantle the skirting board - after that the panel can be easily removed. If linoleum is glued to the base, then it should be armed with a spatula and carefully separate the panel from the adhesive surface. With a strong connection, when even the spatula is powerless, it is recommended to moisten the problem area with hot water and wait until the glue dissolves. After this, linoleum can be easily removed, but when re-laying it will have to be thoroughly dried.

Preparing linoleum for re-laying
The removed linoleum is laid in a free room with the wrong side up and cleaned of adhesive residues and dust. After that, the material is rolled into rolls with an initial diameter of at least 25 cm - this is necessary so that the linoleum that has been in operation and obviously becomes brittle is not covered with cracks and creases when folding. The base of the floor is also cleaned of glue particles using a spatula.
Under the old linoleum there will certainly be a large amount of dirt, small particles, dust - all this must be thoroughly sweep with a broom, and then walk along the surface with a vacuum cleaner. If you skip this stage of work, then overhauling linoleum will be a meaningless event, after which you will again encounter a weak adhesive joint and various roughnesses on the surface.
After you are sure of the crystal clearness of the floor, you can proceed to the most important thing - laying.
Secondary laying of linoleum - attempt No. 2
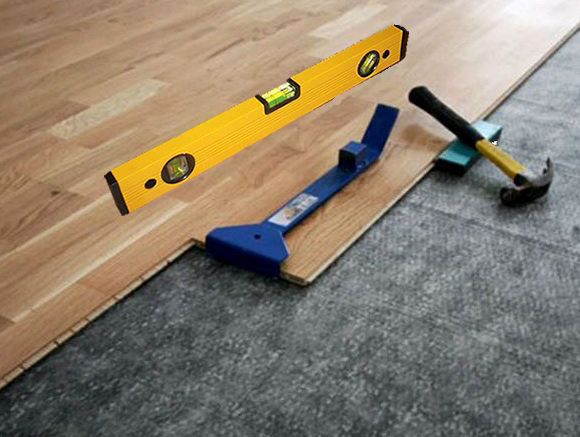
The secondary laying of linoleum, in fact, is no different from the primary. Except for the fact that this time you are dealing with more delicate material, which managed to wear out a little. Laying is done as follows: prepared glue is applied to the floor base and the wrong side of linoleum, and then the panels are glued into place. In a small room where it is planned to lay one linoleum panel, you can do without a glueless laying method. At the same time, the panel is laid on the prepared base and pressed along the perimeter with baseboards.

When linoleum is transected, there is a wonderful opportunity to mask various swelling, dents, scratches. When laying, try to distribute the identified defects in inconspicuous areas. For example, hide them under furniture or baseboards.
Restoration and renovation activities
Typically, linoleum, which has already been in operation, even after being remade, looks frankly used.We don’t need this! We want the surface to look like new. So, let's start the upgrade activities.
It has already been said that various defects can be hidden. But this does not always work out, for example, a noticeable swelling is located just in the center of the room, where there is no furniture and especially skirting boards. In this case, heating the problem area will help us. We put a sheet of paper on the swelling and go over it with a heated iron - with a greater degree of probability the raised surface will straighten. Of course, with this procedure, you should carefully control the temperature so that the linoleum does not melt, but only heats up.
Instead of the iron, you can use a more gentle method - a bag of sand heated in a water bath. They lay him on a swelling and wait until it disappears.

They give out the "age" of linoleum and various dents left after moving furniture or running through women's heels. Here, too, can not do without warming up. It is most effective to carry out such restoration at the stage of removing the linoleum coating, before its secondary installation. To do this, linoleum is laid with the wrong side up on a perfectly flat surface and ironed with a hot iron, straightening the defect. Instead of an iron, you can use a load - a heavy, preferably metal object - that fits into the dent for several days.
Another problem with the old coating is scratches, which, fortunately, are also easy to mask. For example, if you putty them with special mastic to cover linoleums. Such mastics are sold in construction stores, where you can also buy coloring filler in the color of your linoleum. A good putty can be prepared on your own by mixing transparent nail polish with the powder obtained by rubbing a coin edge of a piece of linoleum. This putty will match the color of the surface of linoleum, so by filling it with scratches, you can be sure that they will disappear without a trace, and the old coating will look almost the same as on the day of purchase.

3 comments