
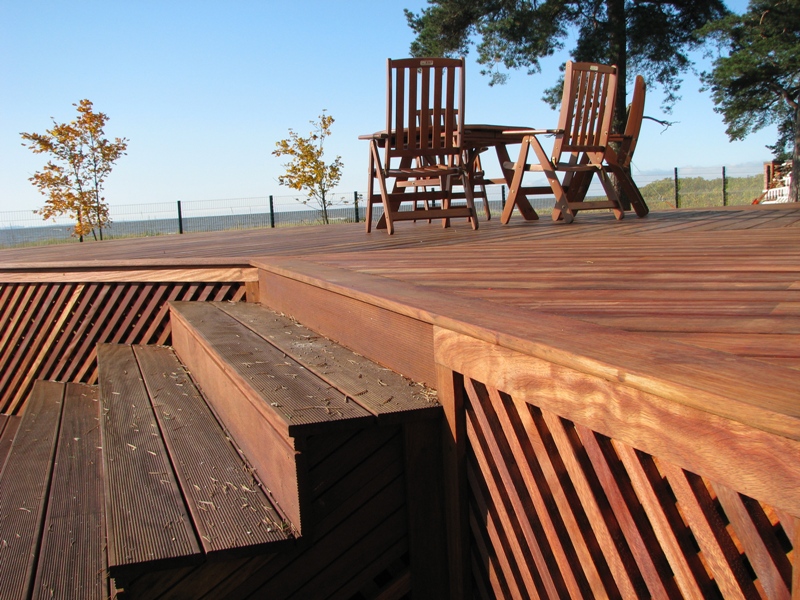
Terrace construction: an overview of 4 options for installing a terrace deck
Terrace is a platform attached to the house or standing separately. Usually it resembles a large porch adjacent to the wall at the entrance to the house. In southern areas, terraces are usually open. In the middle lane - covered with marquises or awnings. The design of the terrace can be initially included in the construction plan of the house and built on the same foundation. But, if the house already exists, to attach a terrace to it is not difficult for any home master. Let's talk about what basic terrace structures exist and how to build them yourself.
Before proceeding with the construction of the terrace, it is necessary to carry out the design and decide which design option to give preference to.
The simplest constructions of terraces are carried out at ground level. These are platforms paved with paving slabs, paving stones or clinker. Paving is performed on a gravel-sand cushion laid in a previously arranged excavation in the ground, 20-30 cm high.
On a gravel bed you can also build a wooden terrace with flooring from boards or composite decking. Wooden blocks or steel profiles, playing the role of a log, are laid on top of the dump. They mount wooden support beams. The floor boards are fixed on top.
Terraces more complex in design, elevated above ground level. Moreover, they can be raised, both by 15-20 cm, and by 2-3 m (level of the second floor). In this case, you can’t do without a foundation. Such a terrace rests on reinforced concrete slabs, blocks or piles, playing the role of a monolithic, columnar or pile foundation. An example of a raised terrace: a platform in the form of a reinforced concrete slab, lined with ceramic or porcelain stoneware. During the construction of a wooden raised terrace, wooden logs are fixed on the selected foundation (concrete columns, slabs, piles), which are sheathed on top with a trimmed or terrace board (decking).

We will provide you with several options for building a terrace, designed in the form of information workshops.
Content
Option 1. Clinker paved terrace
This version of the terrace is built on a sandy rammed pillow, at ground level. Clinker tile, from which the flooring is laid out, allows you to form curves, curved lines of the site. To clearly indicate the boundaries of the terrace, fences are installed around its perimeter. For example, small wooden posts saturated with antiseptics.
The work is performed as follows:
1. Cleans the soil at the site of the paved terrace. They remove stones, driftwood, remove the top layer of soil, 20 cm thick.
2. Sand is poured into the resulting recess, with a layer of 15 cm.
3. A trench with a size of 70x70 cm (depth, width) is dug out along the intended border of the area. A layer of gravel or sand is poured at the bottom of the trench, with a height of 15-20 cm. It is necessary for better water drainage at the installation site of the enclosing columns.
4. In the trench, on the drainage layer, two rows of wooden posts are installed (on the inside and outside). Their verticality is controlled by the building level. The columns installed at the ends of the fence are fastened with self-tapping screws.This solution provides a more durable grip of structural elements, does not allow them to shift and fall out of the row.
The fence has the form of a closed "pocket", which will later be used as a flower bed framing the terrace. If the arrangement of the flowerbed is not included in your plans, then the border can be made in one row by installing bricks, ready-made plastic fences, etc. in the trench.
5. In order to prevent soil from being washed out of a future flower bed, a layer of roofing material is laid inside the enclosing "pocket", leading it to the walls of the columns. Ruberoid is laid to the height of the planned level of backfill with soil. At several points, the waterproofing layer is fixed to the walls of the posts with self-tapping screws or nails.
6. Pegs are driven into the ground, from the wall of the house to the fence, with a pitch of 3 m and pull cords on them with a slope of 2-3 cm per 1 meter. Thus, the level of sand filling is planned, which must necessarily form a slope for rainwater runoff from the terrace site.
7. Press the sand filling and level it according to the level of the tensioned cords, filling up, if necessary, the missing amount of sand.
8. Begin the installation of clinker tiles. Each tile is laid on a sand layer, pressed tightly and tapped on the surface with a rubber hammer.
9. The remaining free areas, between paving and fencing, are covered with large decorative gravel.
10. The joints between the tiles are filled with fine sand with a stiff brush.
11. Excess sand on the surface is washed off with a stream of water from under the hose. The pressure should be small so that the sand does not wash out of the seams.
12. So that rain moisture can flow freely from the paved area, drainage is performed. To do this, lay along the columns of the fence with a slope a drainage pipe with slots wrapped in a jute cloth (so that debris and soil do not enter the slots). To mask the surface of the pipe is covered with gravel.
The end of the laid drain pipe is connected to a storm sewer pipe. Through a tee, a drainage outlet is also connected here. A gutter with a grate is installed in the right place.

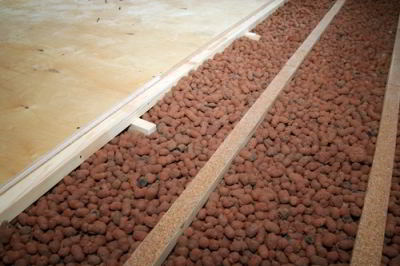
Option # 2. Gravel-covered wooden terrace
The long-life and easy-to-use terrace, built on a gravel bed, can easily be made of steel profiles (logs), wooden blocks and boards. Since they will practically lie on the ground level, for this version of the terrace it is allowed to use only wood from hard, not susceptible to rotting species: larch, oak, garapa, teak, merbau, etc. Before use, the boards are treated with antiseptics that protect them from moisture, rot, insects, and UV rays.
Progress:
1. At the site of the future site, remove the topsoil, 20-30 cm thick.
2. Fall asleep pit gravel.
3. Steel profiles are laid on gravel, forming a slope of 2-3 cm per 1 running meter. The distance between the profiles is about 500-600 mm.
4. Bearing beams are attached to the profiles. The distance between the beams is about 600 mm, if the thickness of the terrace board is 27 mm. With a board thickness of 20 mm, the beam pitch will have to be reduced to 400 mm. For additional protection of the beams from moisture, in the places of their contact with the profiles, rubber gaskets are cut, cut along the width of the boards.
5. Support beams are covered with dark protective fabric (geotextile, for example) to prevent weed germination.
6. A flooring is assembled from the boards perpendicular to the beams with gaps of 2-3 m. Spacers are installed between the boards and the protective fabric to prevent moisture accumulation in the floor space. A compensation gap of 1-2 cm is left between the walls and the floor.
7. At the end of assembly, the boardwalk is covered with antiseptics, stained with impregnation or varnish.

Option # 3. Terrace on a columnar foundation
A wooden terrace on a columnar foundation is the traditional and most win-win option. The design is adjacent to the house and, in fact, is one with it.The columnar foundation is able to raise the area by 15-60 cm. At the same time, the blown-out space formed under the deck contributes to the efficient ventilation of the terrace elements and minimizes the possibility of wood decay.
Step-by-step construction instructions:
1. To connect the future terrace area with the house, the first beam is fixed horizontally (at the terrace level) on the adjacent wall. Above the top edge of the beam, a galvanized steel drain is mounted.
2. In places of installation of concrete columns make excavation. Columns should be installed in increments of 1.5-2 m. Depths are performed taking into account the desired elevation of the terrace, the height of the columns and the required layer of gravel bedding, 10-15 cm thick.
3. Gravel filling is poured into the recesses, then trapezoidal concrete columns are installed. A metal embedded part under square beams is attached to the upper platform of each column.
4. The support beams are embedded in embedded parts on the posts, fixed with screws.
5. On top of the support beams, perpendicular to them, mount the platform beams at a distance of 40-60 cm from each other.
6. Terrace boards are screwed to the platform girders with screws, observing 2-3 mm gaps between them. The gaps serve to prevent the accumulation of rainwater on the floor and its free flow into the underfloor.
7. If untreated trim boards are used for the terrace, at the end of the installation, the surface of the flooring may look uneven. Therefore, the floor is leveled with a grinder, bringing all points of the terrace to the same level. After polishing, wood dust is removed and the boards are treated with impregnation - antiseptic or staining. When using a special terrace board additional grinding of the surface is not required.

The columnar foundation for the terrace can also be built from flat concrete blocks. A similar option for building a terrace is presented in the video:
Option # 4. WPC terrace on pile-screw foundation
Sometimes it is irrational to install a terrace on a columnar foundation. For example, with a high occurrence of groundwater on moist and unstable soils. In this case, the soil will swell and push concrete columns. Difficulties in the construction of the columnar foundation can occur in areas with large level differences, on the slopes. In all these cases, for lightweight buildings, another type of foundation is more successful - pile-screw. Screw piles make it possible to raise the terrace area to the desired height (even by 2-3 m!), Perfectly hold the wooden flooring with all the necessary furniture. In addition, the screwing of screw piles for the terrace takes place within 1 day.
Consider the technology of building a light terrace from KDP on screw piles.
Progress:
1. Determine the installation points of piles. They are screwed in increments of 2-3 m, with mandatory installation in the corners of the future site.
2. Screwing in the piles is performed using a special technique or manually. With manual screwing into the slots on the upper end of the pile, metal scrap is inserted, which serves as a lever. In the process of scrolling this lever, the pile blades the soil with blades and falls to the required depth (below the level of freezing of the soil).
3. Twisted piles are cut to the level of the future supporting frame.
4. Inside each screw-in pile, cement mortar is poured to increase its strength and prevent corrosion of the internal cavity.
5. On top of the piles, a steel metal frame of profile pipes is mounted. The frame has the form of a frame with intermediate elements spaced 50-60 cm apart. The finished frame is coated with a primer, paying particular attention to the weld points.
6. Aluminum logs are laid on piles. Since when the aluminum comes into contact with the steel of the frame, the corrosion process starts, it is recommended to lay the logs only through rubber gaskets.
7. Fastening of decking boards to aluminum logs is carried out using terminals that are inserted into the slot of the log.The terminals allow you to mount the boards without the use of screws and the need to drill holes in them. If the used aluminum profile does not allow the installation of terminals, the mounting of the decking boards is traditionally carried out using self-tapping screws.
8. After assembling the composite flooring, an aluminum enclosing profile is mounted at the ends of the decking. Now the deck of composite decking is almost indistinguishable from an expensive wooden structure!

How the installation of the terrace on screw piles is performed is shown in the video plot:
2 comments