
Laying the cork floor in two different ways and then care for it
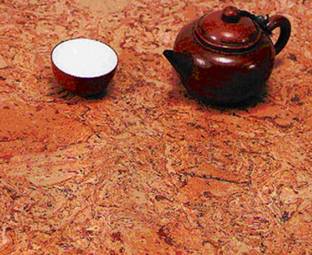
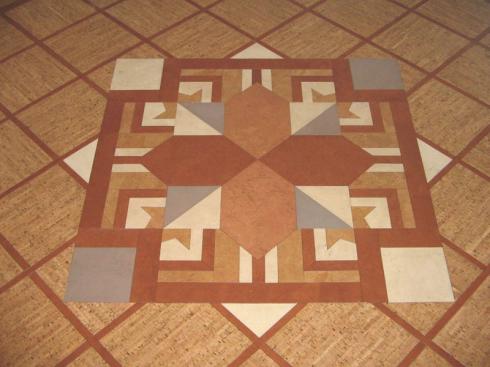
The most hygienic material with a maximum of useful properties (from the point of view of modern building standards) is natural cork. The floor covering is elastic, resilient and durable. What determines the exceptional properties of the material? Of course, its unique structure. The structure of the cork, like a honeycomb, is millions of multilayer cells filled with a mixture of oxygen and nitrogen. This flooring is not electrified (natural antistatic properties) and does not cause allergic reactions. The cork does not rot, does not mold, does not support the combustion process. Due to the fact that almost every concrete coating element (tile or plate) has a unique pattern, laying a cork floor can turn into a small field for creativity - because the resulting pattern under your feet will be virtually exclusive.
But how to lay a cork floor? What tools and accessories will be required for this? Professional answers to these and many other questions related to the installation of cork flooring can be found in this article.
Preparatory stage
Cork floors do not need some kind of supernatural preliminary work with the base. The only condition is that the rough surface must be absolutely clean and relatively even. Concrete, metal, wood coating does not matter.
- even wooden floors are covered with fiberboard or plywood sheets (avoid matching seams!) and fasten them over the entire surface;
- the concrete base is cleaned, if necessary, leveled with a mixture.

Laying adhesive cork floors
How to choose the right glue?
The glue is selected depending on the type of surface on which the cork tile will be planted, and of course, on the quality of the latter.
Ideally, it is better to use a special adhesive. You can also use waterproof PVA. However, it should be borne in mind that some of its types provoke shrinkage of the coating and the appearance of gaps at the junction of individual elements.
How to mark up the rough floor?
Laying the cork floor by glue starts from the center of the room. In order to determine the point “X” they act in this way - the diagonally located corners of the room are connected by a stretched twine. The intersection of the cords will be the desired position. Then, through the center of the room defined by a simple method, two perpendicular lines are drawn that will set the laying direction (strictly parallel to the walls).

Installation Technology: Step by Step
- Having determined the desired layout, the tiled pattern is laid out dry first. If, according to the assumptions, the width of the tiles at one of the walls is less than 5 cm, the guides should be slightly shifted. Strive for equal widths of stripes at each wall;
- installation of cork flooring begins with whole elements;
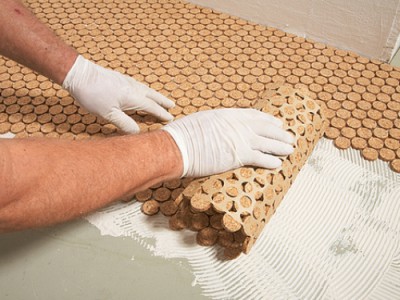
- Contact adhesive is applied both to the lower surface of the tile (using a velor roller) and to the surface of the base (a notched trowel is suitable). Then you should wait for the “drying up” of the composition (specific dates will be indicated on the package);
- Now you can proceed directly to gluing; start should be from the intended center, rushing towards the wall opposite the doors. Glue two or three tiles along one guide, then along perpendicular to it.Press each element firmly to the base, plus make sure that no gaps form - this is not a tile for you !;
- first form a coating on one half of the room - then on the other: until all the whole tiles run out. Then proceed to stacking the pieces.
The tile for bottlenecks is cut with a knife with a trapezoidal blade, not forgetting the compensation gap of 5 mm.
- In order to ensure maximum bonding quality, each of the tiles is tapped with a rubber mallet.
The adhesive that comes to the surface of the coating should be immediately removed with a damp sponge.
You can walk on the laid cover immediately, but it is recommended to bring furniture, etc., not earlier than in a day.

Laying “floating” cork floors
The technology of laying cork floor from sandwich plates decorated with cork veneer is practically no different from the technology of installing a laminate or parquet board.
- “Floating” floors can be laid on existing carpet or PVC;
- explicit concrete base should be insulated with plastic wrap;
- experts recommend orienting the panels along the direction of the light;
- if the last in the row plank is shorter than 10 cm, you should trim the first;
- installation of furniture, etc. heavy items is possible only a week after the end of installation.
Cork flooring - video instruction on the topic
An educational video from experts will help you to see for yourself that installing cork floors with your own hands is not at all difficult.
Cork Floor Care
Ordinary water, various washing and disinfecting products, special formulations - everything is suitable for cork floors, except for products containing abrasives and solvents. Pieces of the same cork glued to the furniture legs will help protect the coating from scratches. It is not recommended to lay rugs on a latex or rubberized basis - this can cause the appearance of stubborn stains.
The use of cork floors, subject to all necessary measures, brings exceptional pleasure!
2 comments