
How to level a wooden floor: an assessment of a condition and 2 ways of leveling
It is impossible to describe the joy experienced by a person who has just become the owner of his own home. As a rule, this joy is directly proportional to the time that the young family had to wander around the rented corners or live with their parents. At this moment, even the crumbling “shack” seems like a palace, and numerous plans are swarming in my head to turn this squalor into the most beautiful of dwellings. Unfortunately, in fact, everything is not so simple, and what at first seems like a trifle, upon closer examination, can turn into a real problem. How to level the wooden floor, which for some reason looks more like a raging sea? Do you really have to override it completely? Or maybe you can somehow fix the situation at minimal cost? In most cases, it is really possible. It all depends on the real state of the floor, which means that first of all it is necessary to correctly evaluate it.
Content
Assessment of the condition of the wooden base
You can get the first idea of the condition of the floor when buying a home. To do this, walk energetically through it, and even better to jump. If the floor does not make any sounds and does not stagger under your feet - he passed a preliminary check. Even if the surface of such a coating is not very even, it can almost certainly be leveled with minimal effort.

The main enemies of the wooden floor are moisture and insects. Even a sound-looking floor can be rotted or damaged by woodworkers. Before proceeding with the restoration of the floor covering, it is necessary to make sure the safety of the lag and the underside of the boards. To do this, tear one of them and look under the floor. Armed with a flashlight and a screwdriver, look under the floor and carefully examine all the wooden parts.
Another natural enemy of wood are insects that lay larvae in it. Having hatched, “cubs” can live on your floor for about 4 years, and eat it. A clear sign of uninvited guests are “eaten” grooves in the wood. If you find something like this, you must definitely treat the wood with special tools. With local damage, you can cope on your own, but for processing large surfaces it is better to call professionals with special equipment that will allow you to get to the most remote areas.
If the boards are led, but the floor is not damaged
Let's start with the simplest option, when the floor is strong enough, not damaged by insects or rot, but over time, the board “led”, which caused irregularities on the floor surface. How can I level the wooden floor in this case?
Option # 1 - floor scraper
The easiest way to try using a looping machine or a plane. But it should be remembered that this is possible if the floor is located strictly horizontally.

Before starting work, it is necessary to take some security measures:
- Get protective equipment (earphones or earplugs, respirators);
- Cover upholstered furniture with polyethylene;
- With the help of a damper, drown the heads of the nails on the boards, a few millimeters below the floor. Having stumbled upon such an obstacle, the blades of the looper may break;
- Having taken all measures to protect the machine, furniture and your own health, you can begin to work. You need to start from the far corner of the room and move to the door with a "snake". That is, reaching the wall, turn around 180 degrees and continue to work;

Important! In the process of cleaning the floor with a looping machine, very fine dust is formed, which easily penetrates into all cracks. A closed door may not be enough to protect neighboring rooms. Before starting work, it is better to hang the doorway with a wet sheet.
- After removing the top layer of wood, it is necessary to putty large cracks. Use acrylic putty of the desired shade for this.
- After the putty has completely dried, recycle the floor again.
Important! If in the process of work you find that one or several boards are so damaged that it will not be possible to hide it, just try to remove them and nail them to the floor with the back side.
That's all. If you decide to open the floor with varnish, wait until the dust has completely settled, collect it with a vacuum cleaner, treat the floor with white spirit or other solvent and start applying the varnish.
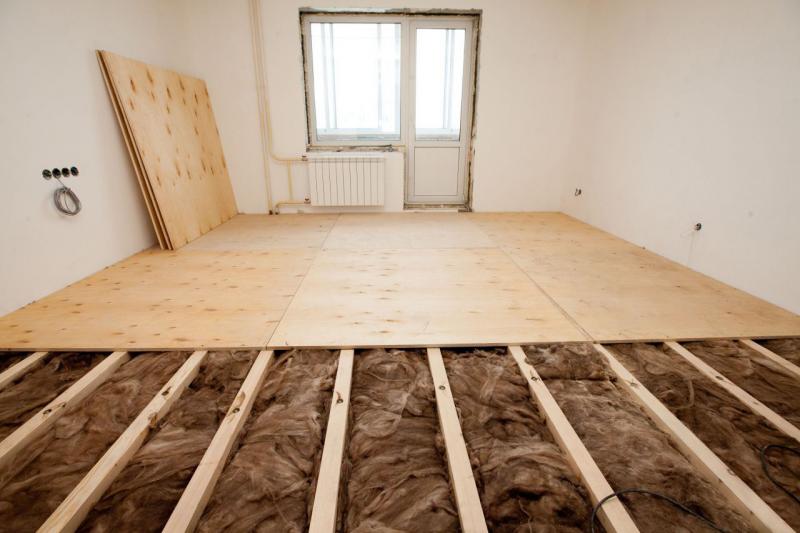
Option # 2 - using plywood
This method can be applied both to correct small defects on the floor surface, and in the case when the floor level is significantly deviated from the horizontal. In the first case, it is enough just to fill the plywood on the floor surface. This must be done in two layers so that the joints of the sheets do not coincide.
When aligning with this method, you have to tinker a bit longer:
- First you need to make markings on the walls. The easiest way to do this is with the laser level;
- Now put the beacons out of the screws. At a distance of 250-300 mm from each other, screw them into the floor so that the caps form a horizontal surface. Check the level;
- As a log, you can use a bar or strips of plywood, 3-4 cm wide. We fix them to the floor with glue.
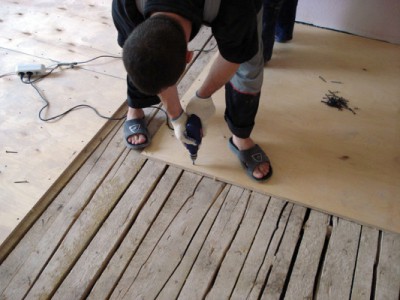
- The time has come to lay plywood sheets. The easiest way to do this is to first cut the plywood into equal squares with a side of 60 cm. You can easily get these by simply cutting the standard sheet 125X125 into 4 parts.

It is necessary to lay plywood squares on the guides with an offset, as when laying brick. Before the final installation, we cut the plywood to size and fasten it to the logs with self-tapping screws with a countersunk head.


What if the floor creaks and staggers?
You can overcome the wooden floor in this case. If the floor in your home is fastened with nails, it may be sufficient to replace them with screws to fix these defects. You can not remove the nails, but simply screw two screws at a distance of 20-30 mm from the edge of the board, the length of which will be one and a half to two times the thickness of the board.
Important! For more reliable fastening, it is necessary to screw the screws at a slight angle to each other.
If the floor does not stagger, but creaks rather strongly, this may be due to the friction of the boards against each other. In this case, it is enough to pour graphite powder into the gap between the boards or to drive the wedges between the "creaky" board and the beam to which it is attached.
Dangerously! Rot Detected!
If during the inspection of the floor and lag you find rot sites, they must be urgently replaced. In the case when only small areas of the log are affected, you can do without a complete replacement of the floor. It is enough to remove the boards (this will give an additional opportunity to carefully inspect them and replace the damaged ones), cut out a damaged piece of the timber and replace it with a new one.
As you can see, most of the problems with uneven floors can be solved with "little blood." And only in the case when the wood is badly damaged by moisture or dry rot, the floor will have to be completely changed. In any case, do not lay the finish on a shaky, uneven floor. This will inevitably lead to damage.
3 comments